 PluBIM Help
ExportDesk
Batch-export sheets and views to PDF, DWG, IFC and NWC, with named format configurations, file names and output folders.
- Ribbon group
- Output
- Version
- PluBIM 1.5.0
When to use it
| You want to … | How |
|---|---|
| Export sheets or views to PDF, DWG, IFC or NWC now | Export sheets and views |
| Run the same export automatically on a regular basis | Schedule an export as a job |
| Change a scheduled export | Edit a scheduled job |
| Reuse or pass on settings, file names and folders | Save settings as a profile |
Requirements
- The project contains at least one sheet or view.
- For IFC and NWC: at least one 3D view, because these formats export only 3D views.
- For NWC: the Navisworks exporter is installed. Without it you can set up the settings, but the export fails.
- Binding images into DWG files requires AutoCAD 2019 or later.
Export sheets and views
In the ribbon, click PluBIM › Output › ExportDesk. While ExportDesk reads the sheets and views, a loading window shows the progress.
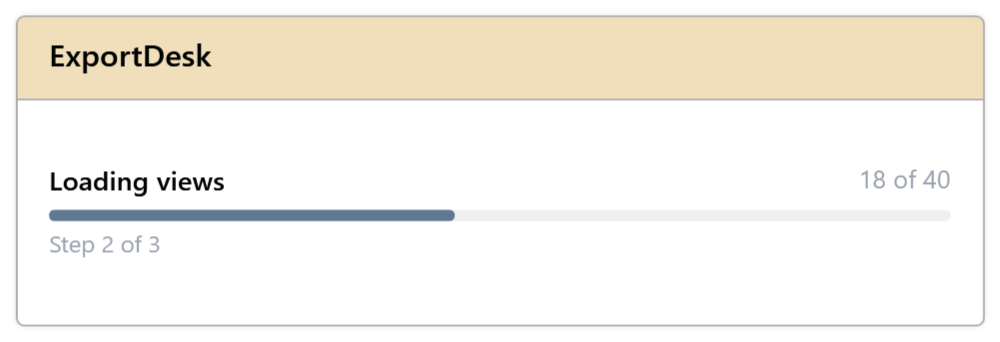
Fig. 1 · Loading window In the Selection step, check the sheets and views to export.
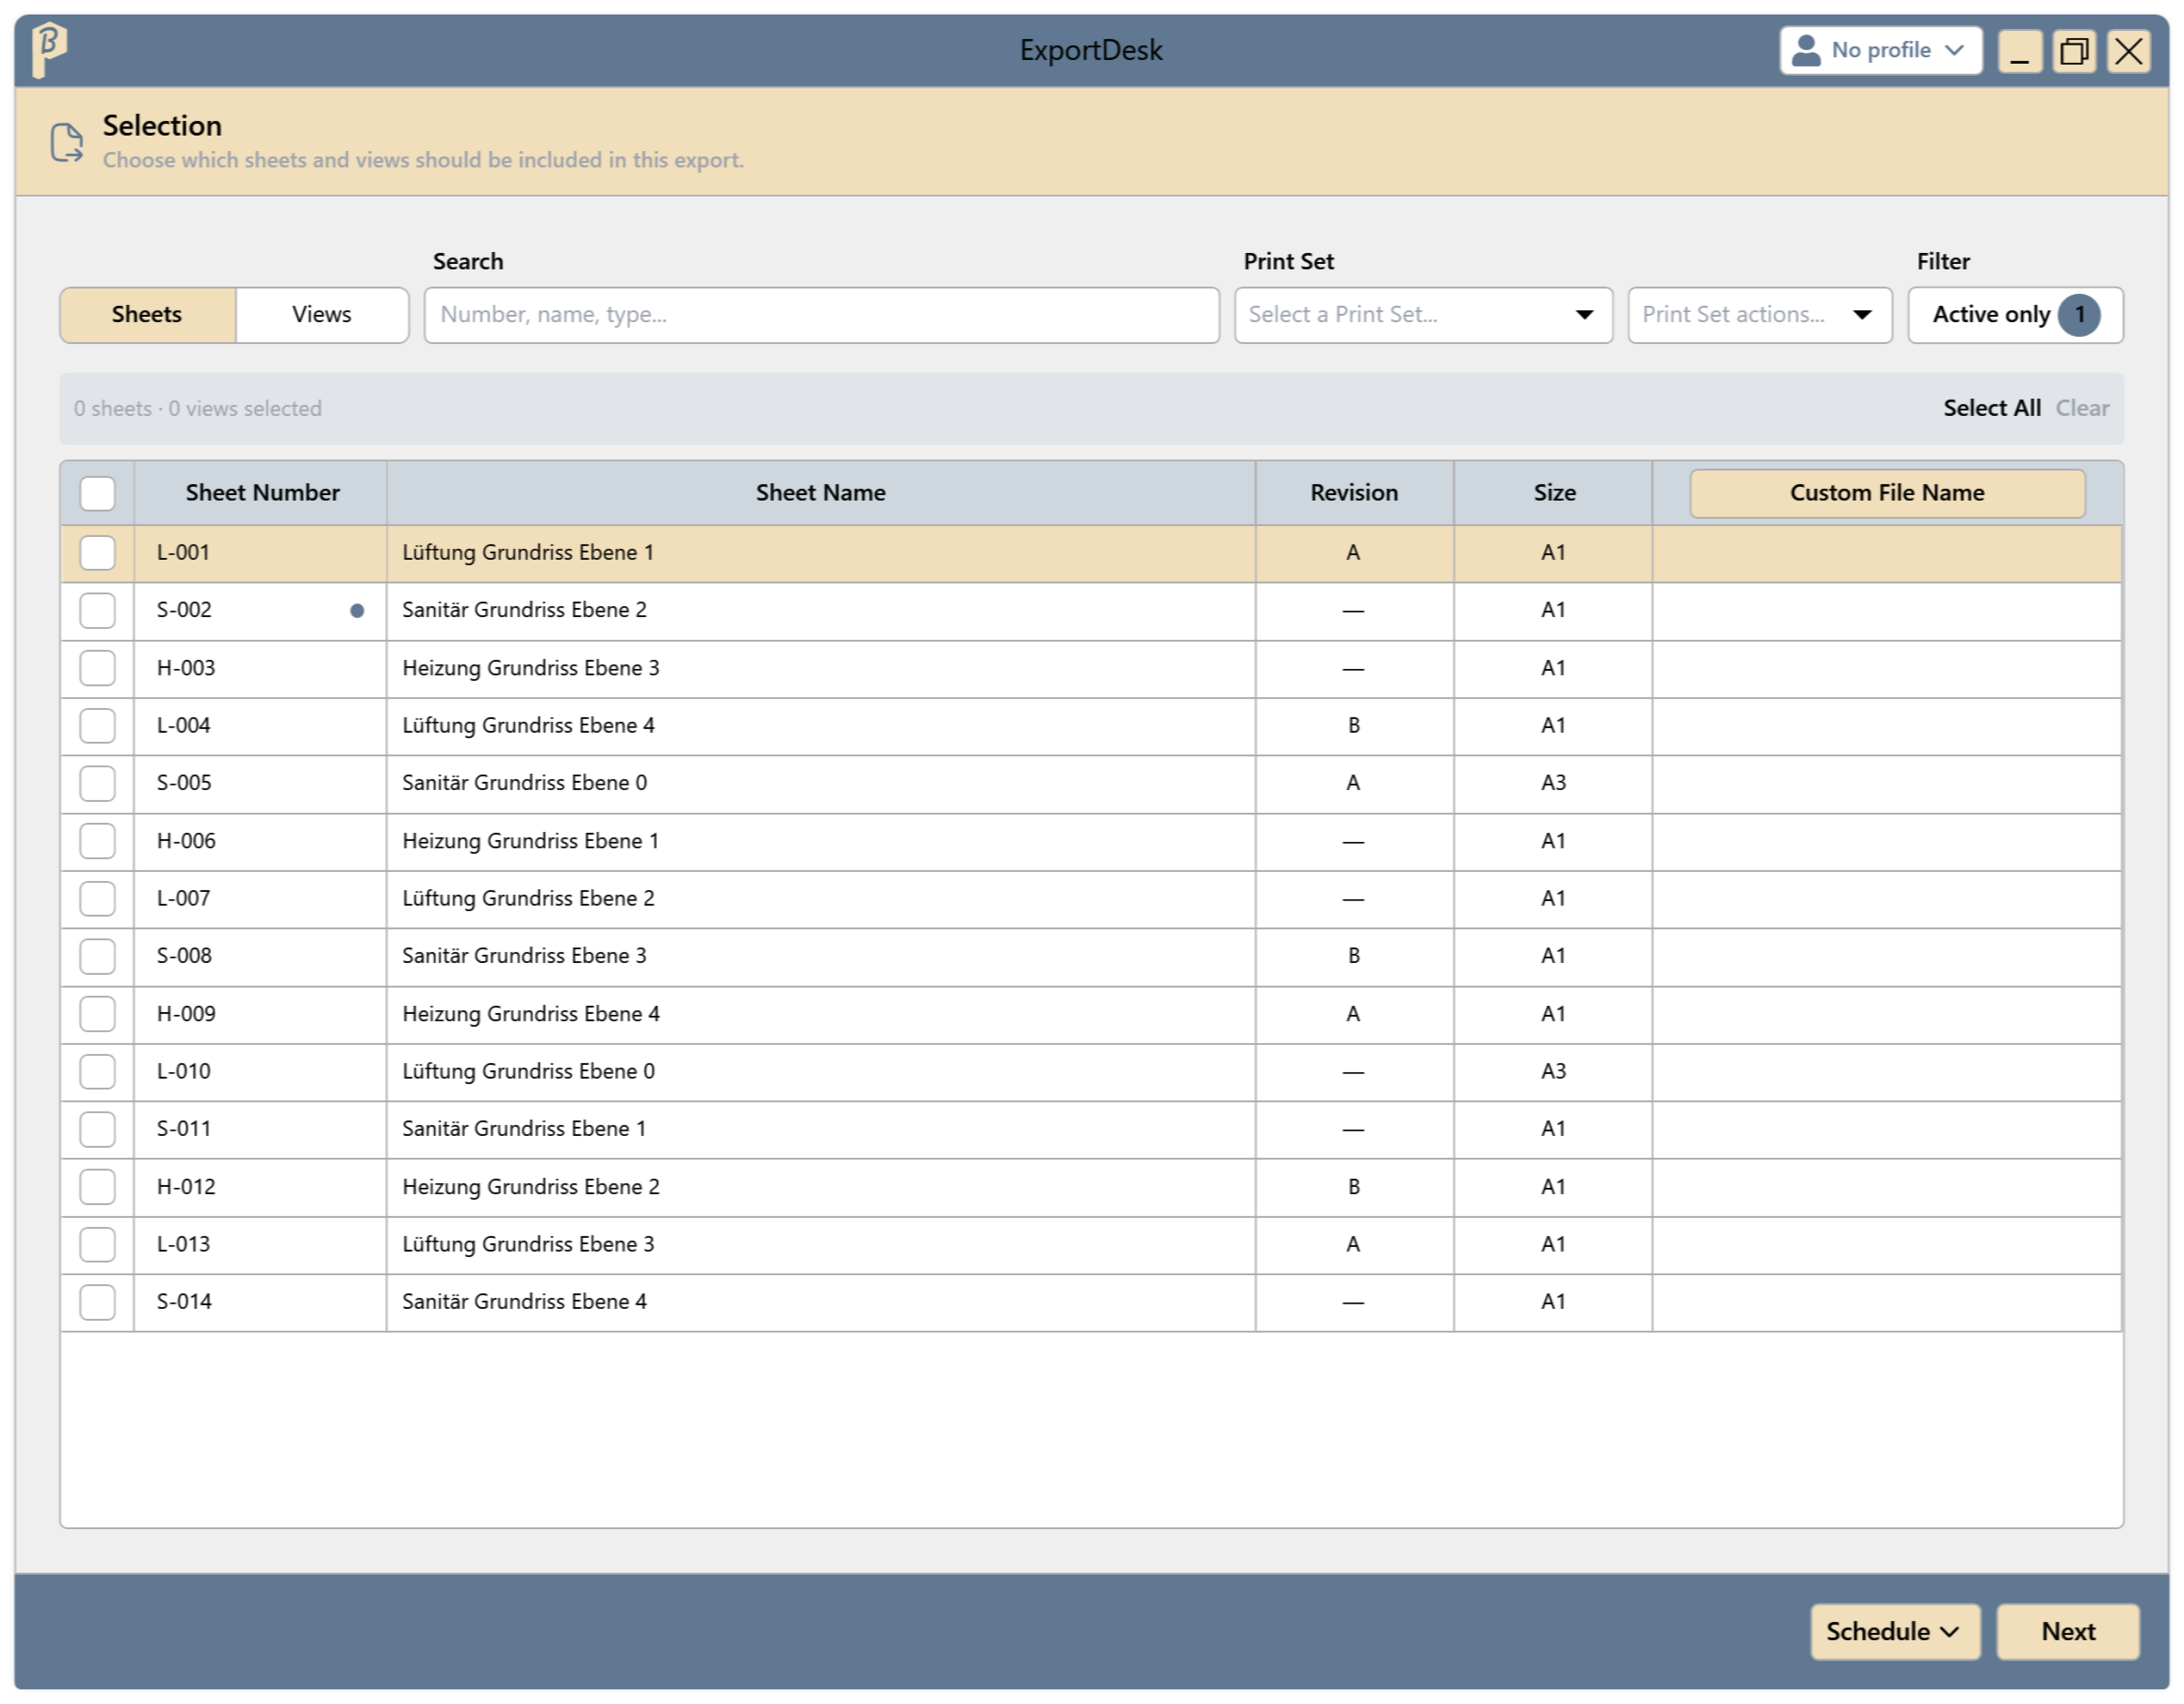
Fig. 2 · Selection step - Without a Custom file name, the file is named after the sheet number (sheets) or view name (views).
- A chosen Print Set filters the list to its sheets and views.
- Right-click a row › Open Sheet or Open View shows it in Revit. Open items carry the Currently open in Revit icon.
- Right-click a column header to open the column picker: tick parameters to show them as extra columns, sheet parameters on the Sheets tab and view parameters on the Views tab. Search parameters... narrows the list, and the bottom row shows how many columns are shown. Reset columns hides all extra columns again.
- Drag a column header to move a column, or drag its edge to change its width. ExportDesk remembers the extra columns with their order and width per tab for the next time you open it.
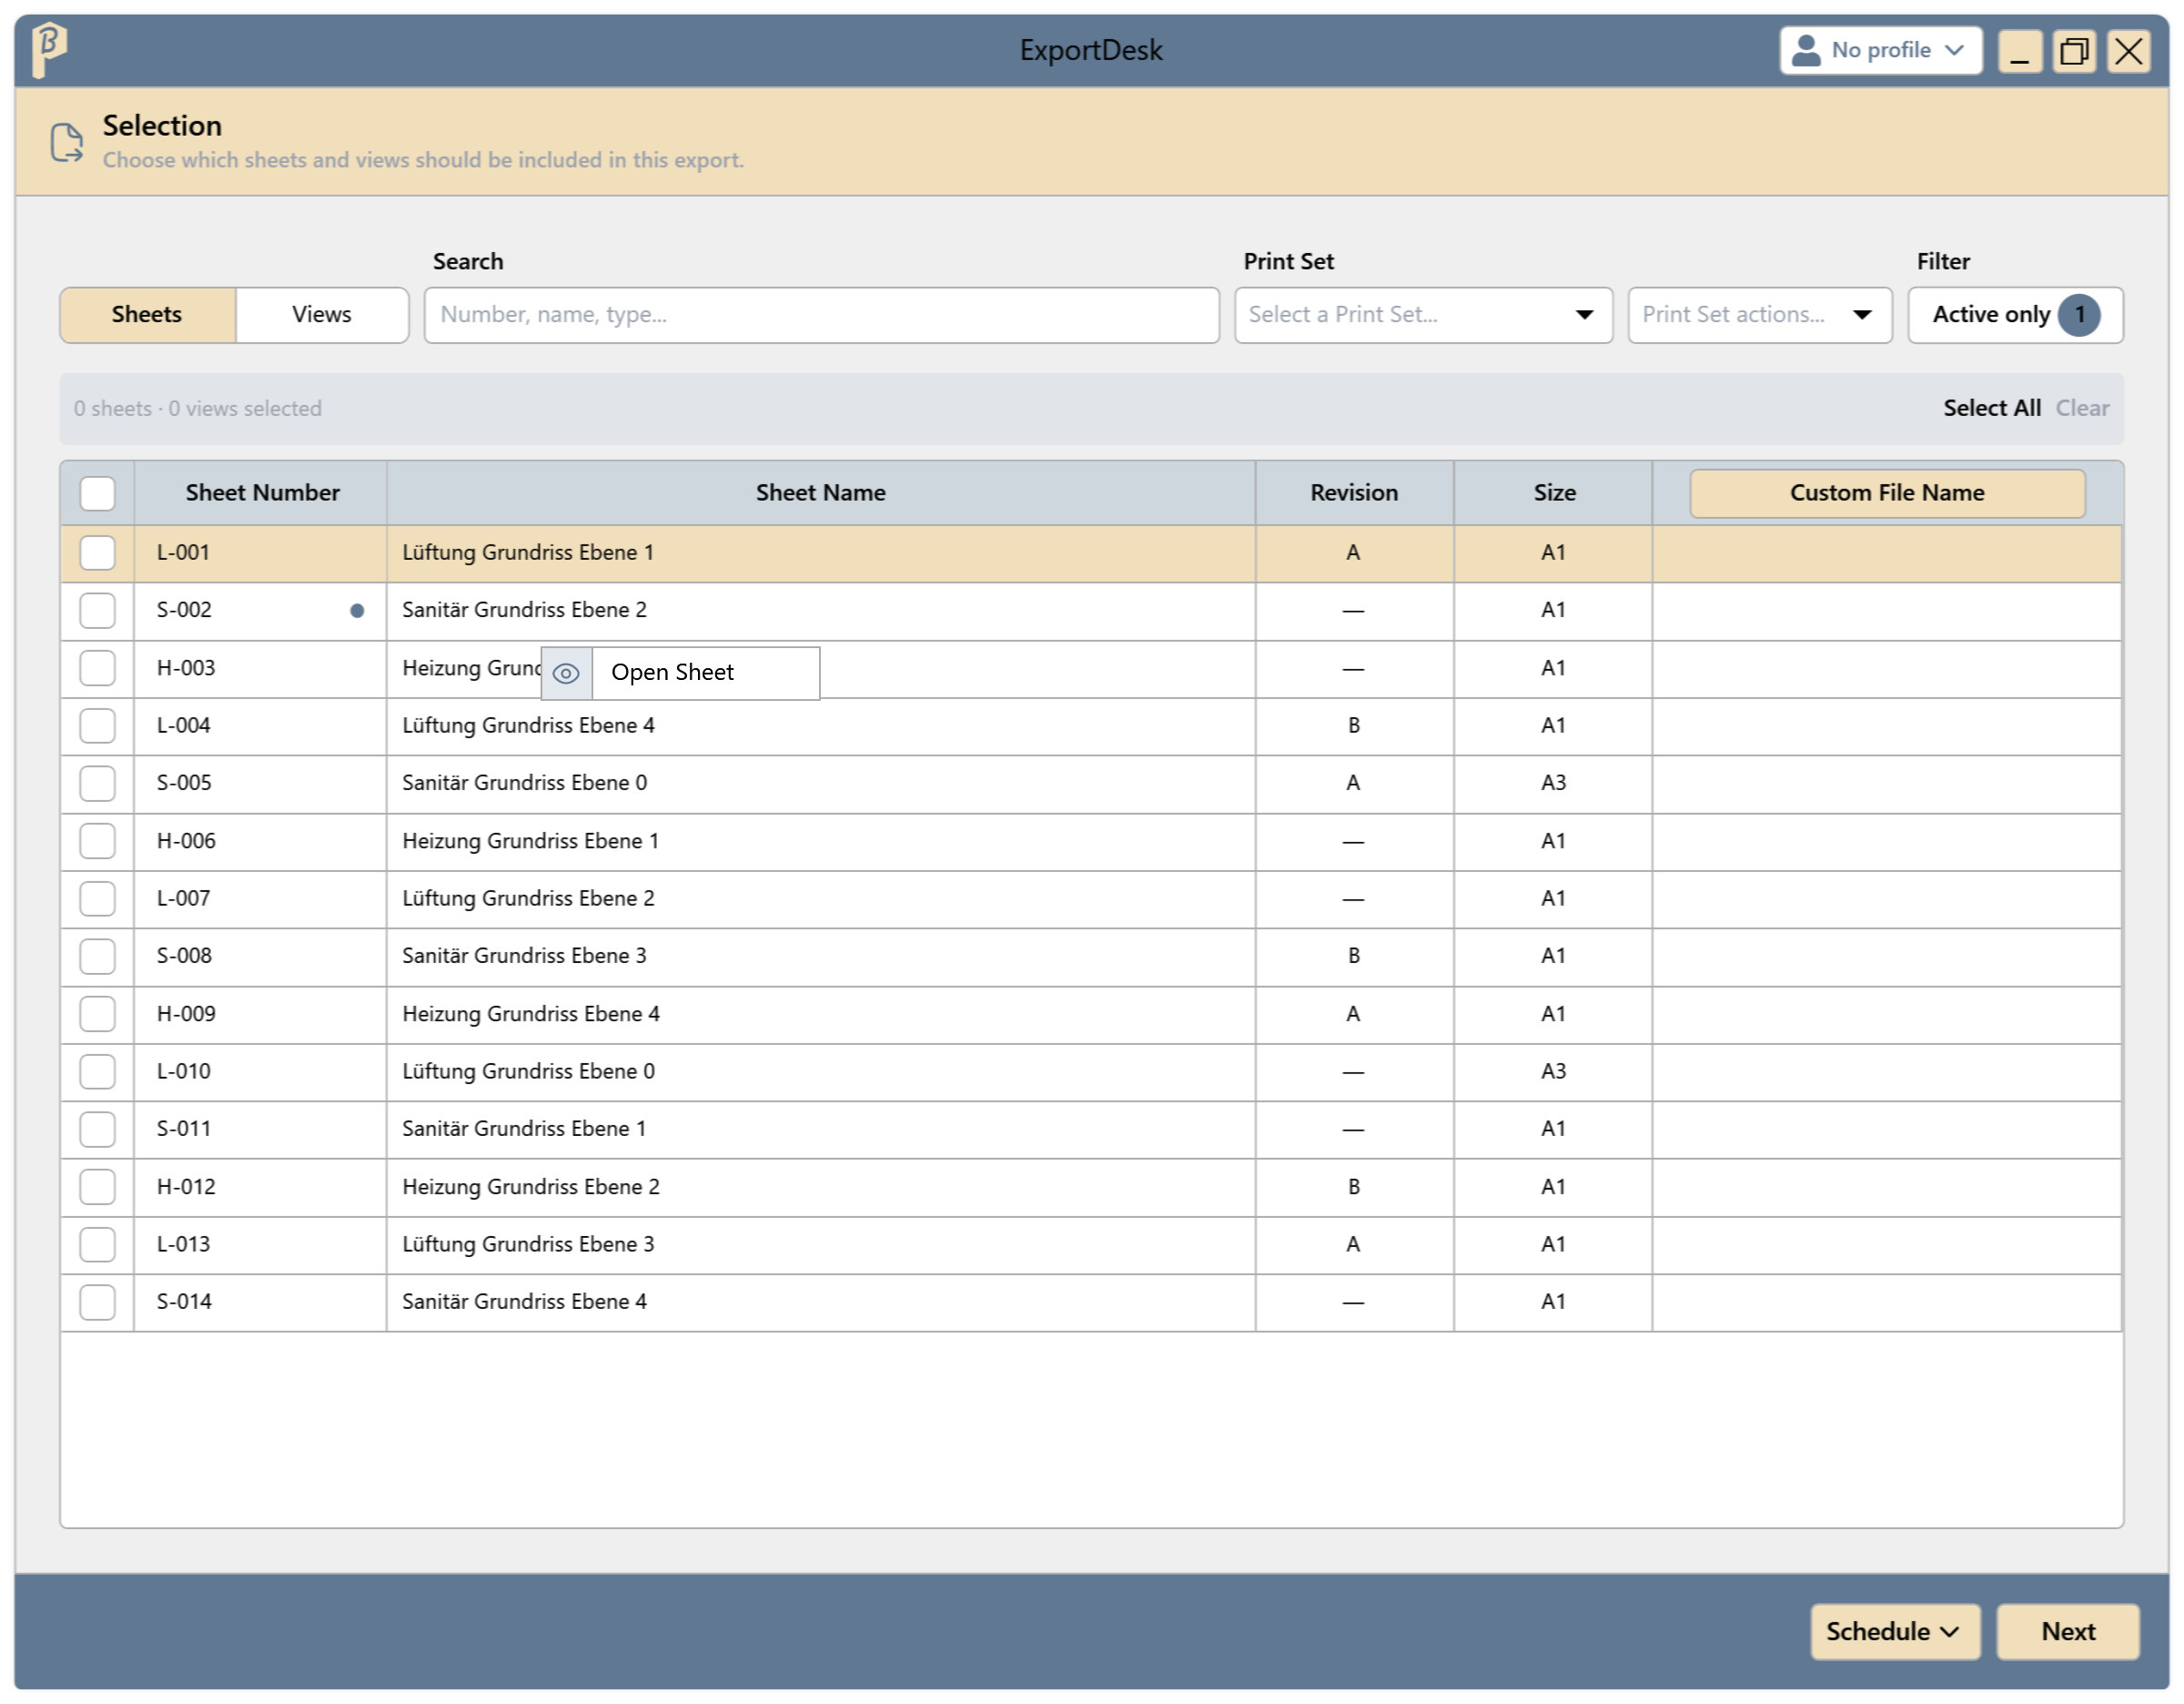
Fig. 3 · Open a sheet in Revit 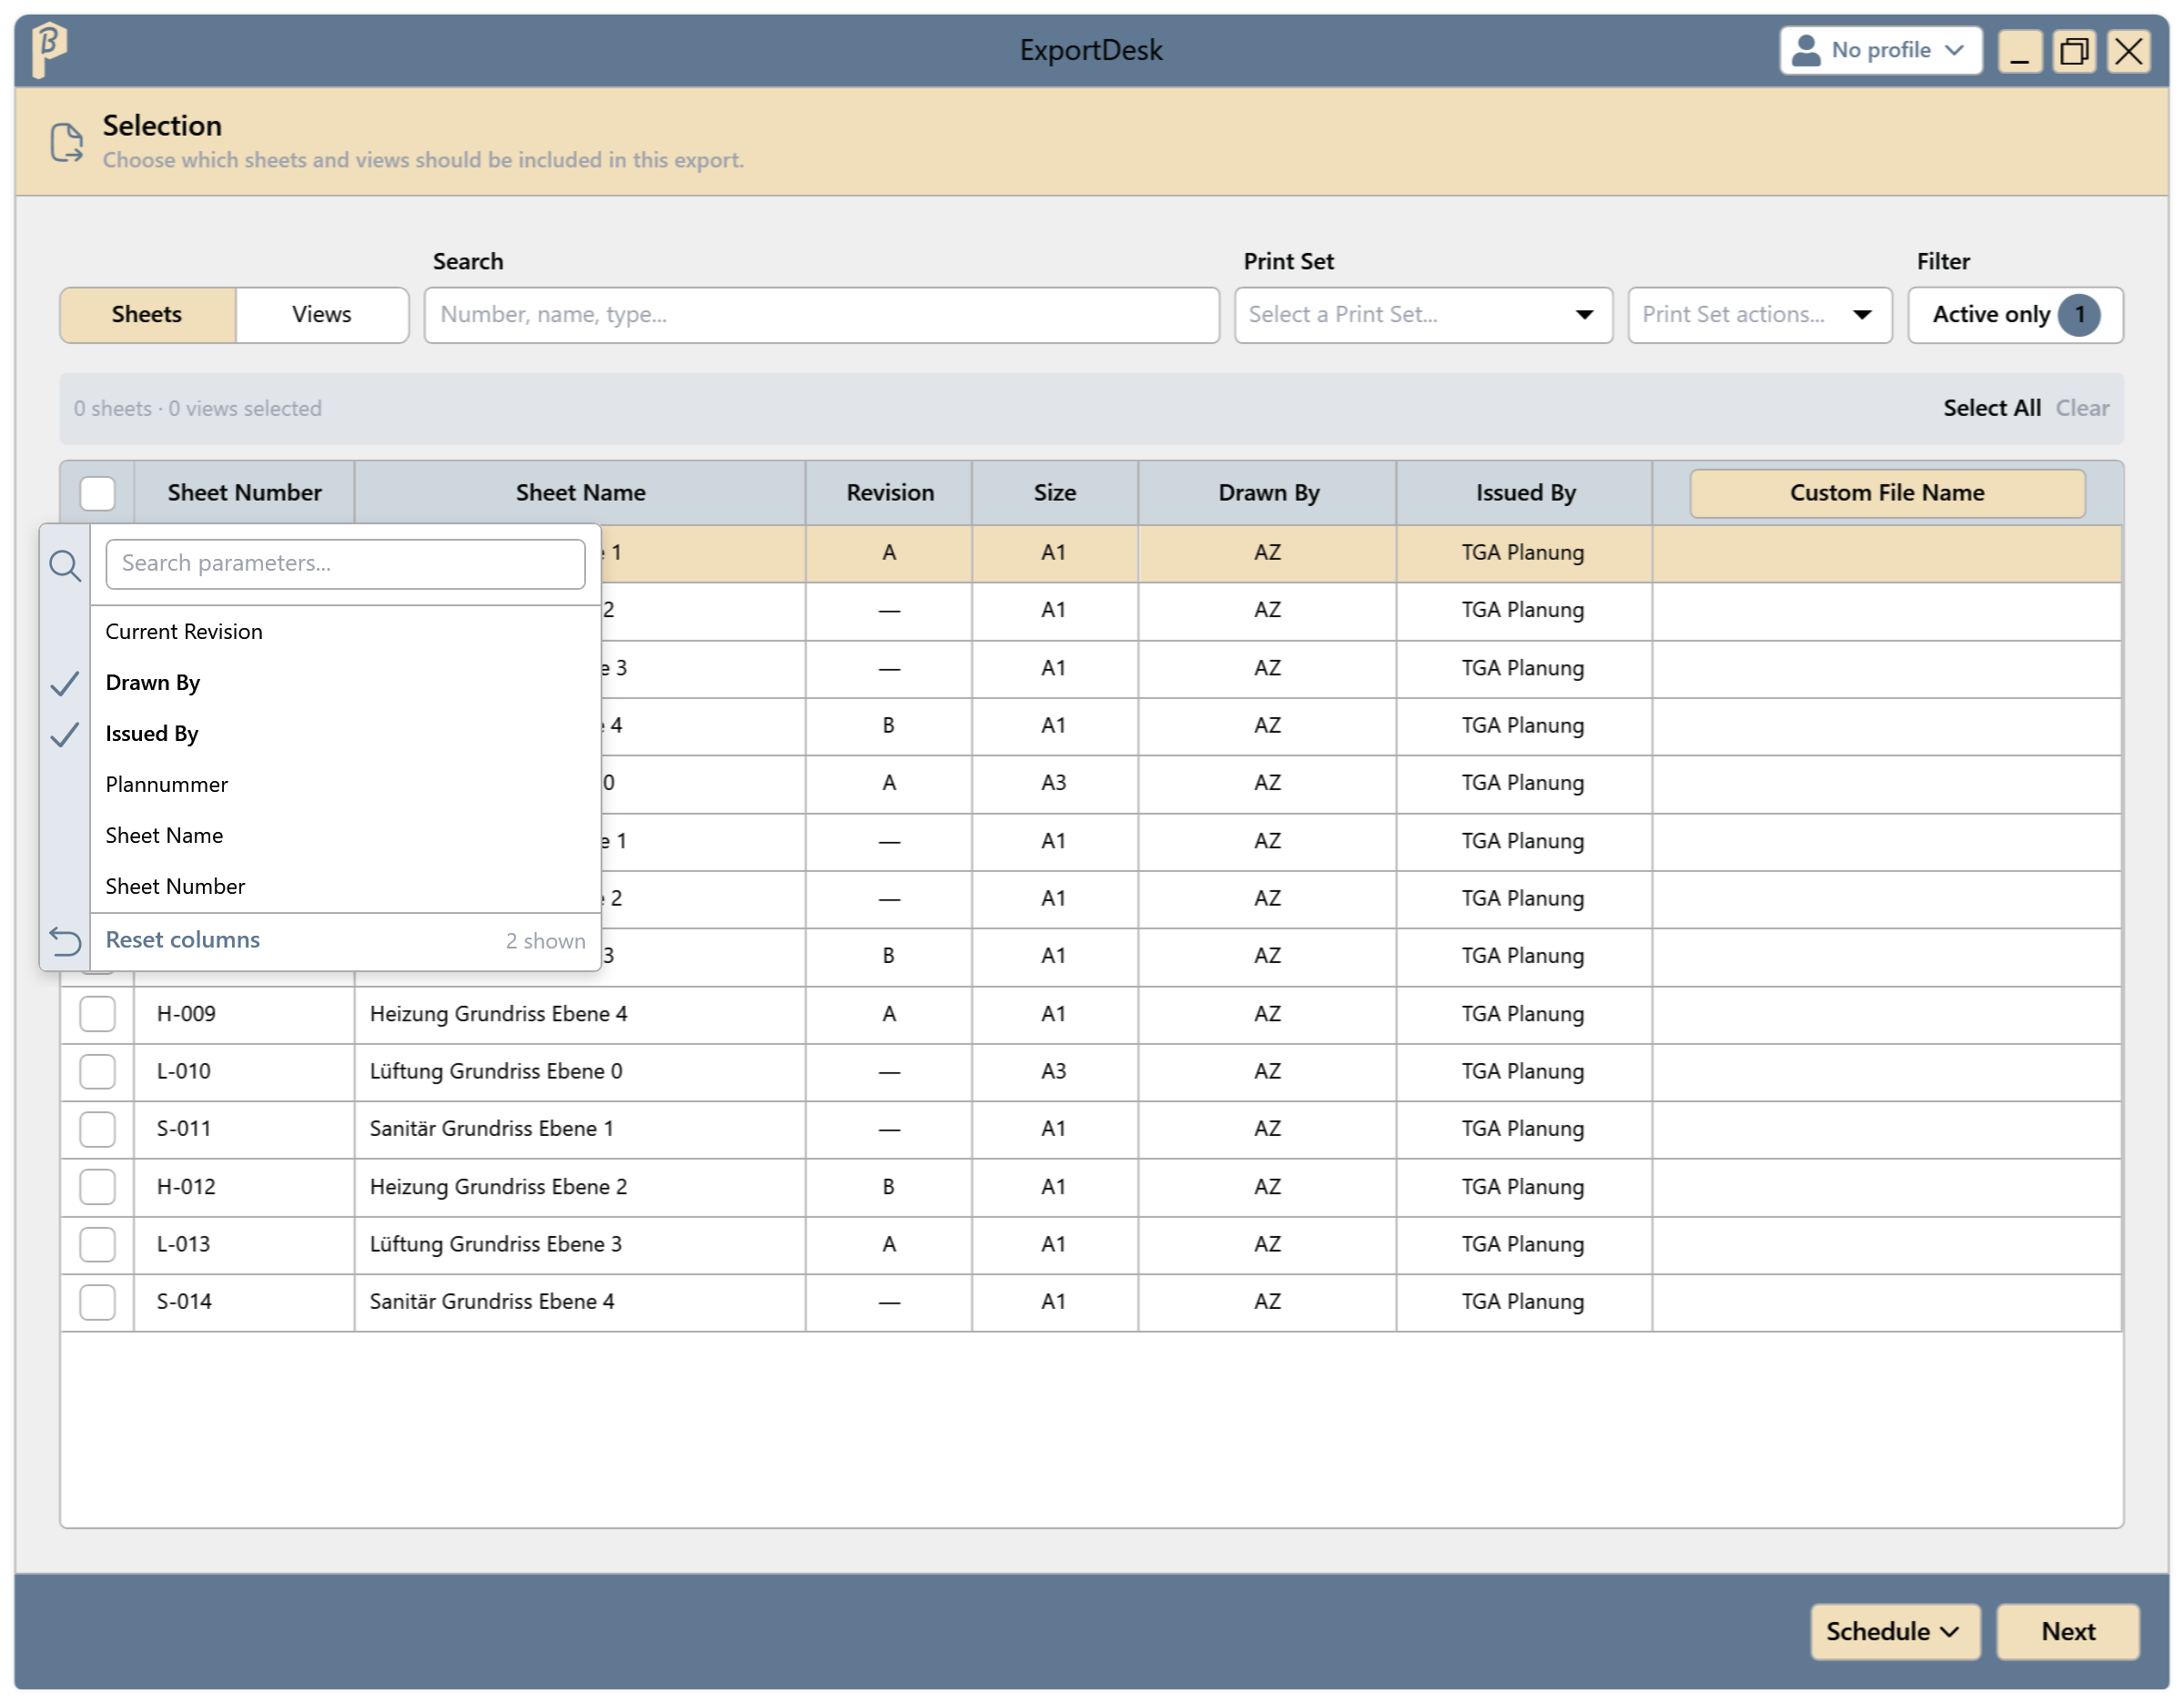
Fig. 4 · Extra columns via right-click on a column header 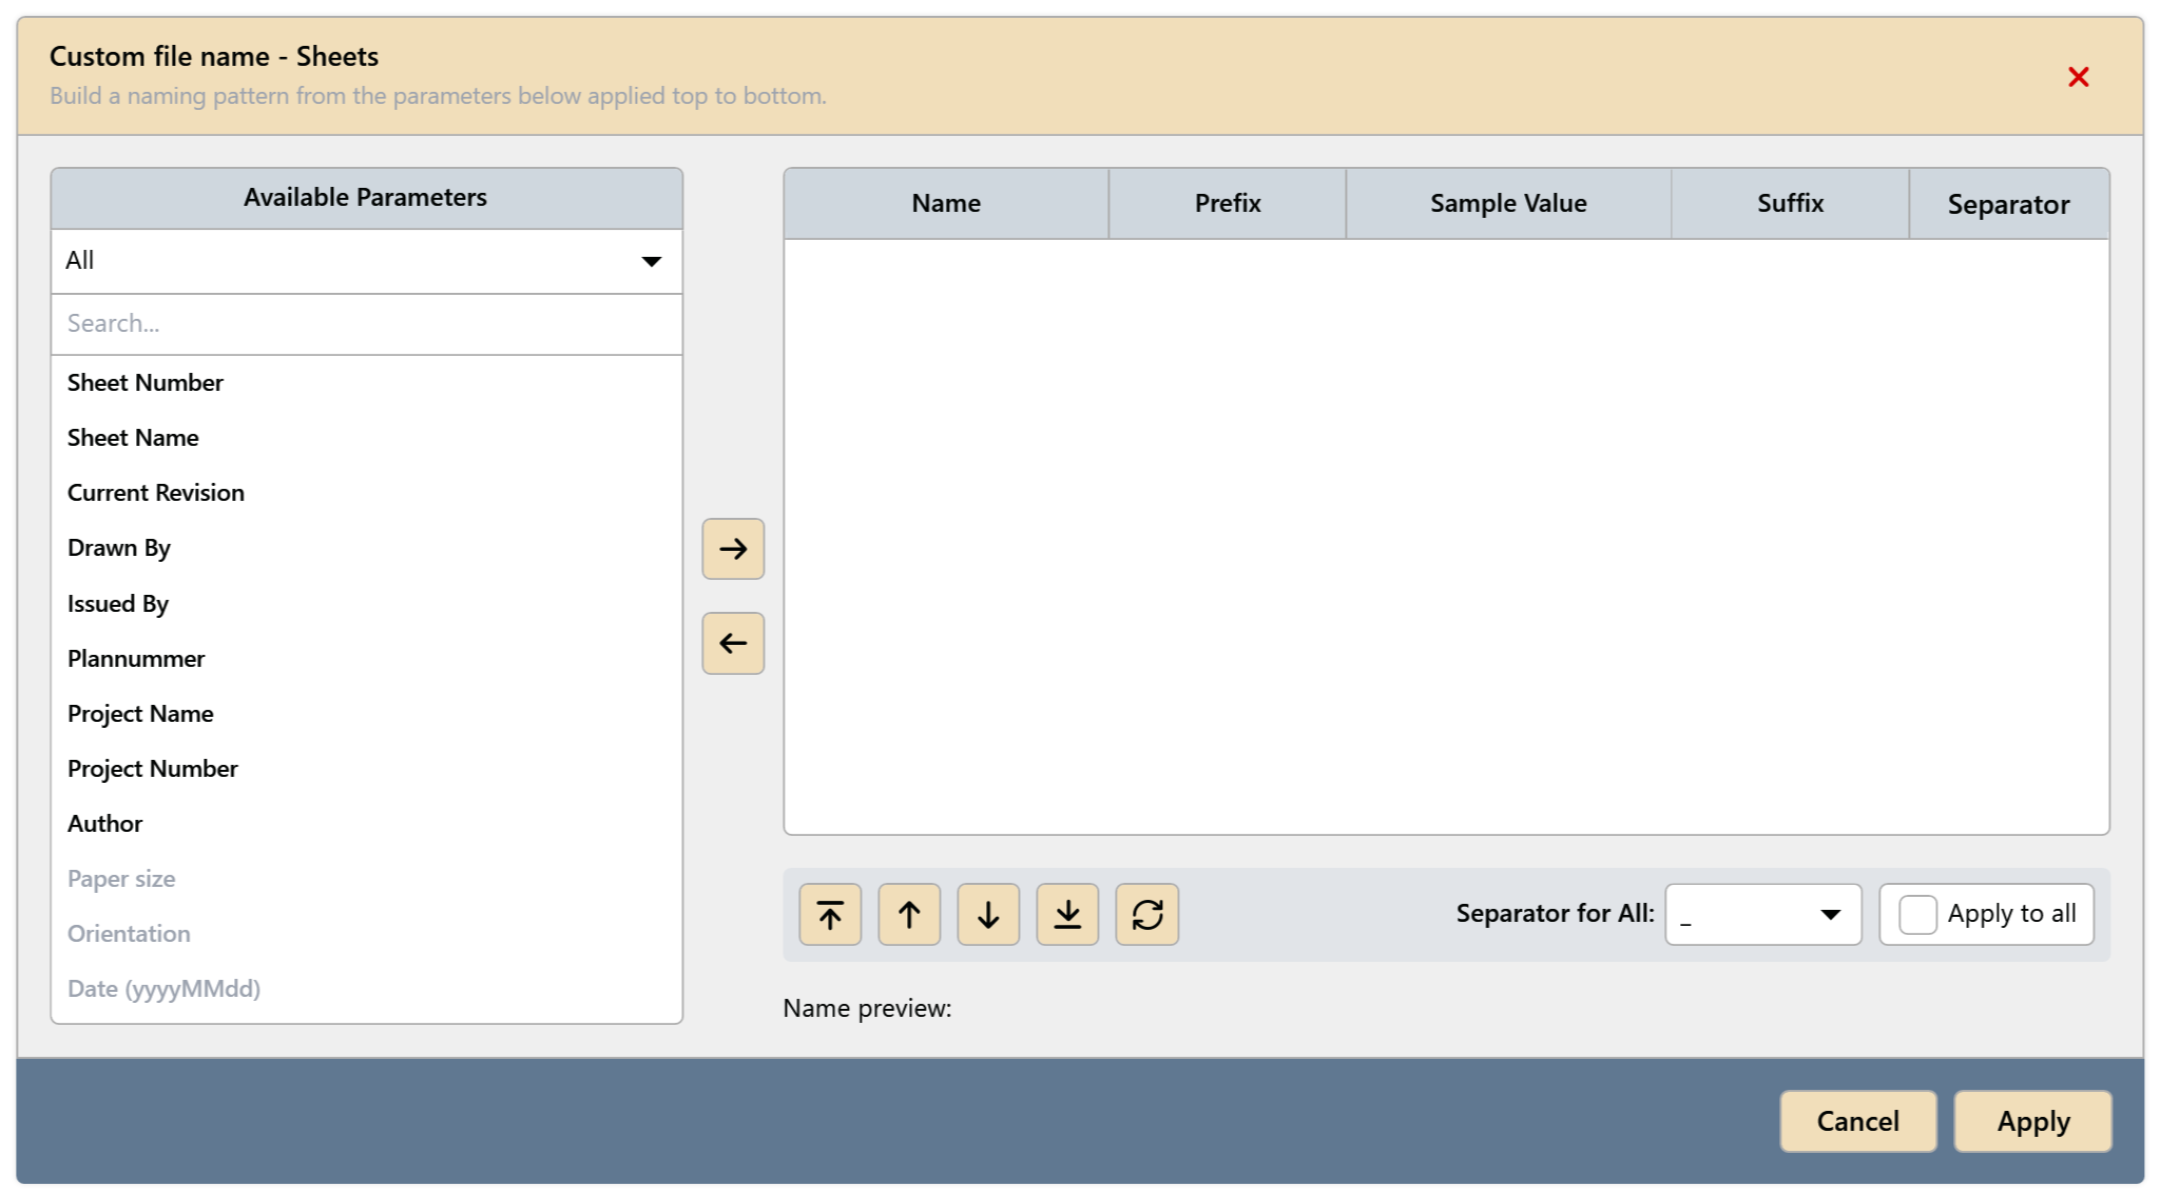
Fig. 5 · Build a Custom file name from parameters Optionally save the selection as a print set in the project with Print Set actions...:
- New Print Set creates a new print set from the checked items.
- Add to existing adds the checked items to the chosen print set.
- Delete Print Set removes the chosen print set from the project.
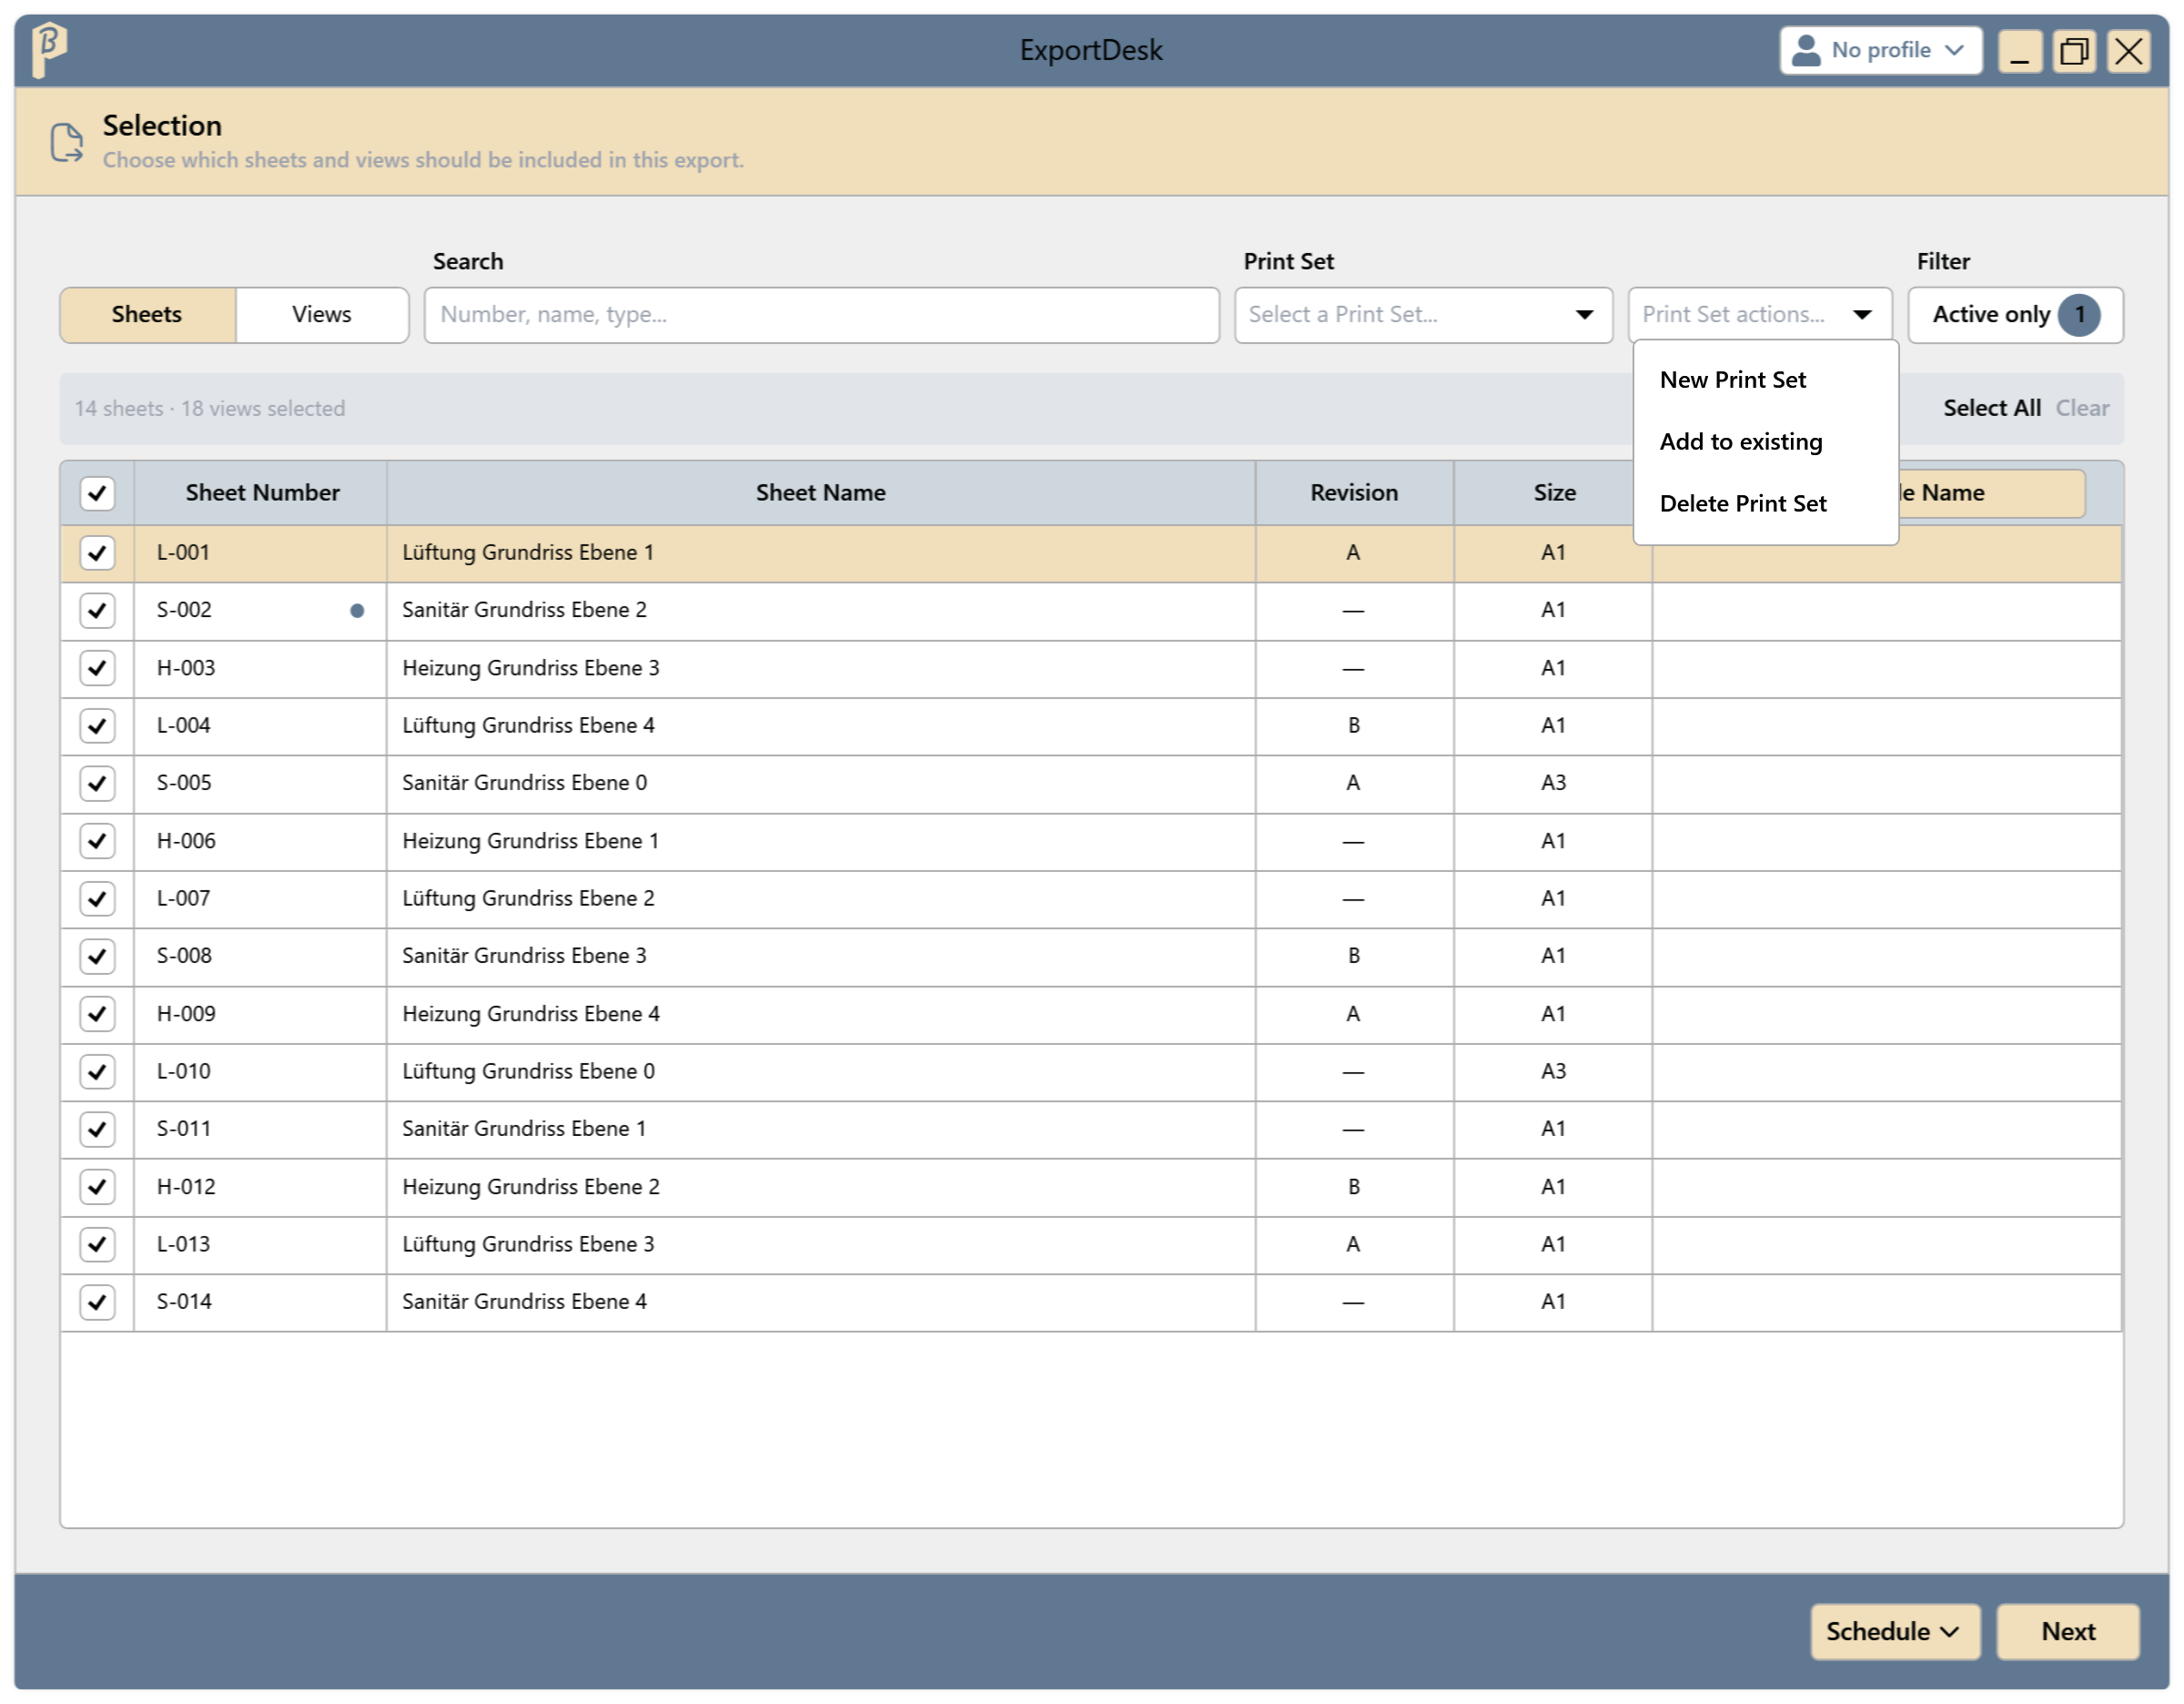
Fig. 6 · Print Set actions 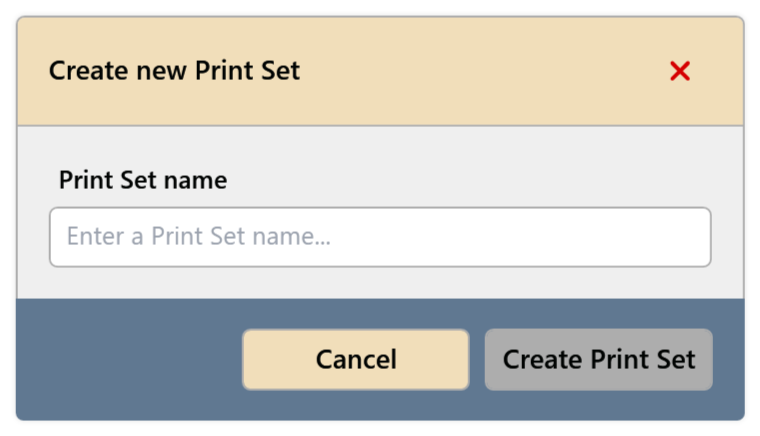
Fig. 7 · Create new Print Set Click Next. In the Formats step, choose a format with Add format configuration and name it, e.g. “PDF – Issue”. The same format can be added several times with different settings.
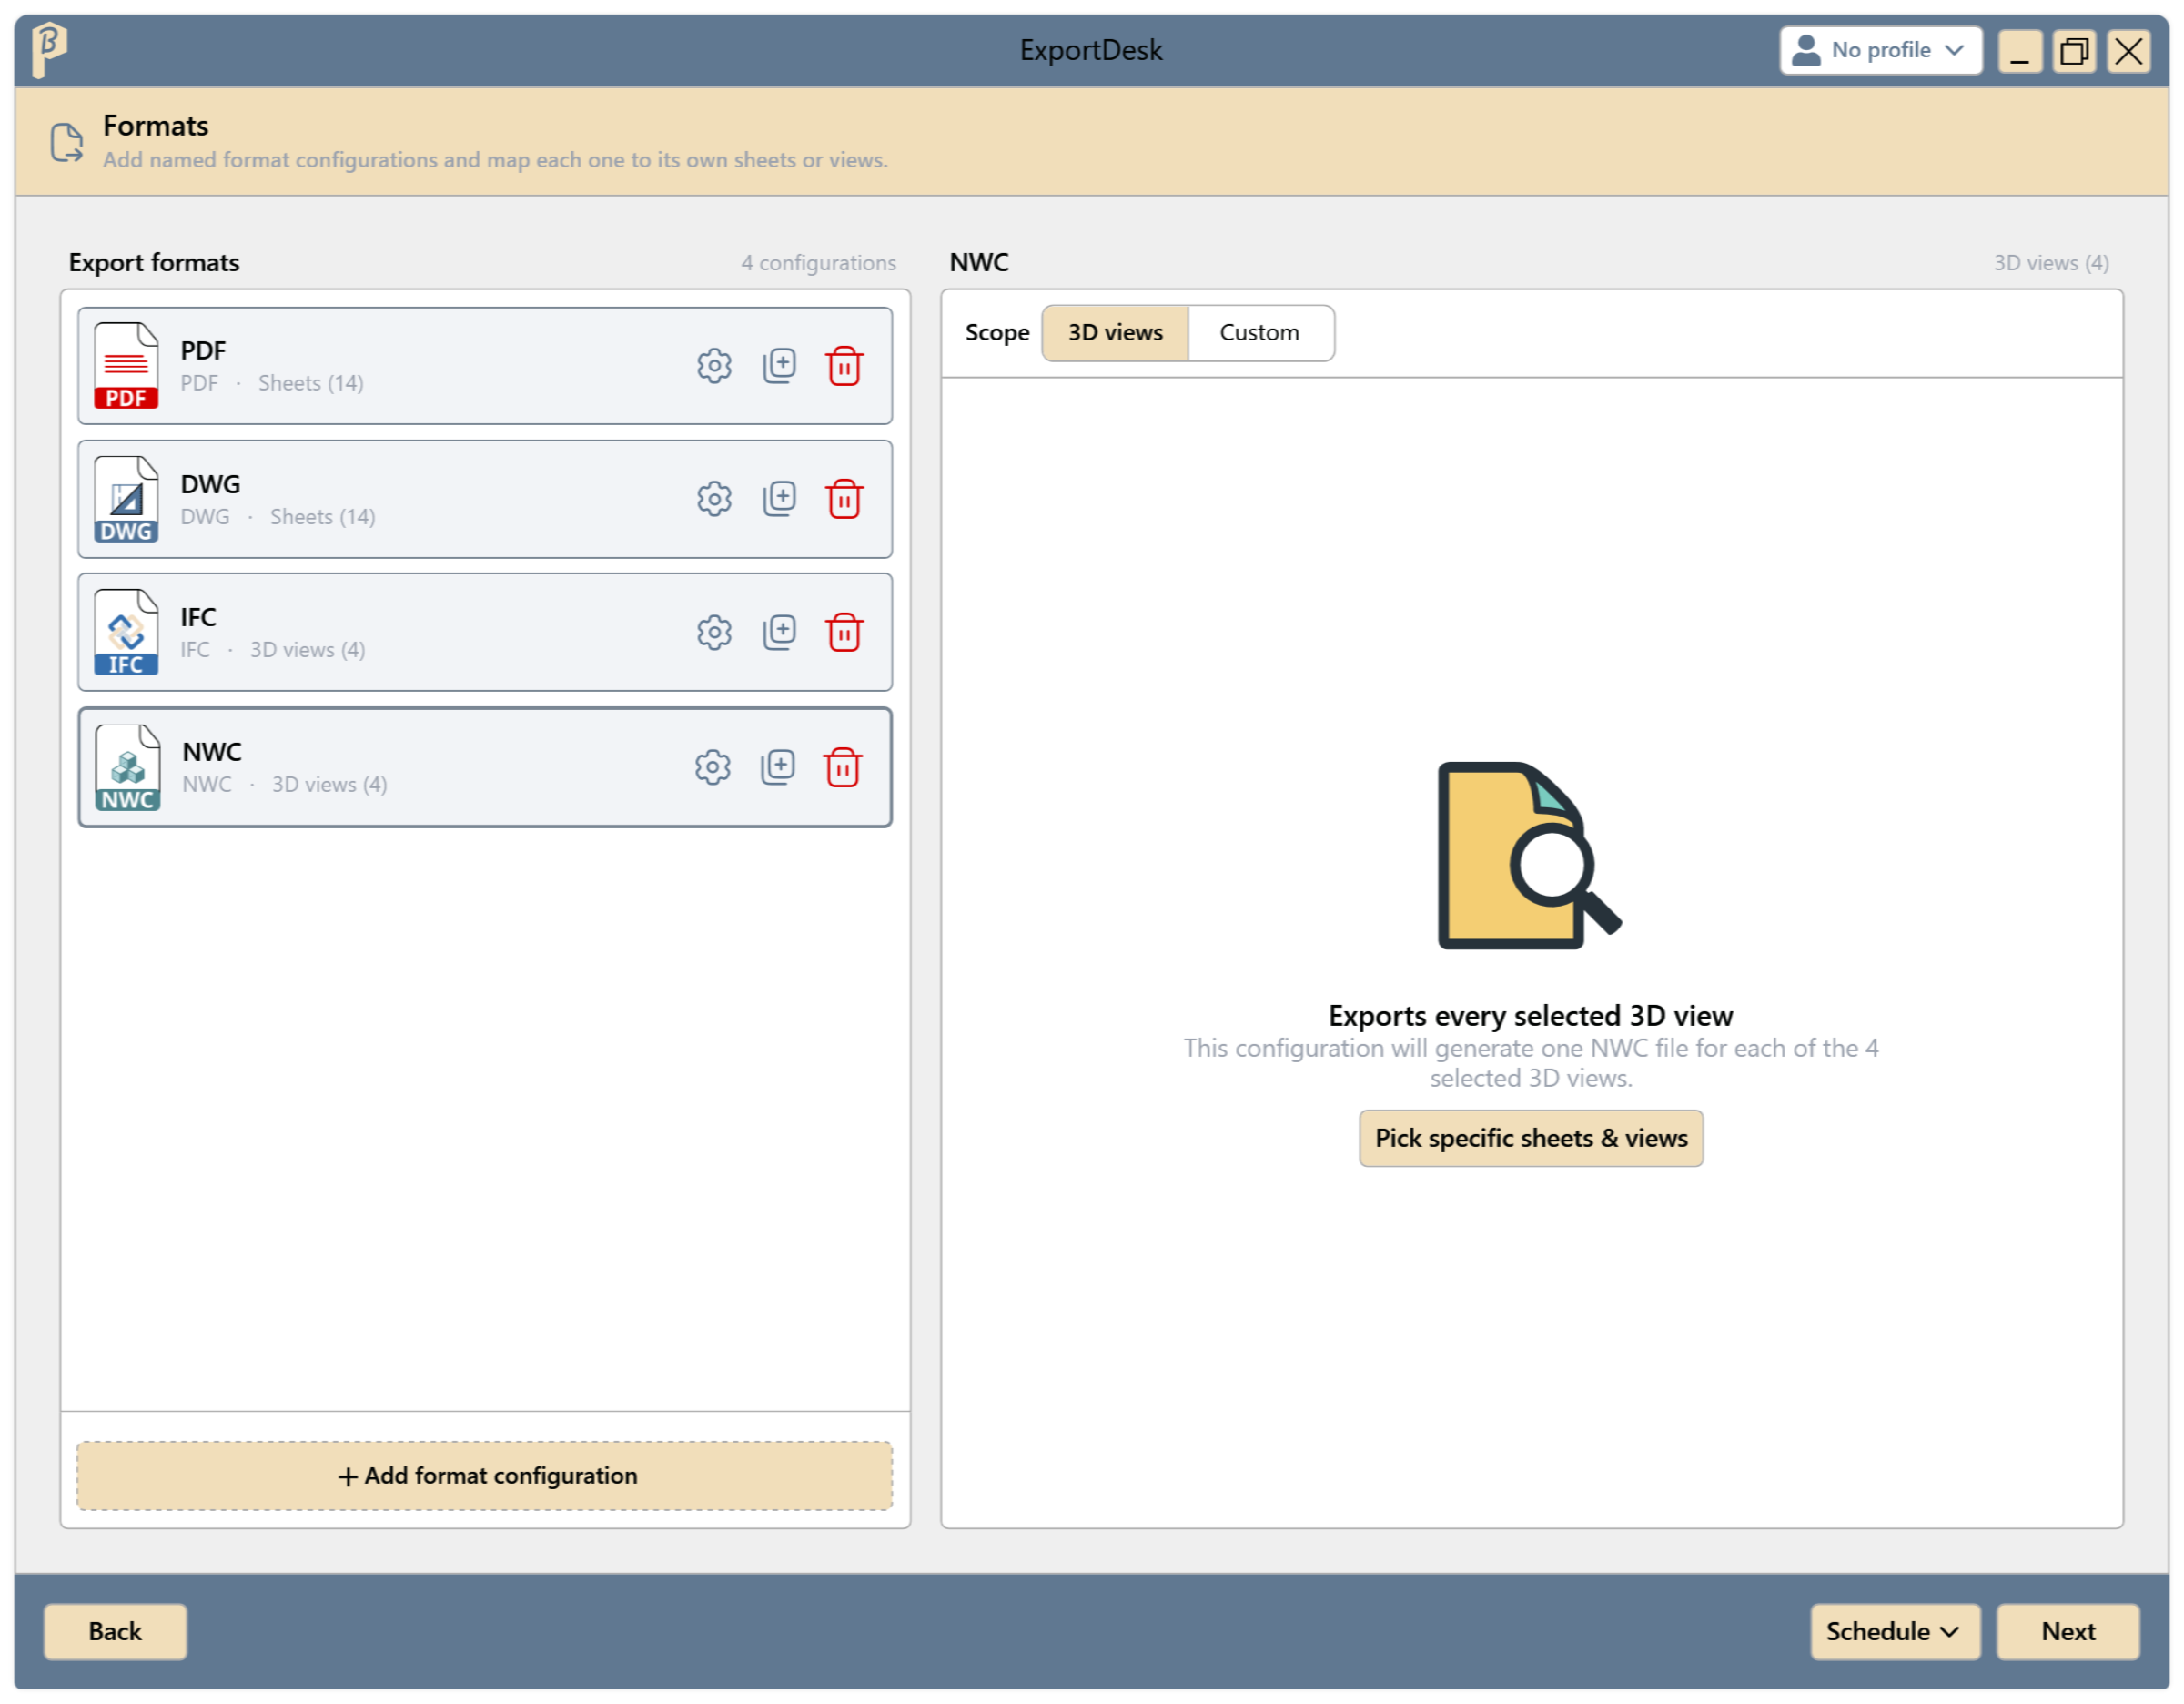
Fig. 8 · Formats step Click the gear to open a configuration's settings. Changes only take effect with Apply; Cancel discards them. Reset to defaults restores the default values. Duplicate (tooltip “Duplicate format configuration”) creates a copy with the same settings, e.g. as a starting point for “PDF – Check plot”.
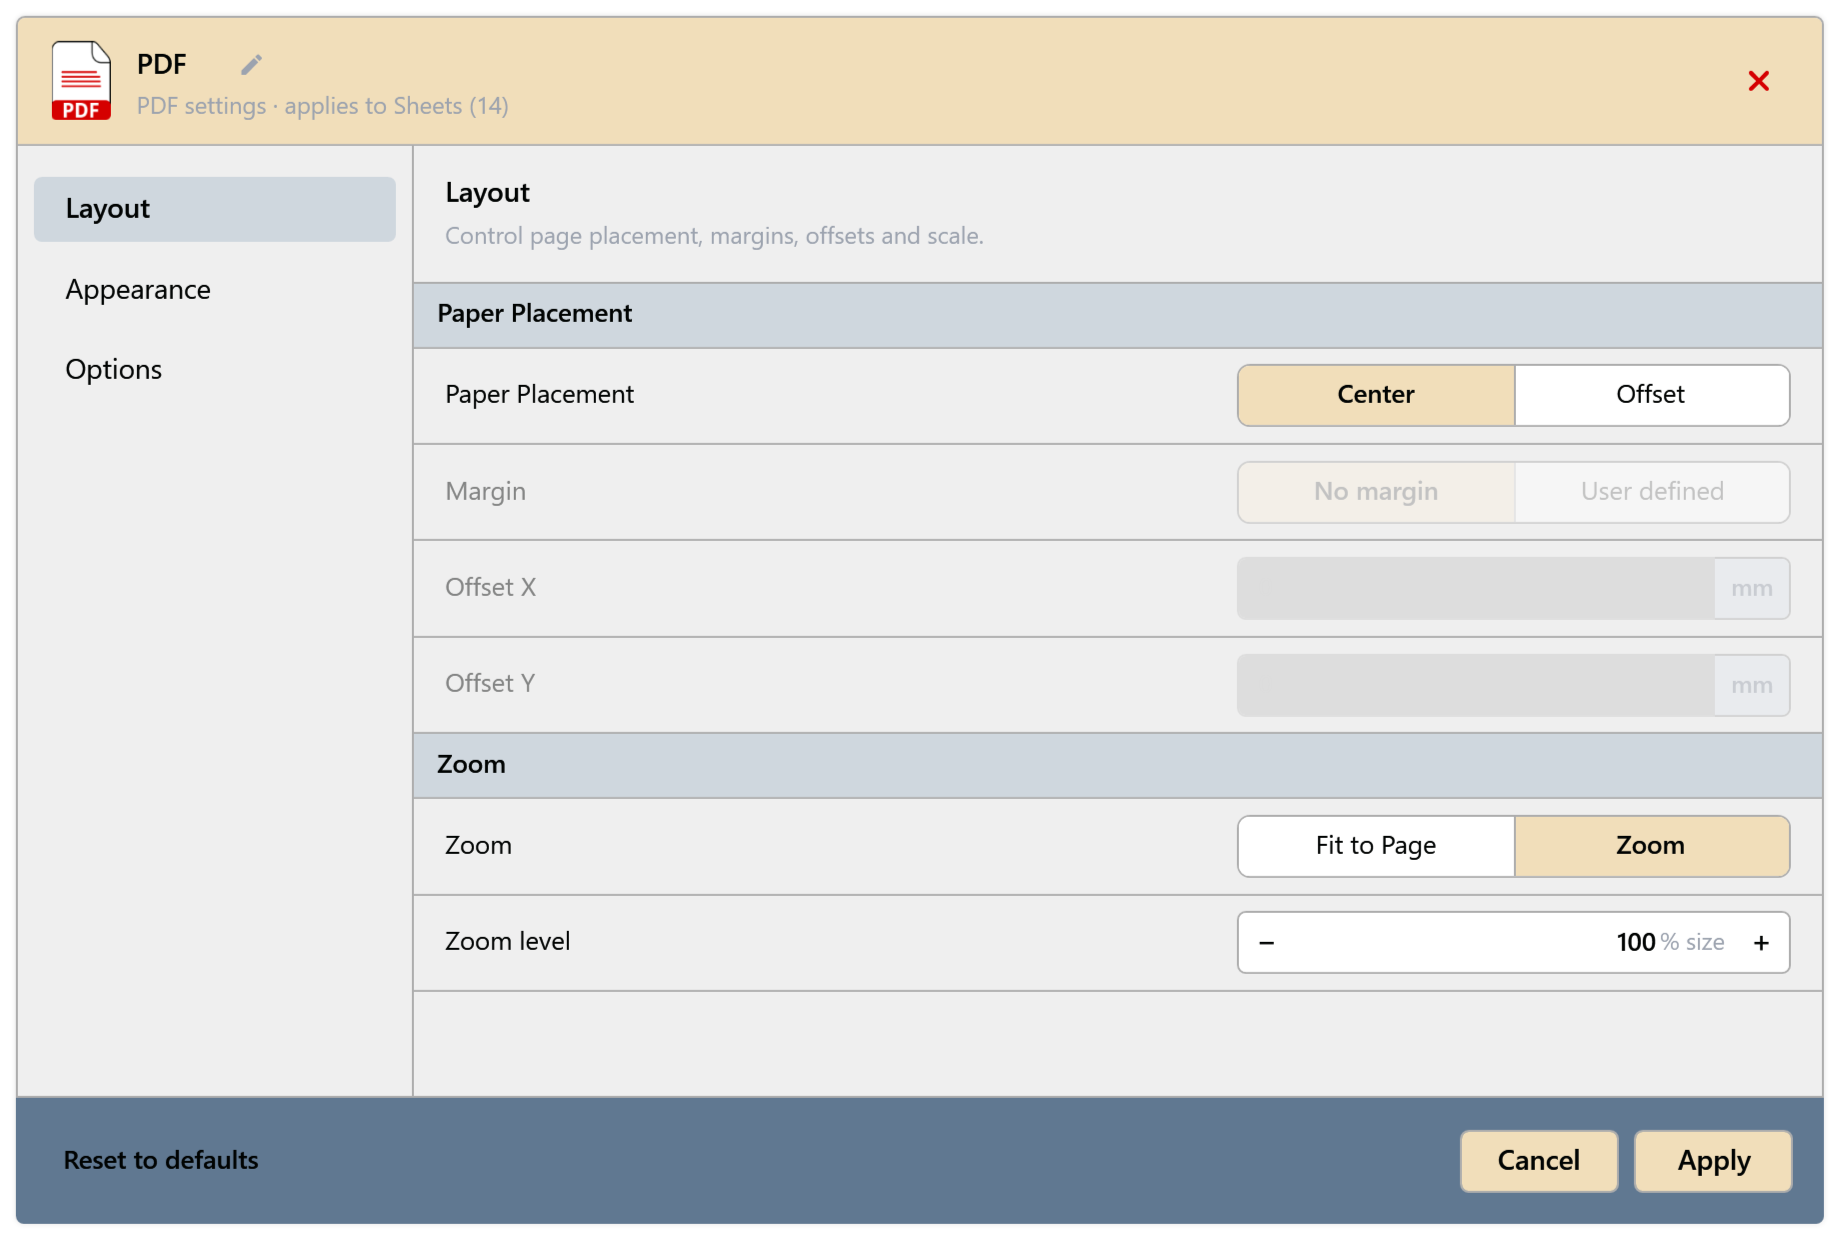
Fig. 9 · PDF settings 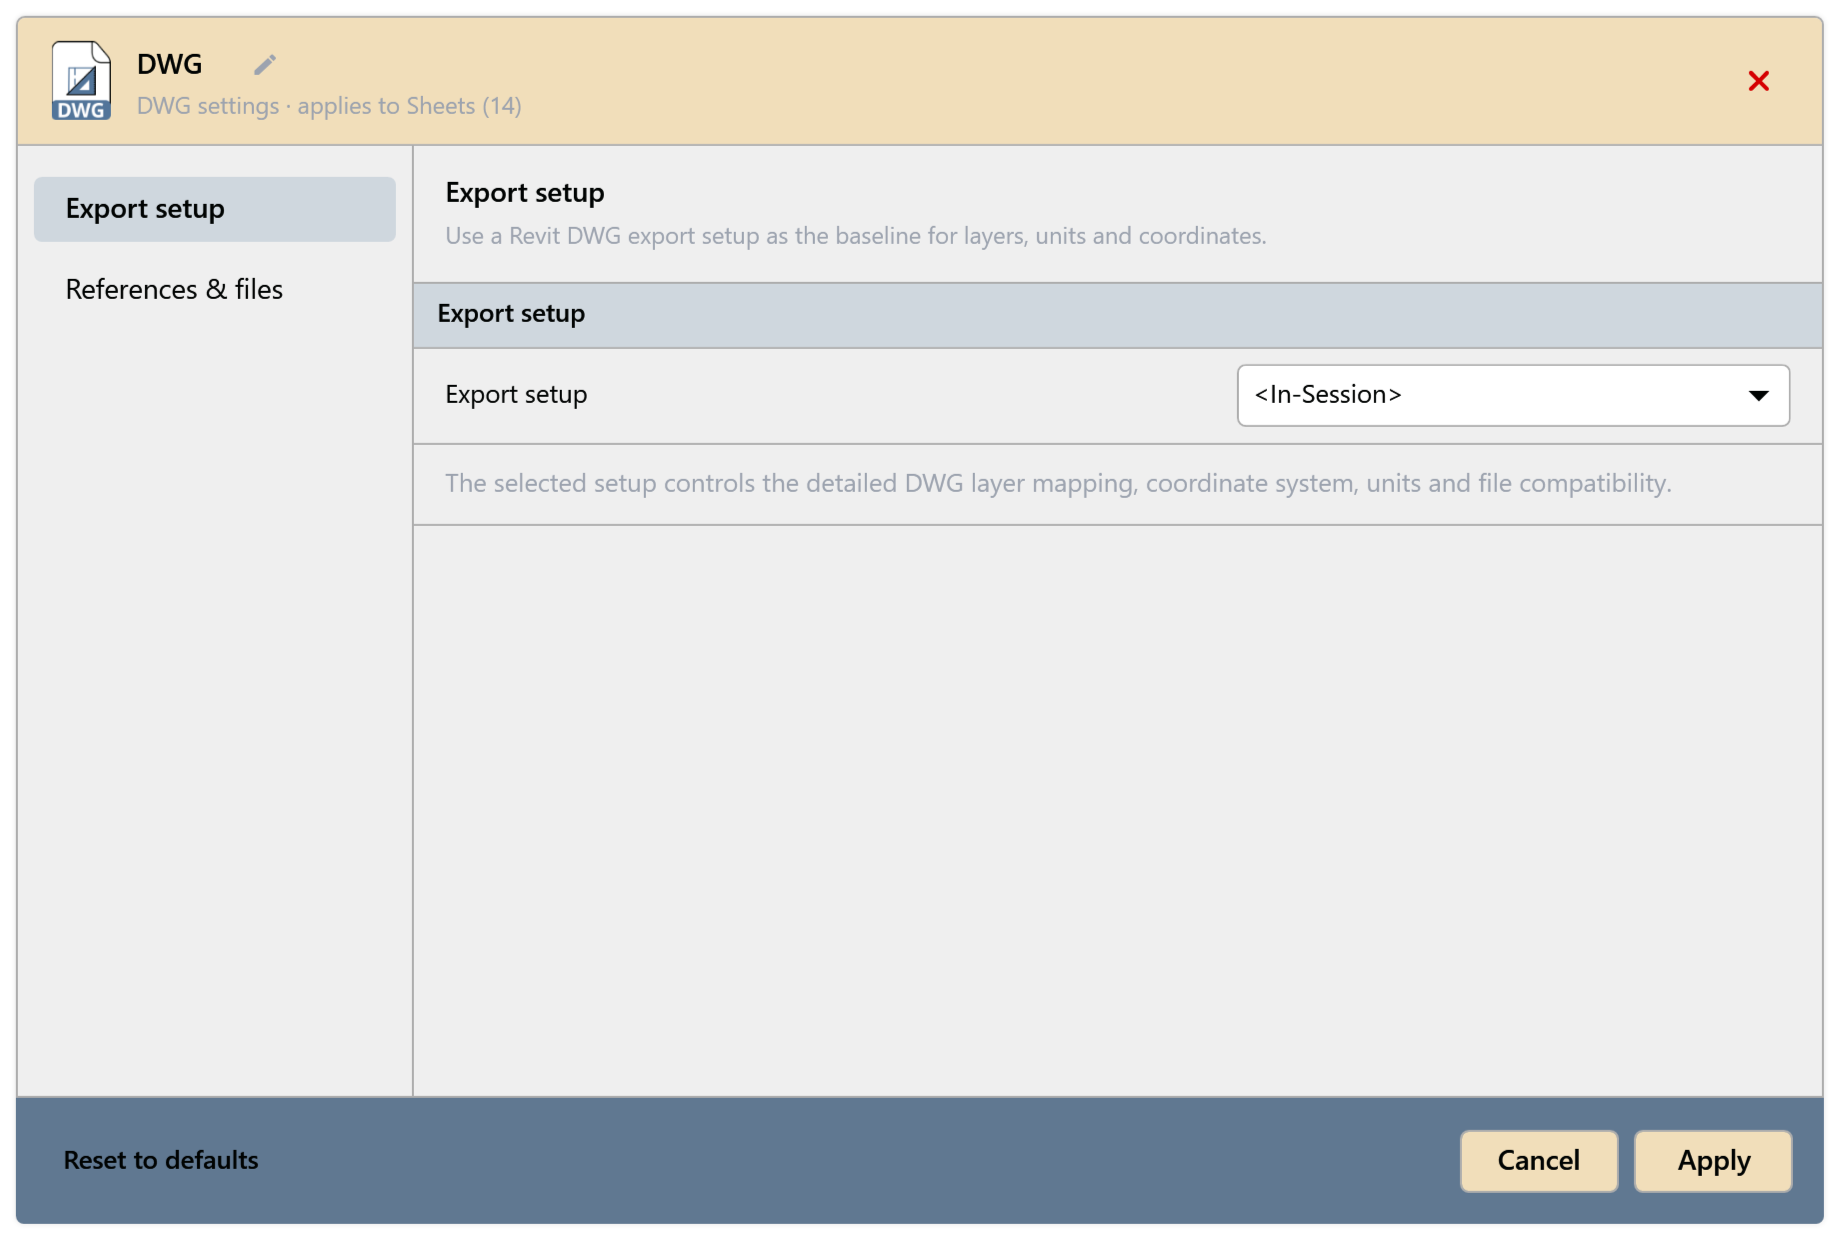
Fig. 10 · DWG settings 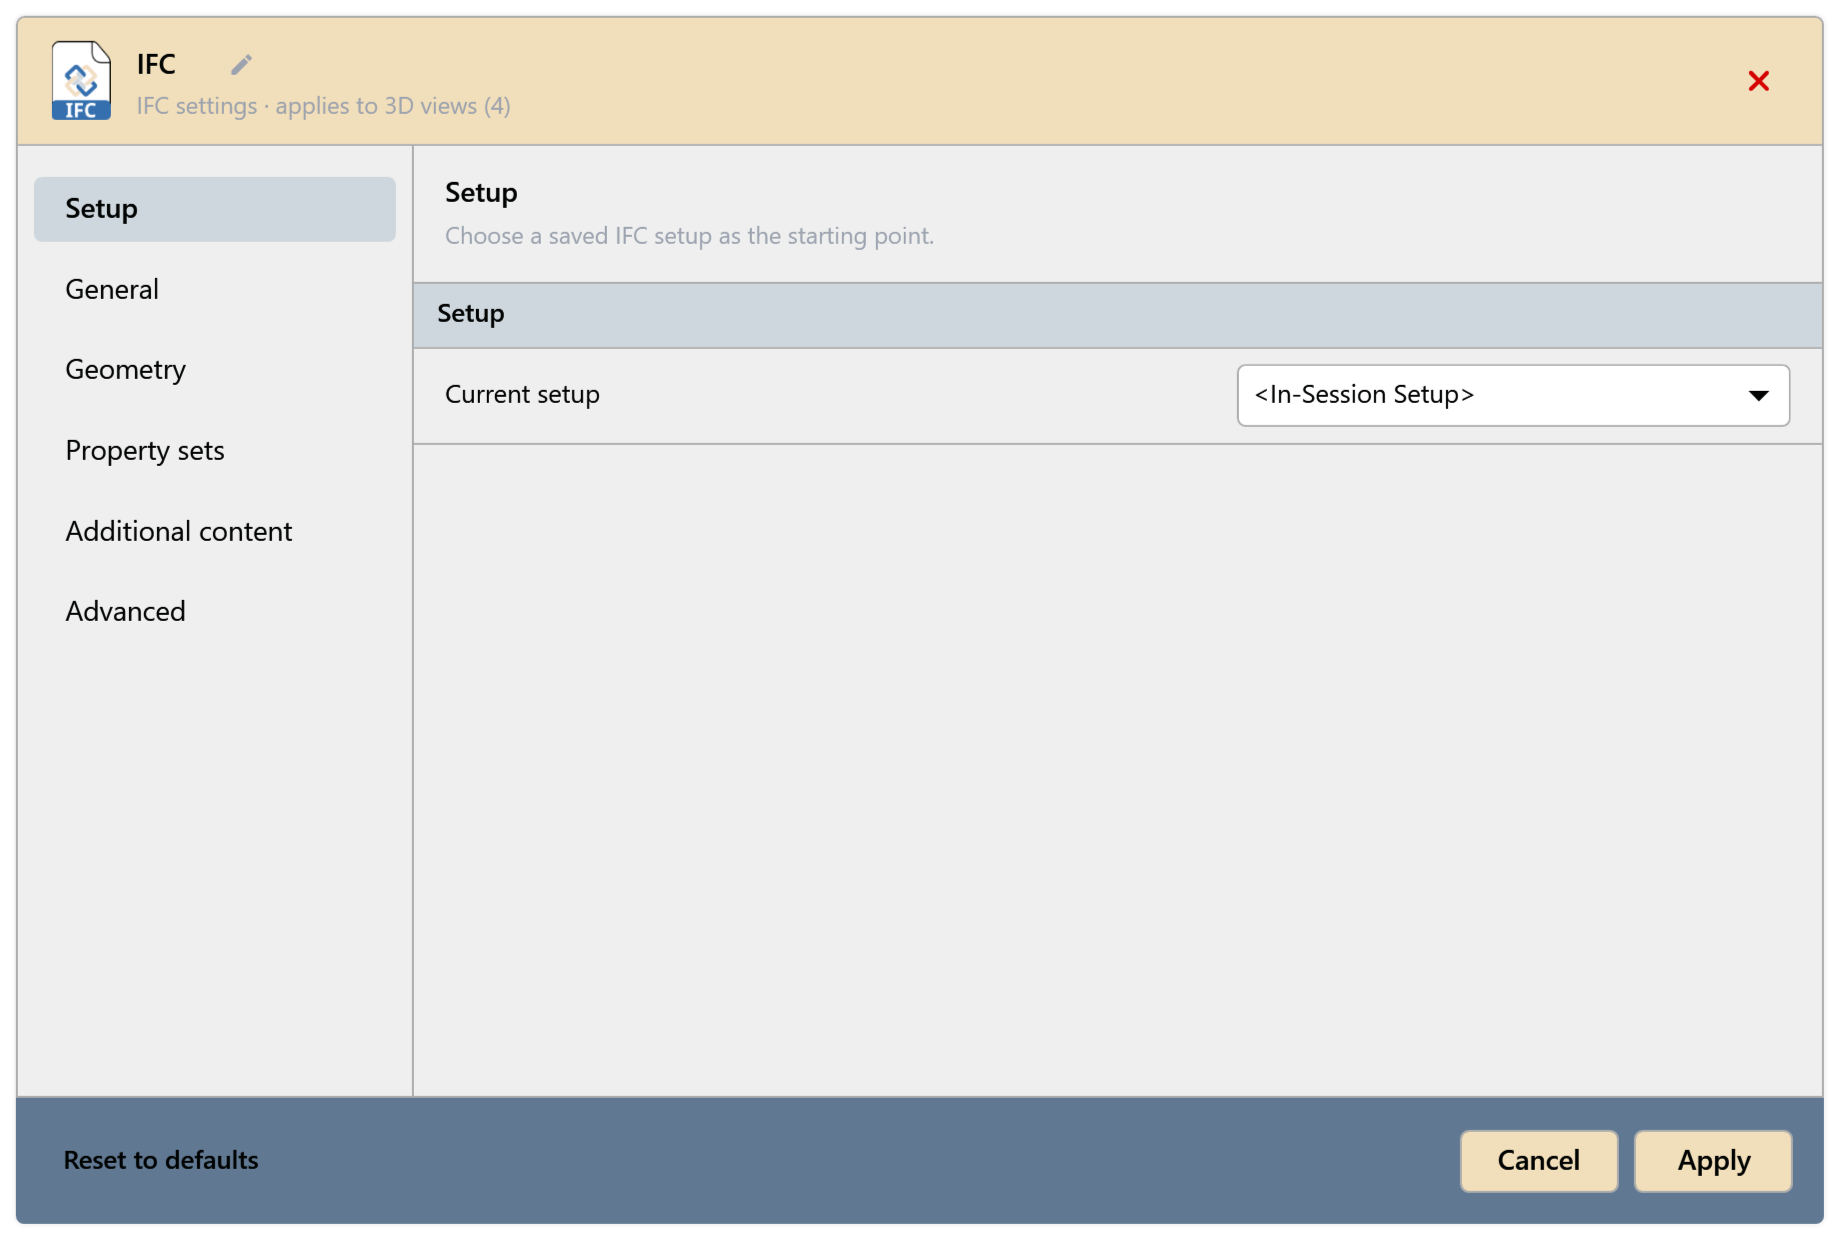
Fig. 11 · IFC settings. Classification, file header and project address have their own dialogs. 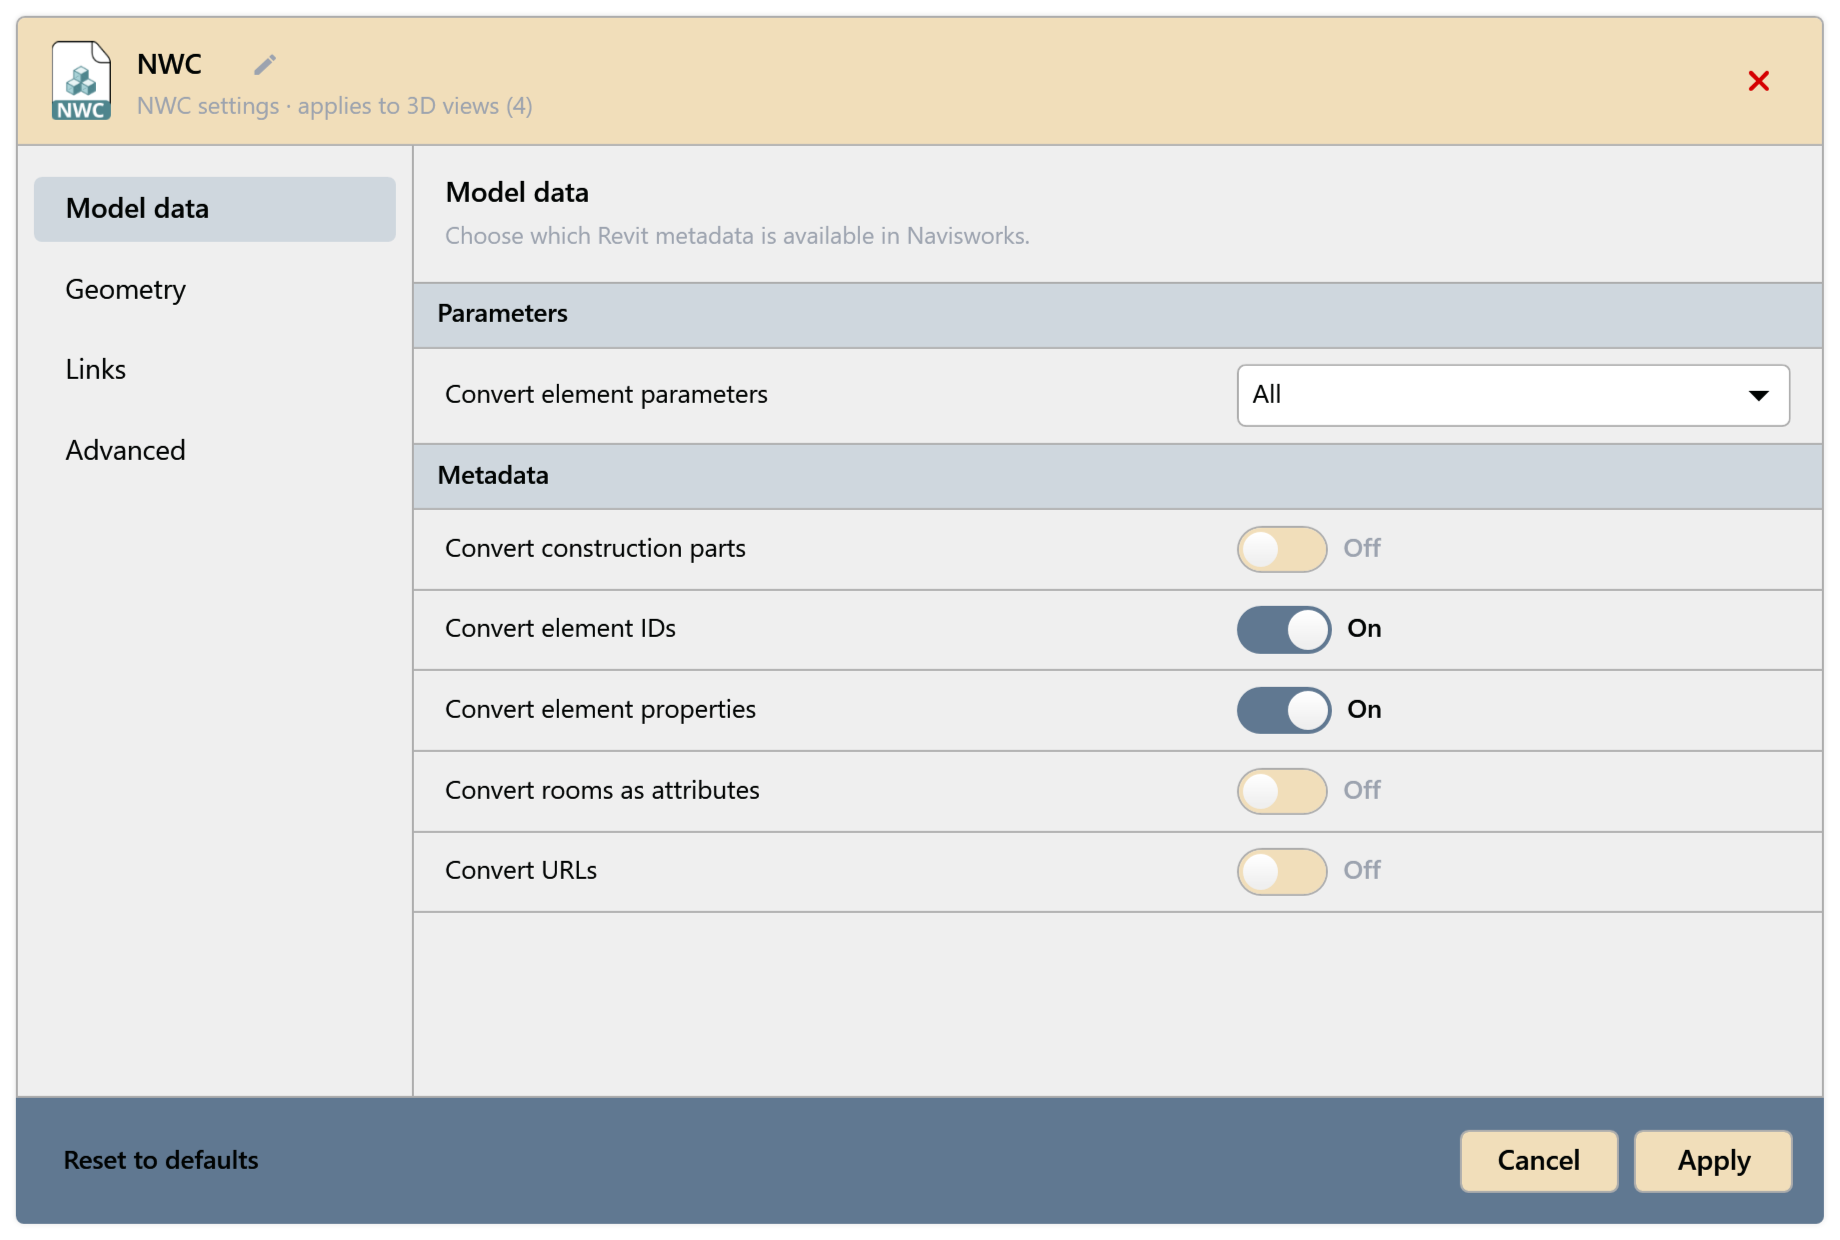
Fig. 12 · NWC settings Click Next. In the Review & Export step, each file is a row of its own.
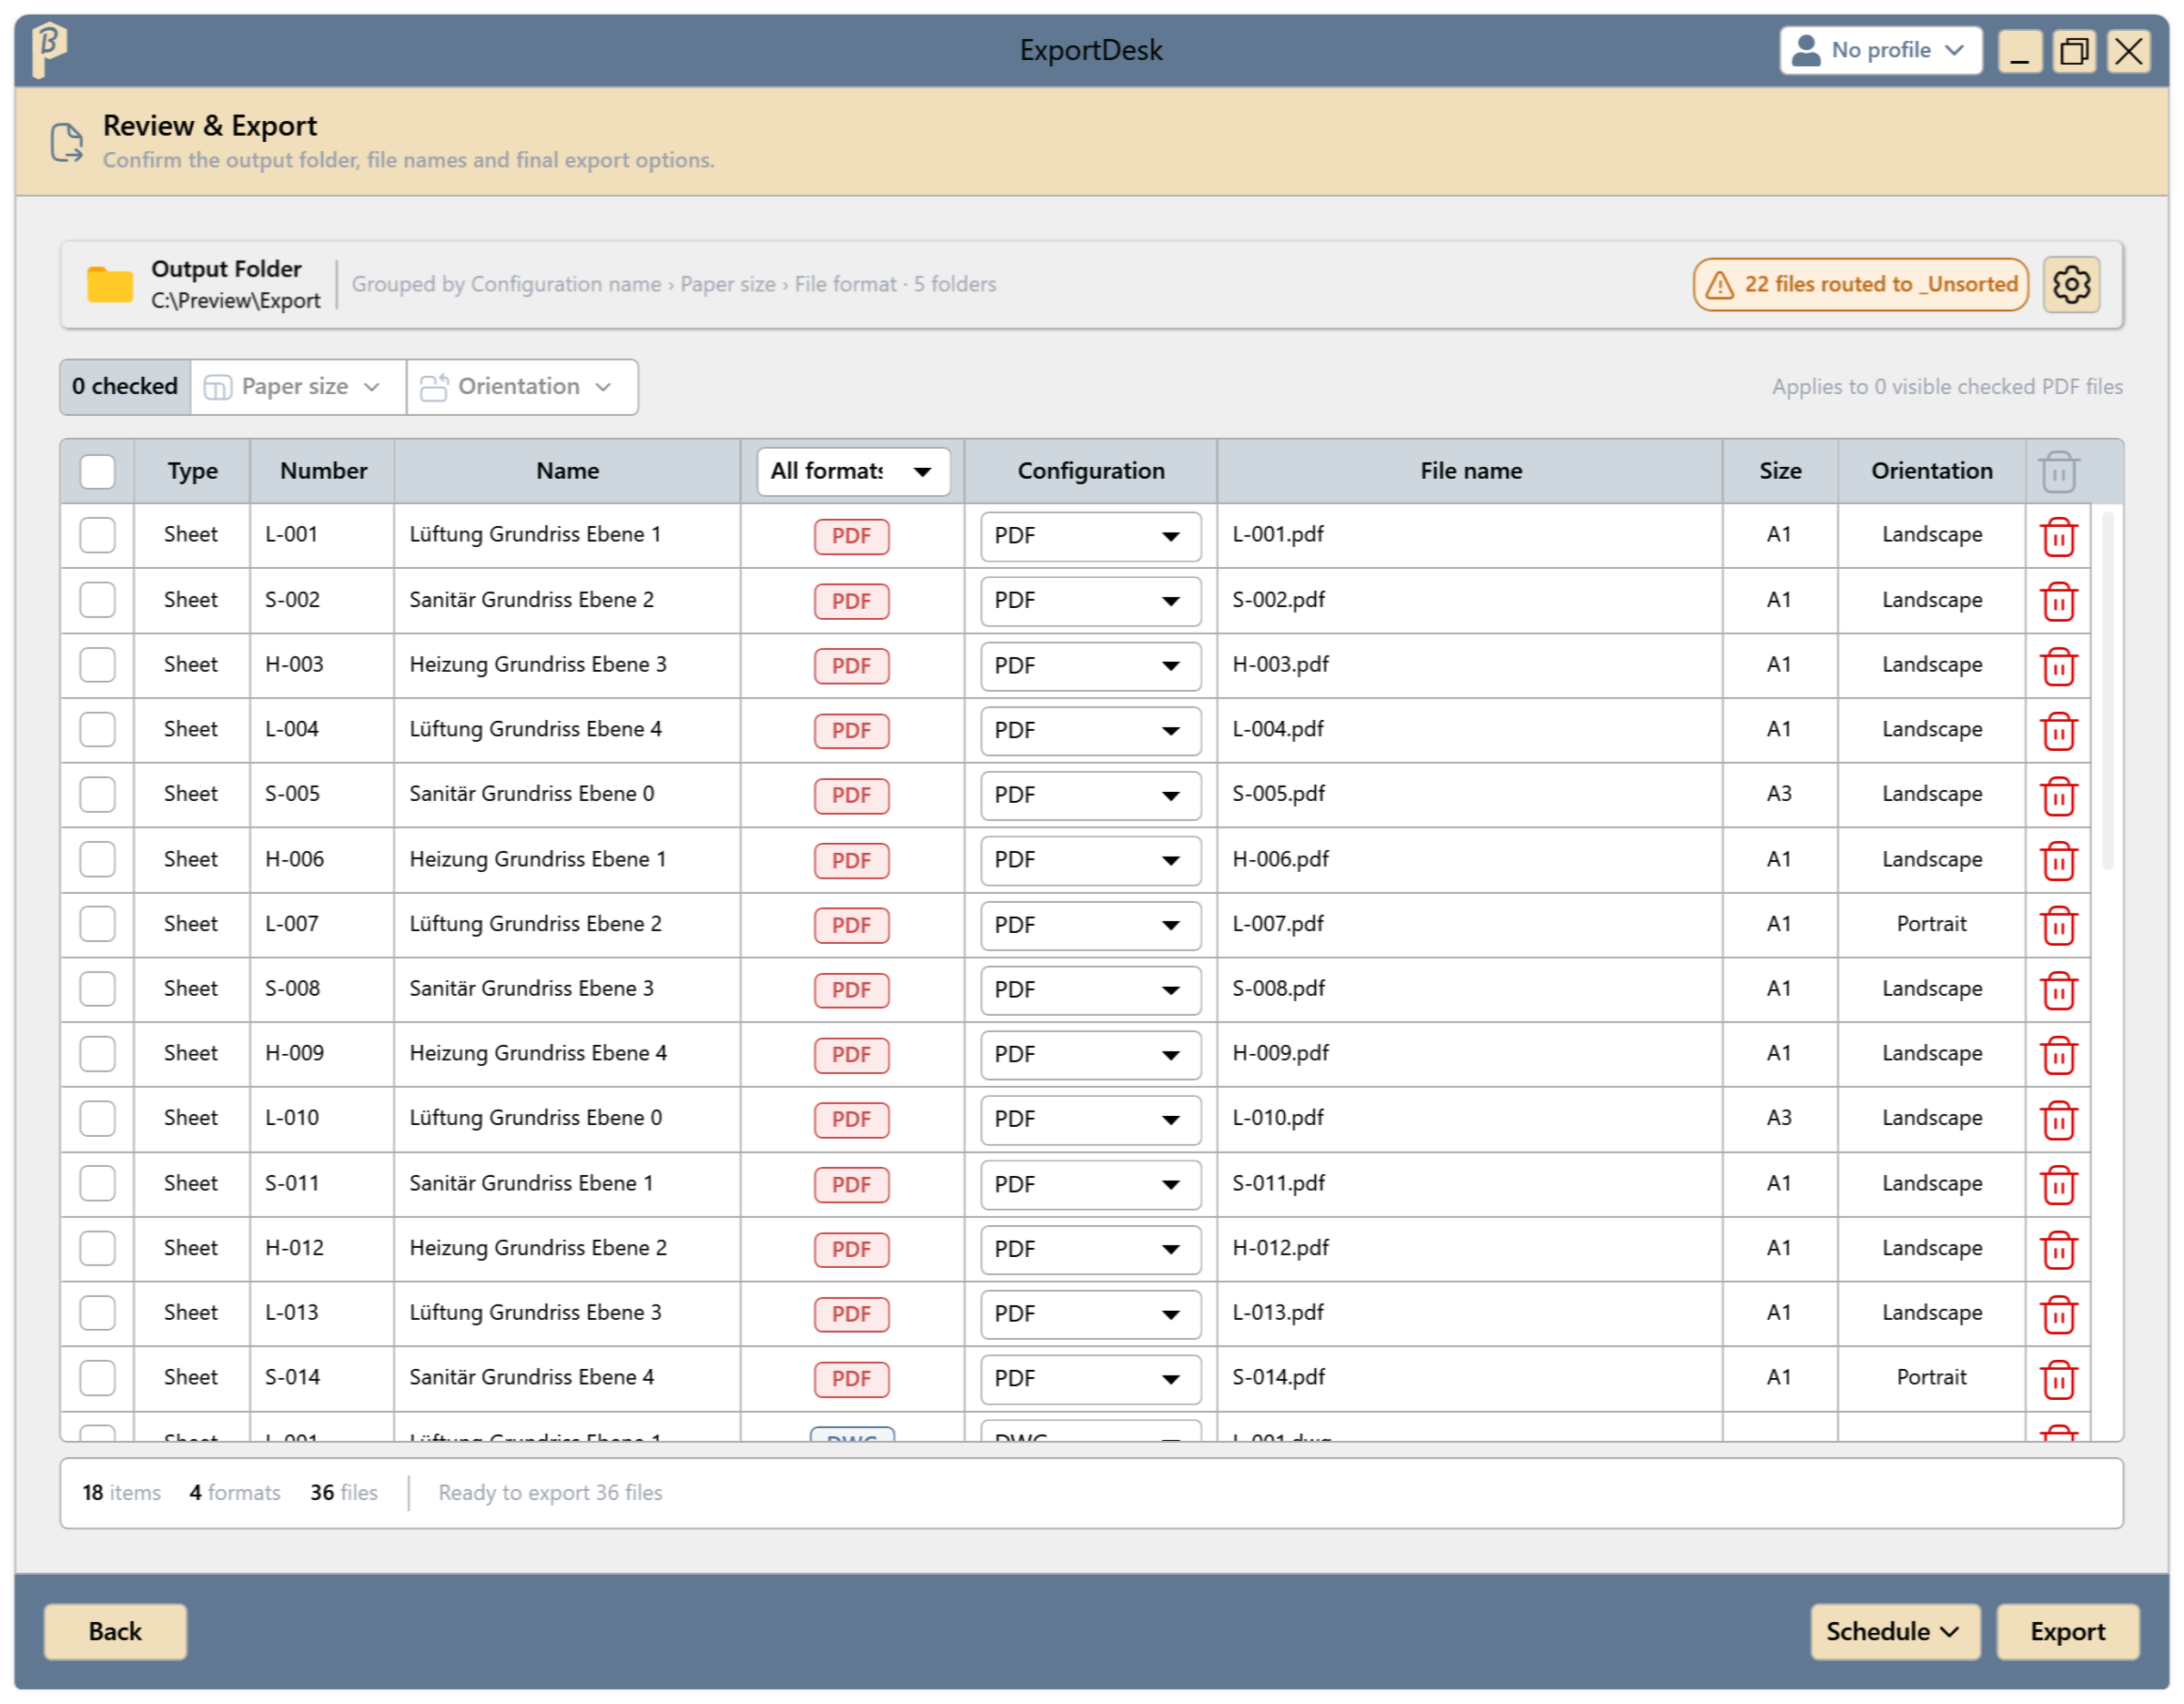
Fig. 13 · Review & Export step Before exporting, you can still adjust the rows:
- Paper size and Orientation apply to all selected, visible PDF rows. PDF rows without a paper size block the export until both are set.
- Use the Format column header to show only the rows of one format.
- Change a row's Configuration; with several selected rows of the same format, the change applies to all of them.
- Use the trash can at the end of a row to remove the file from this export. The selection in the Selection step stays unchanged.
- Right-click › Open Sheet or Open View shows the row's source in Revit.
Use the gear to set the Output folder: a base folder and either Single folder or Group into Subfolders.
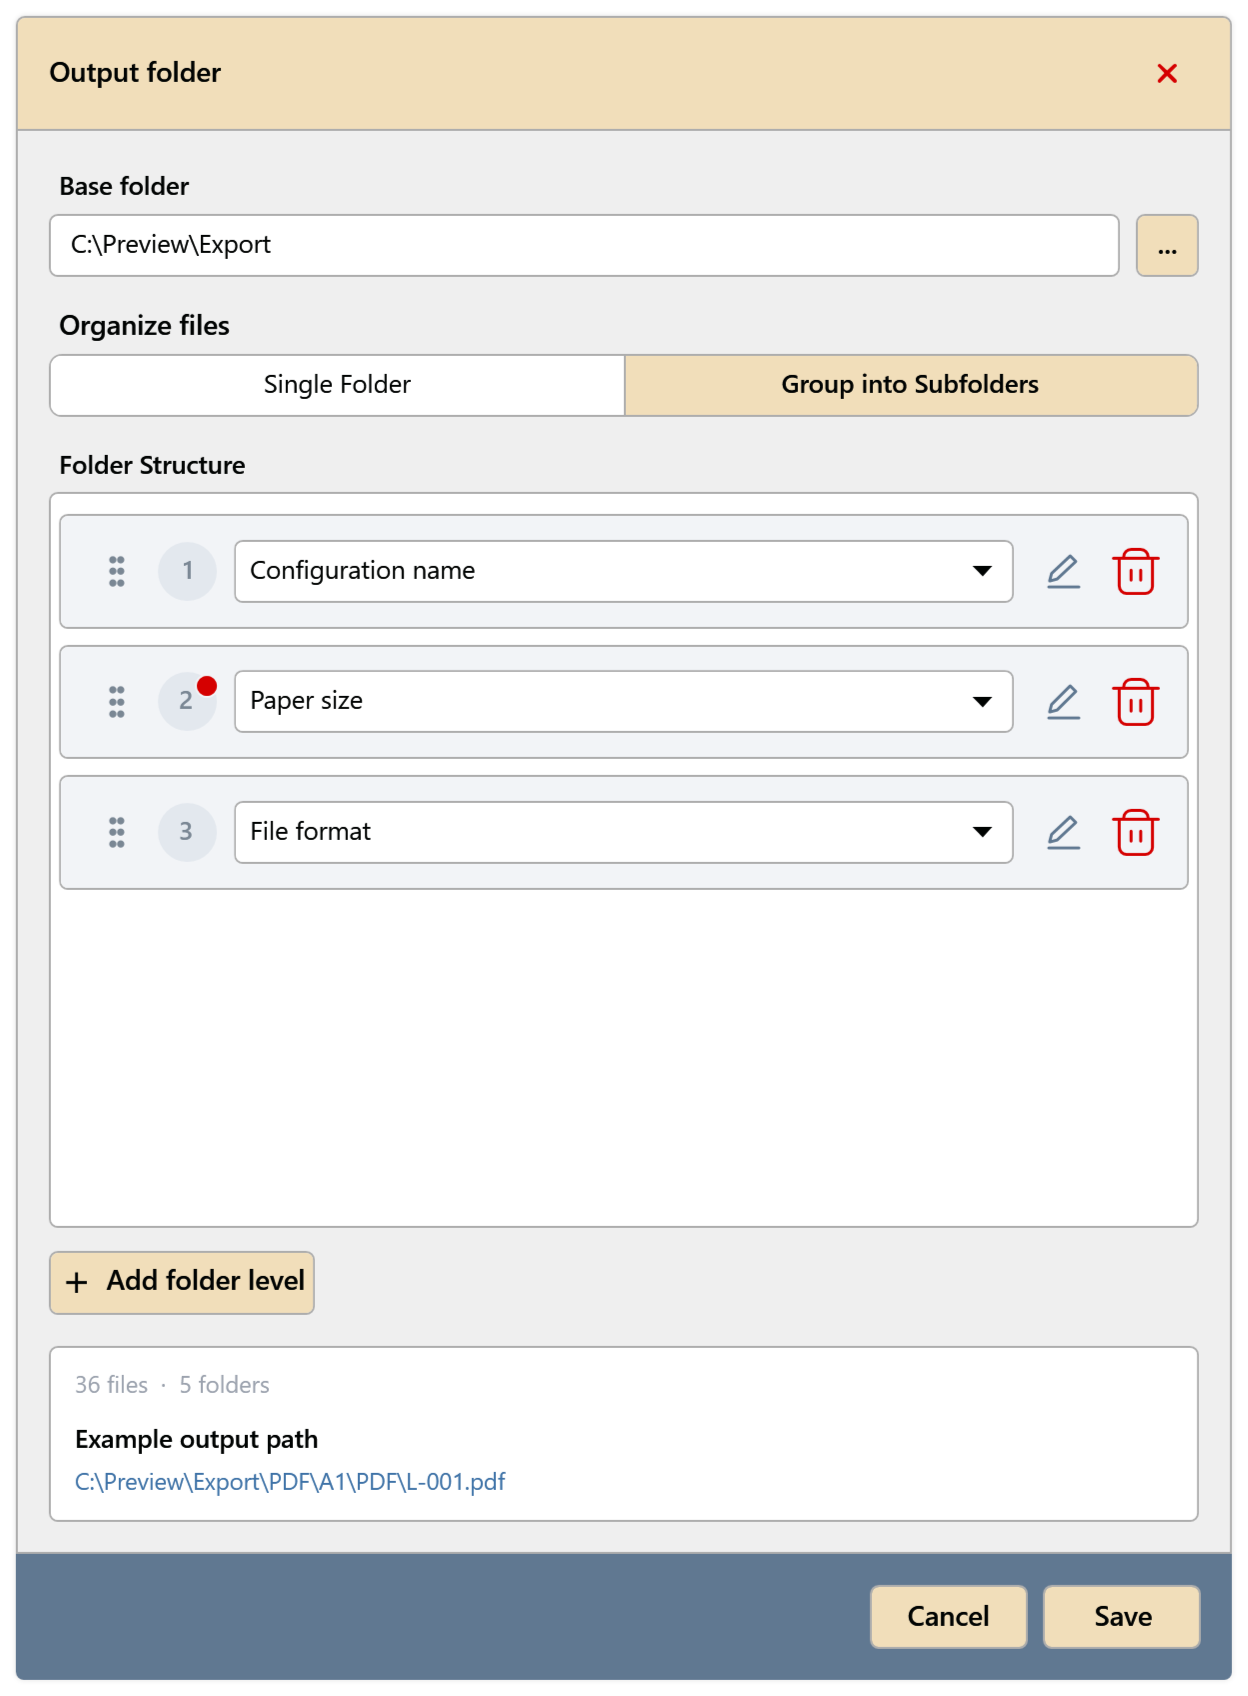
Fig. 14 · Output folder 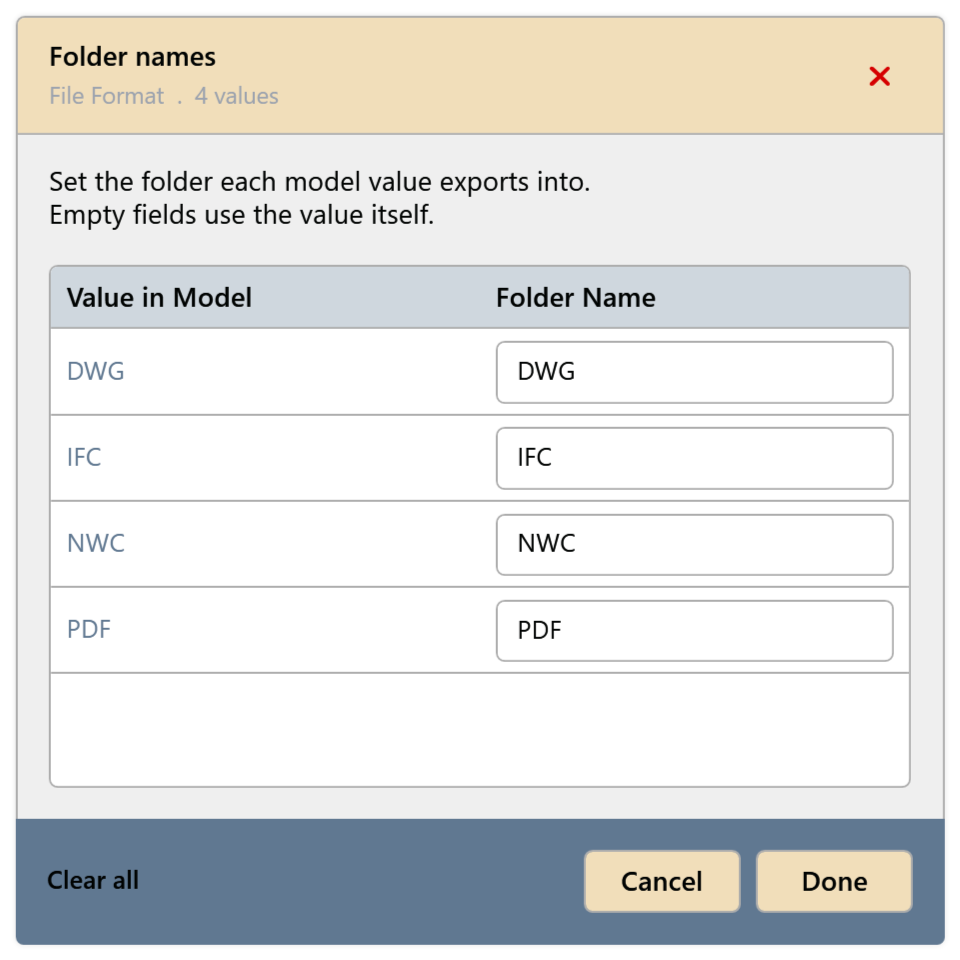
Fig. 15 · Folder names: the value in the model and the folder name - Files without a value for a folder level go to the _Unsorted folder. A red dot on the level shows this; the note in the Review & Export step says how many there are.
- Clear all resets the folder names of a level to the values from the model.
Click Export. The files are written one after another. You can stop the export at any time with Cancel.
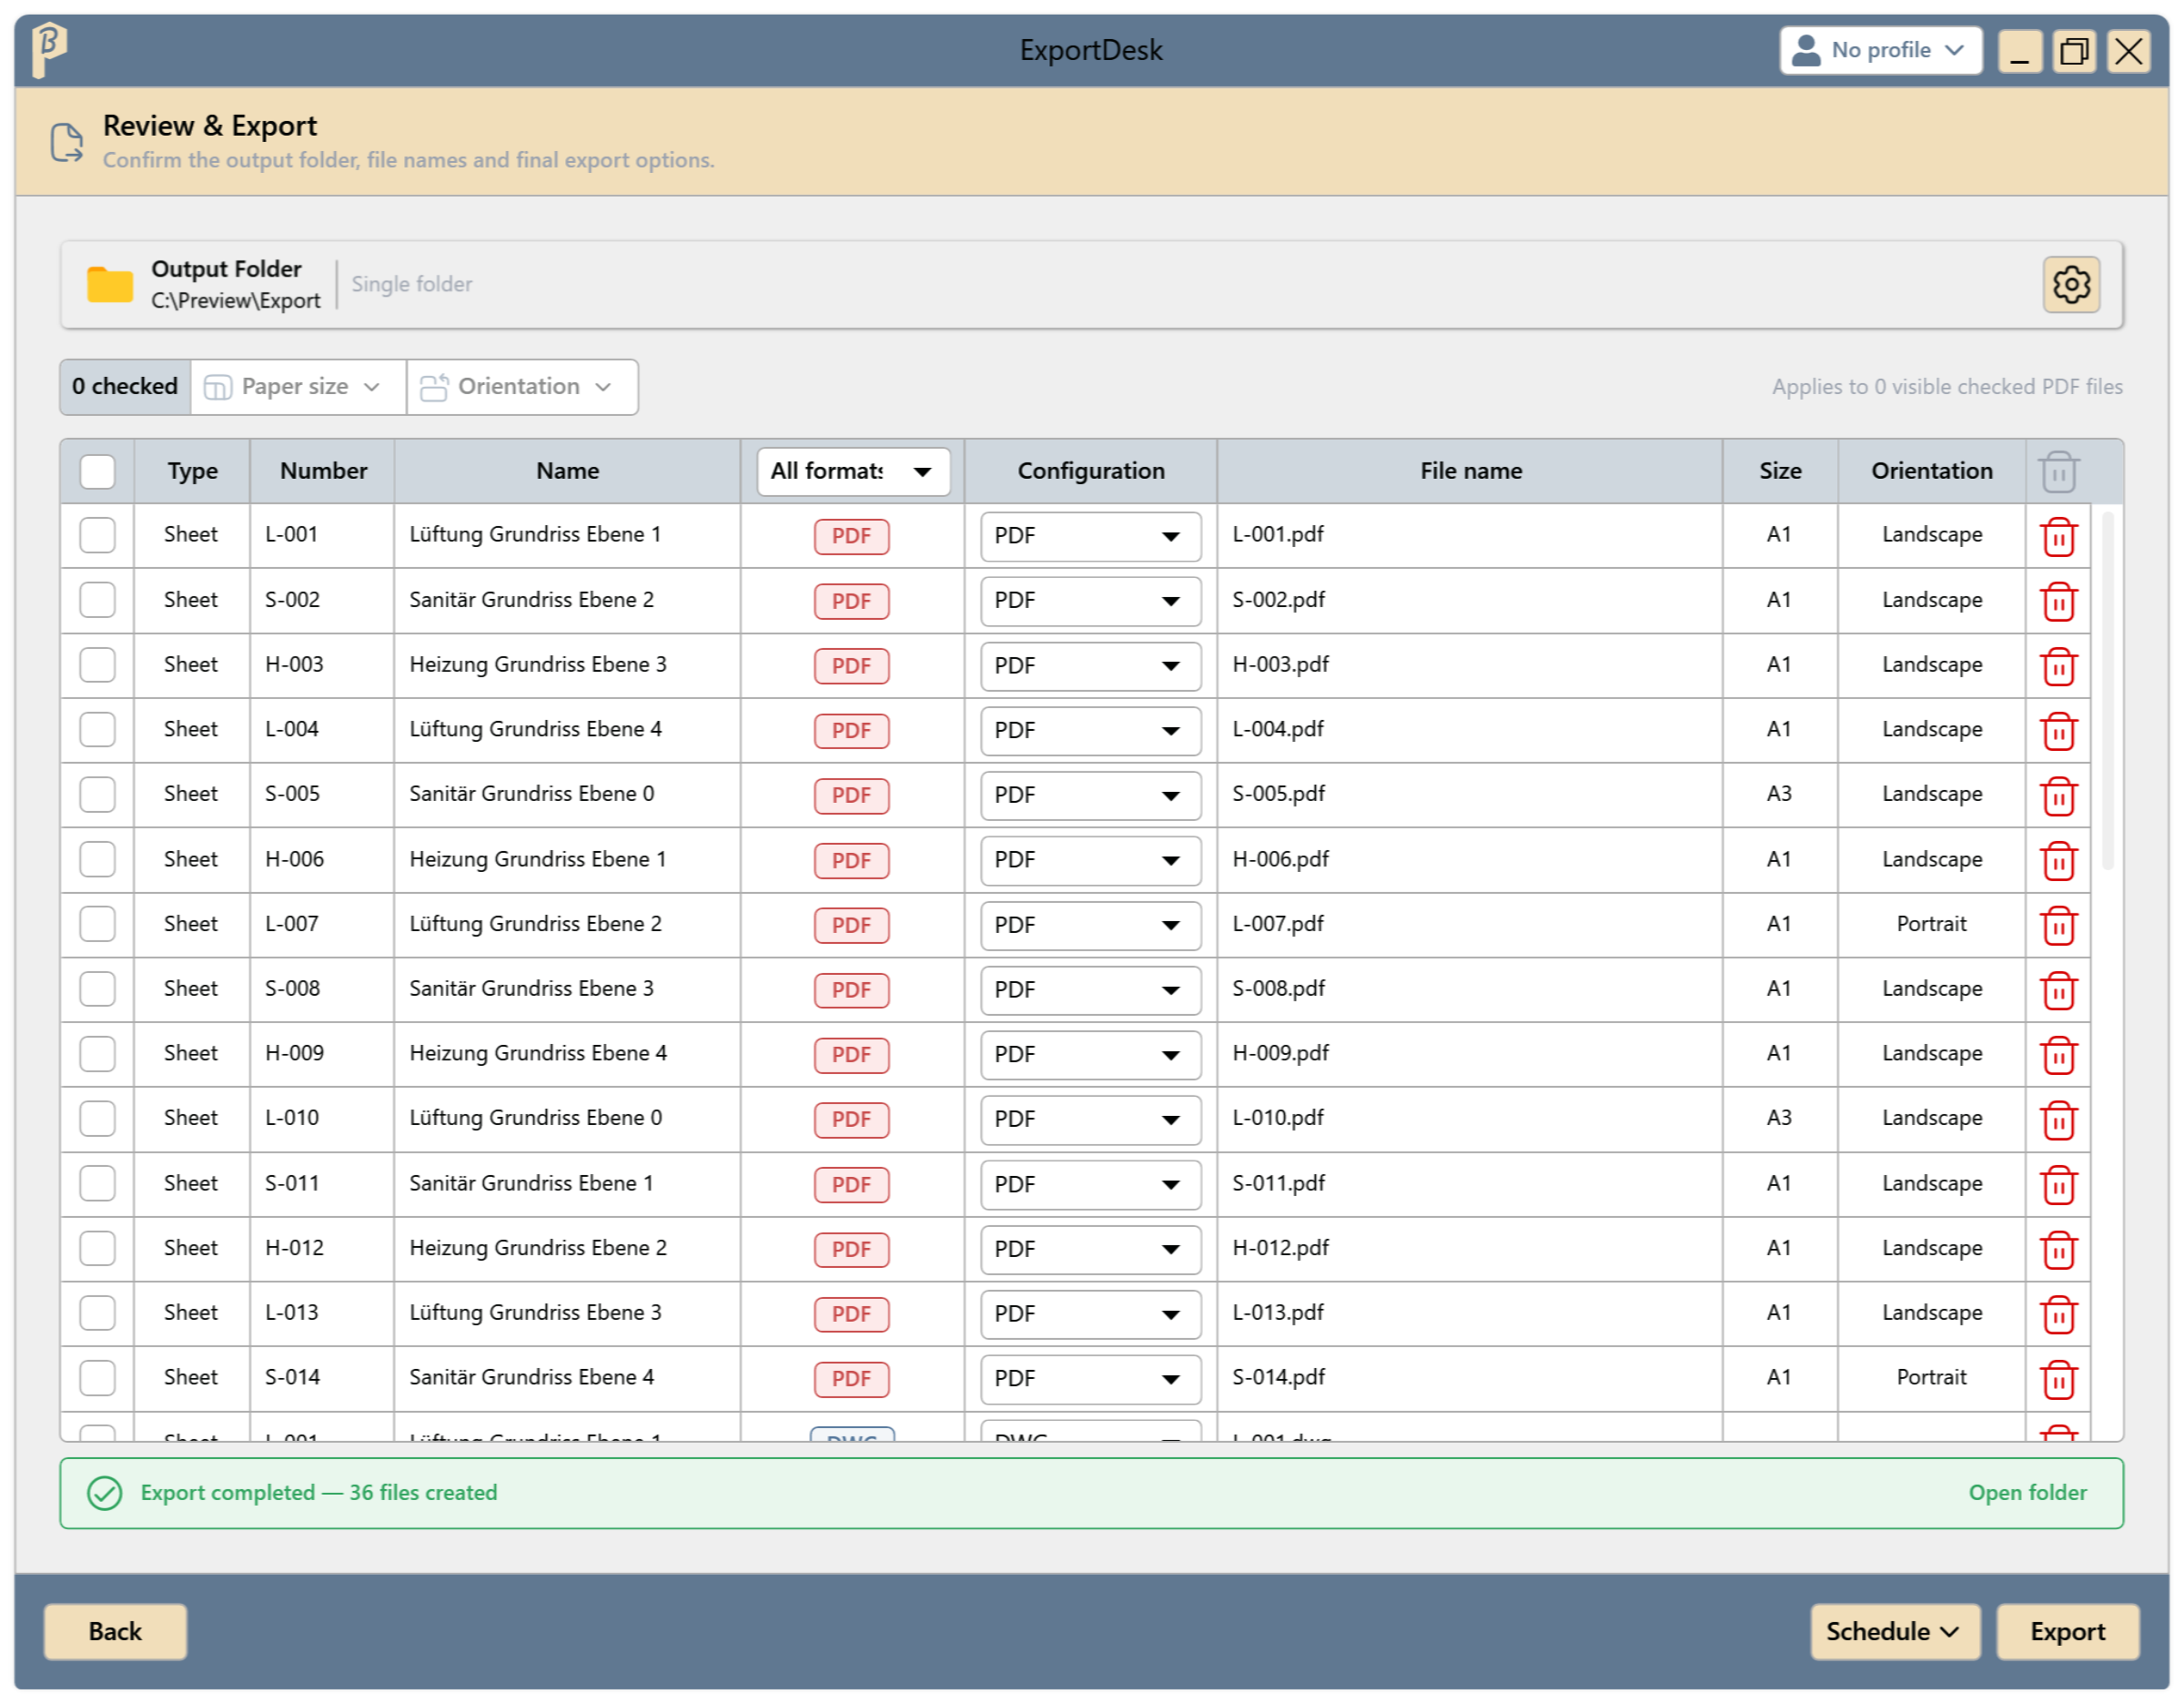
Fig. 16 · All files created
The files are in the output folder, in subfolders when grouped. Existing files with the same name are overwritten. If all files are in one folder (Single folder), Open folder shows it in Explorer.
When files fail
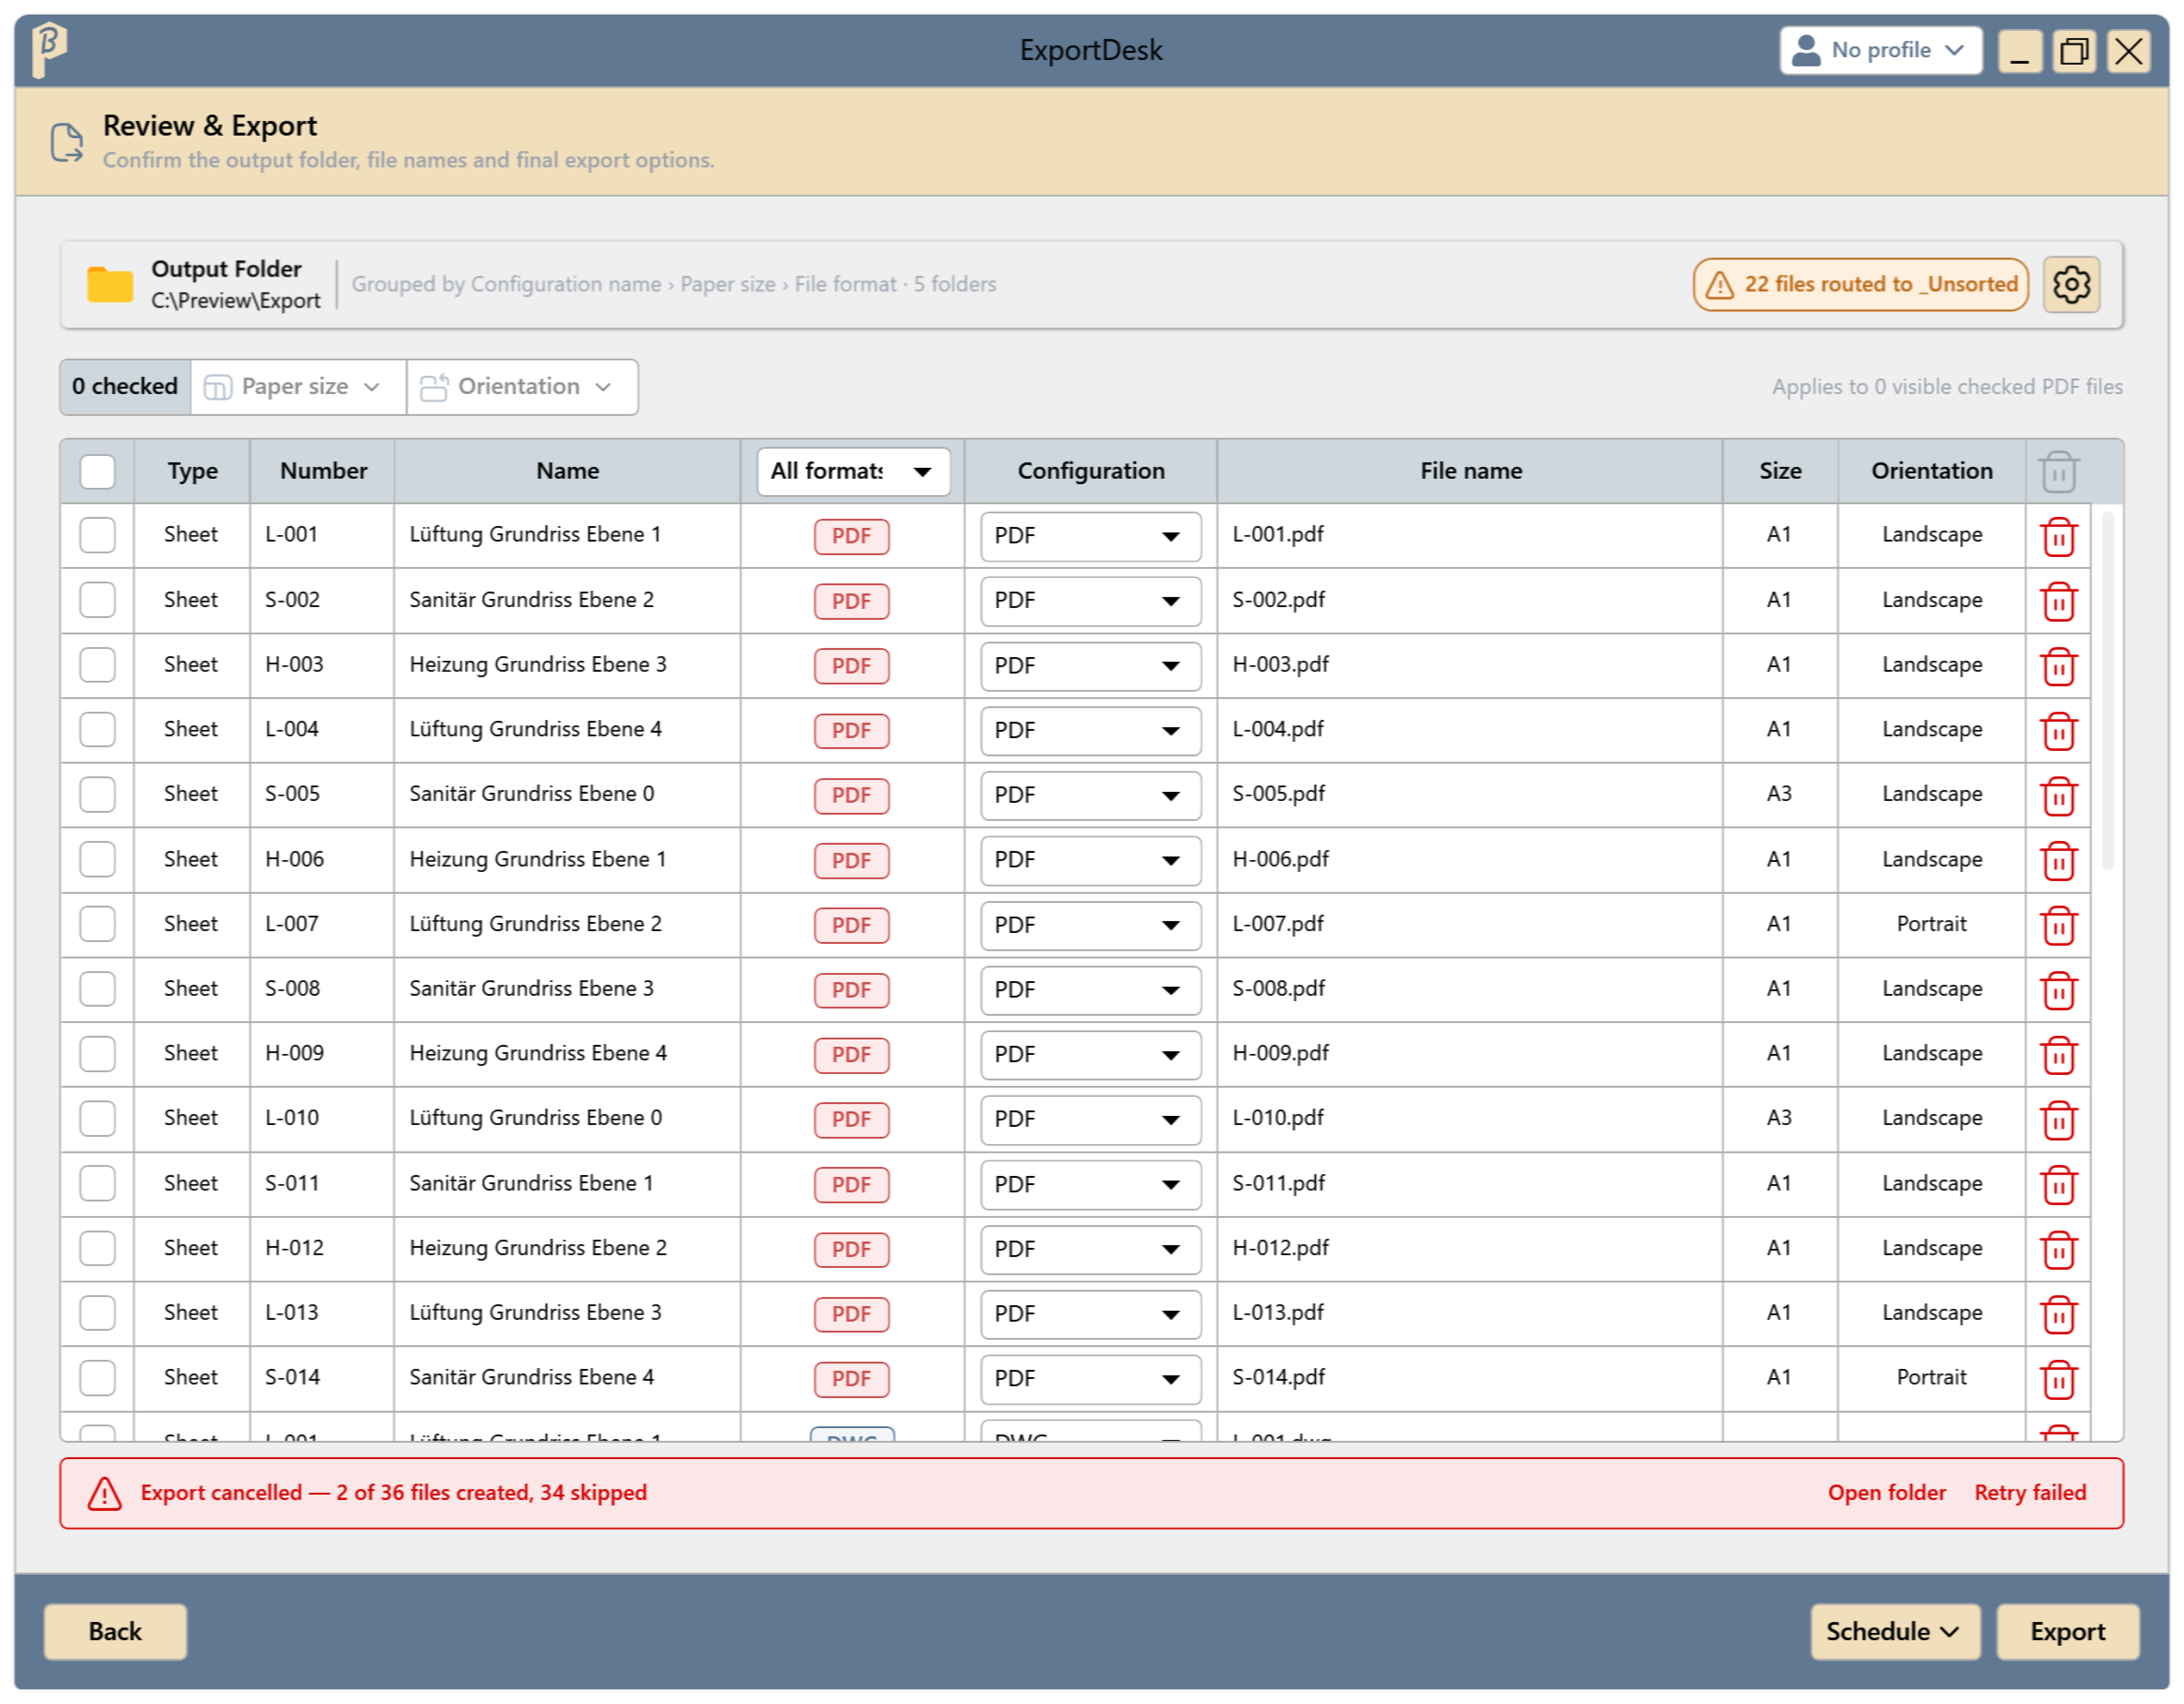
Failed rows are marked red; the tooltip on the warning icon gives the reason. Retry failed exports all failed and skipped rows again; right-click › Retry failed retries just one row.
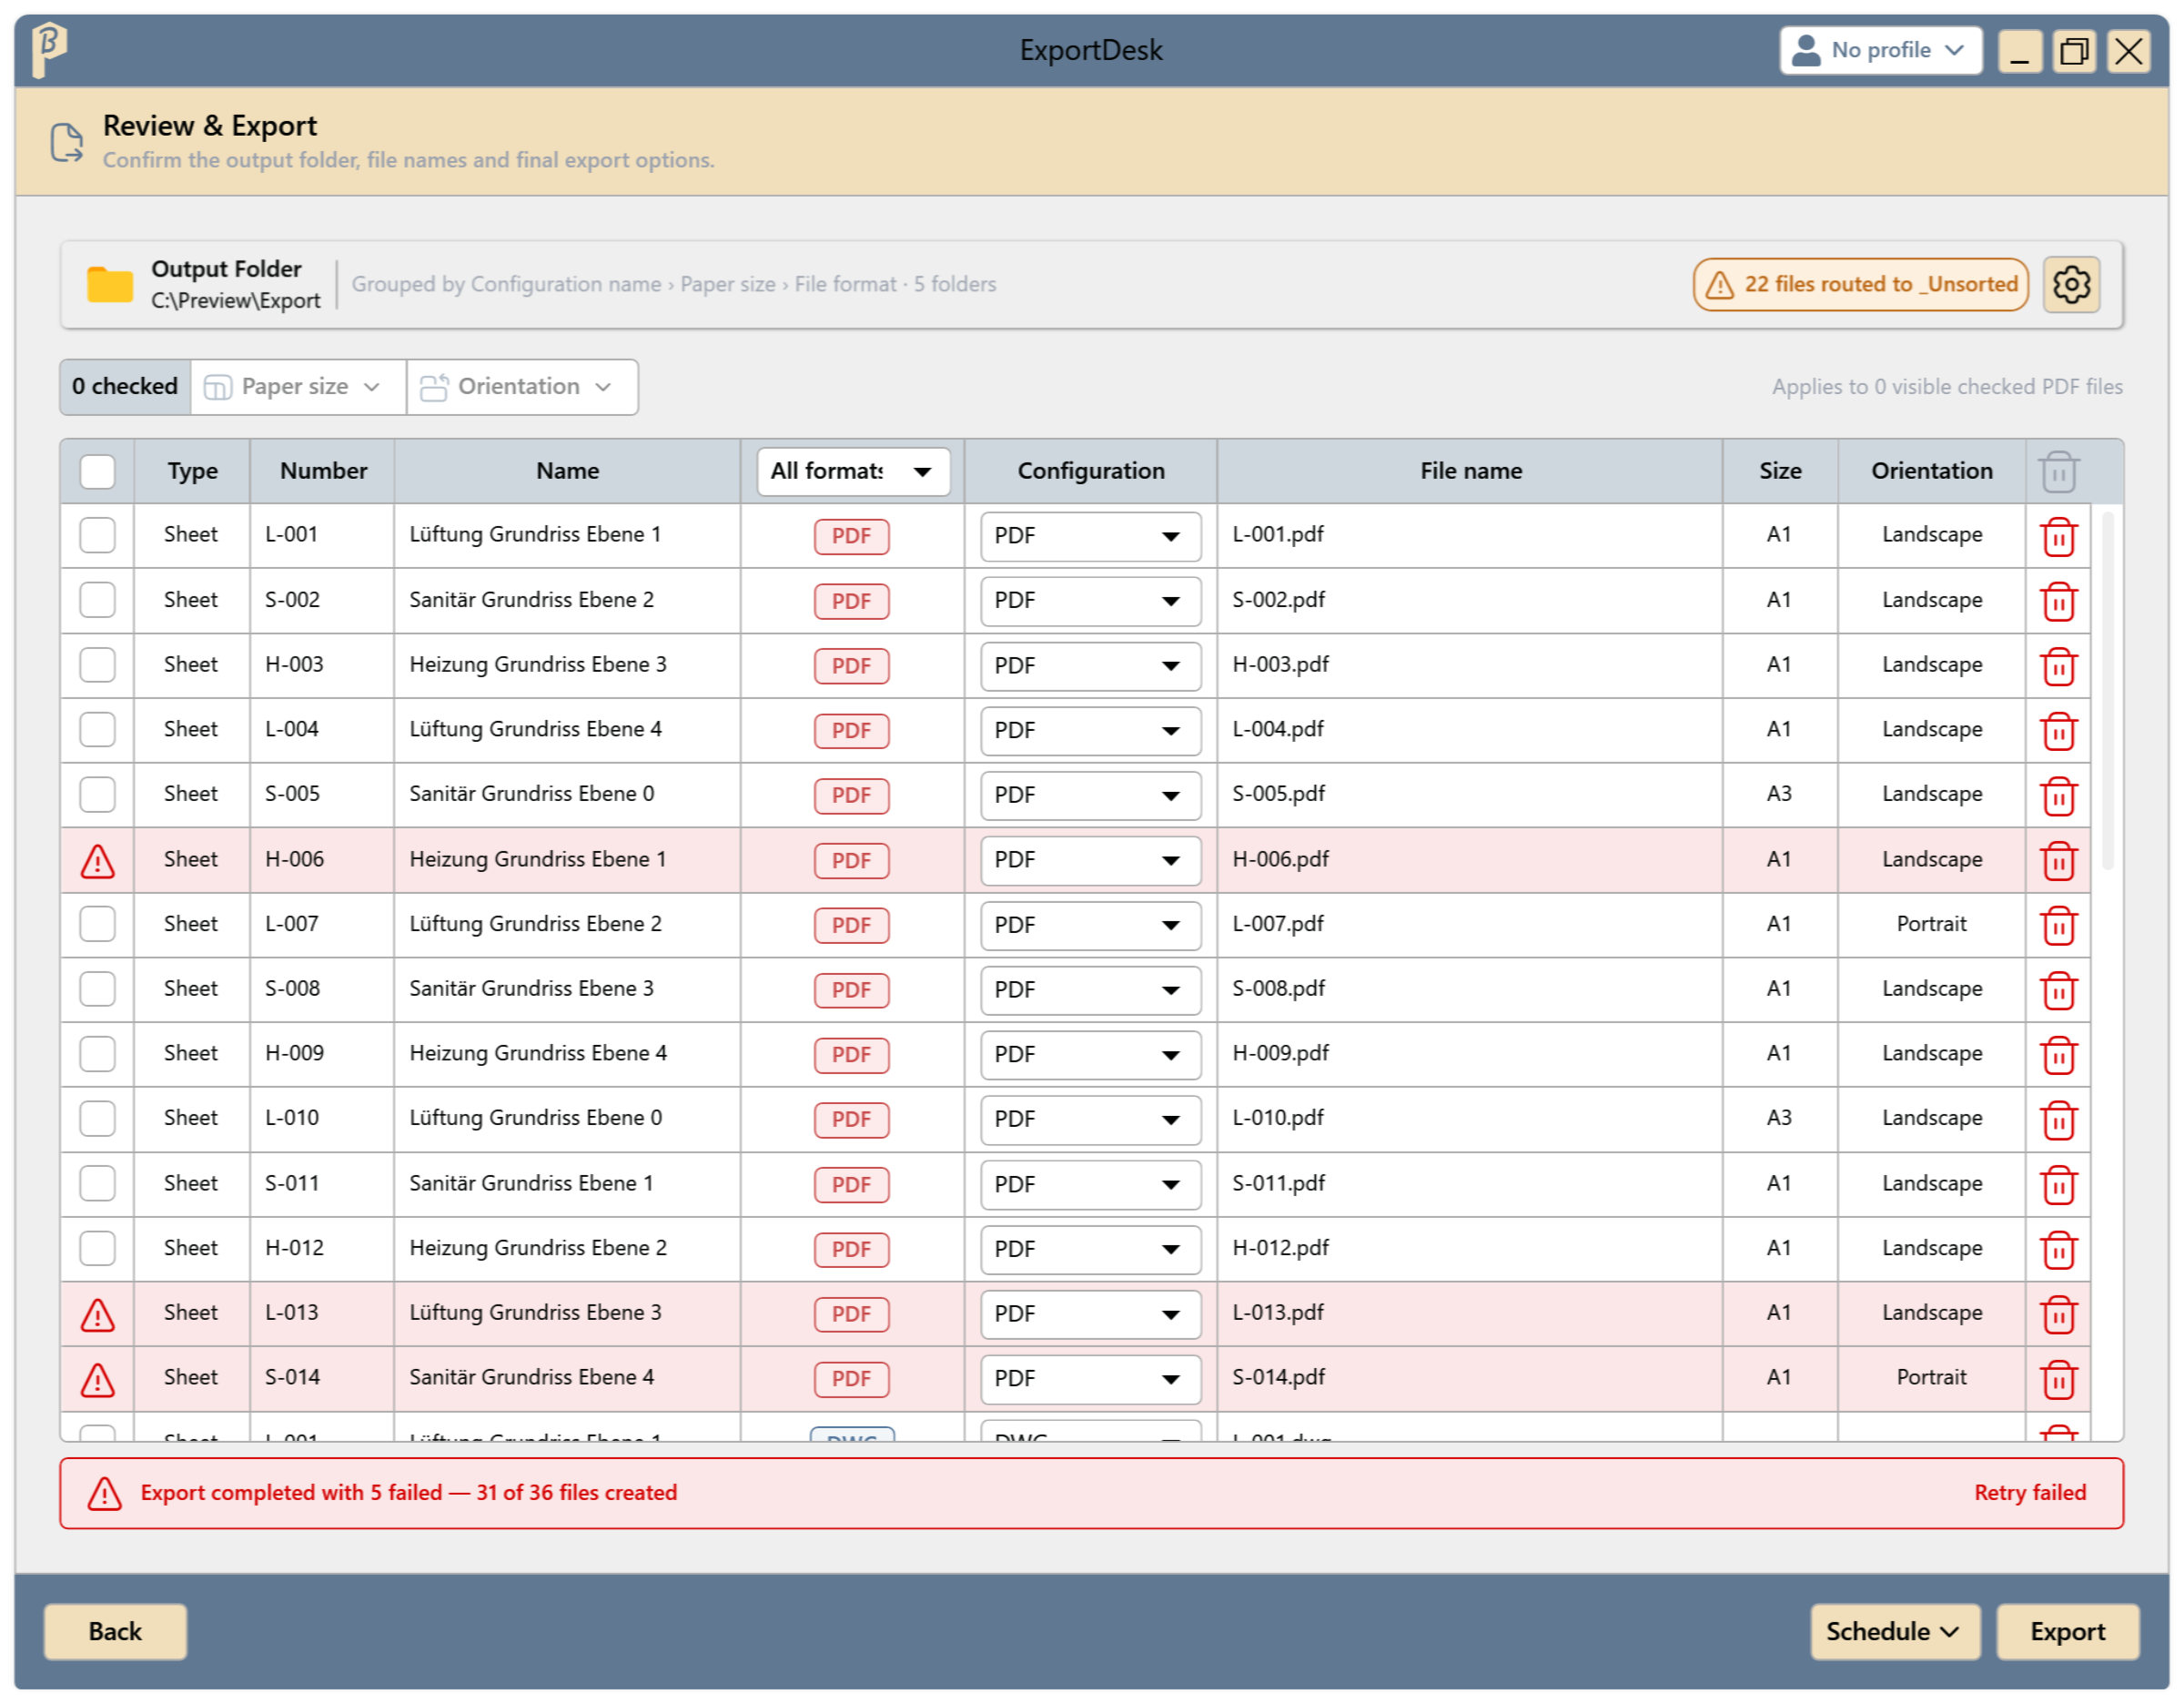
After Cancel, the files not yet reached count as skipped; they can be retried too.
Schedule an export as a job
In the Review & Export step, click Schedule › Schedule as job…. The finished export is taken over as a job and the Schedule step opens.
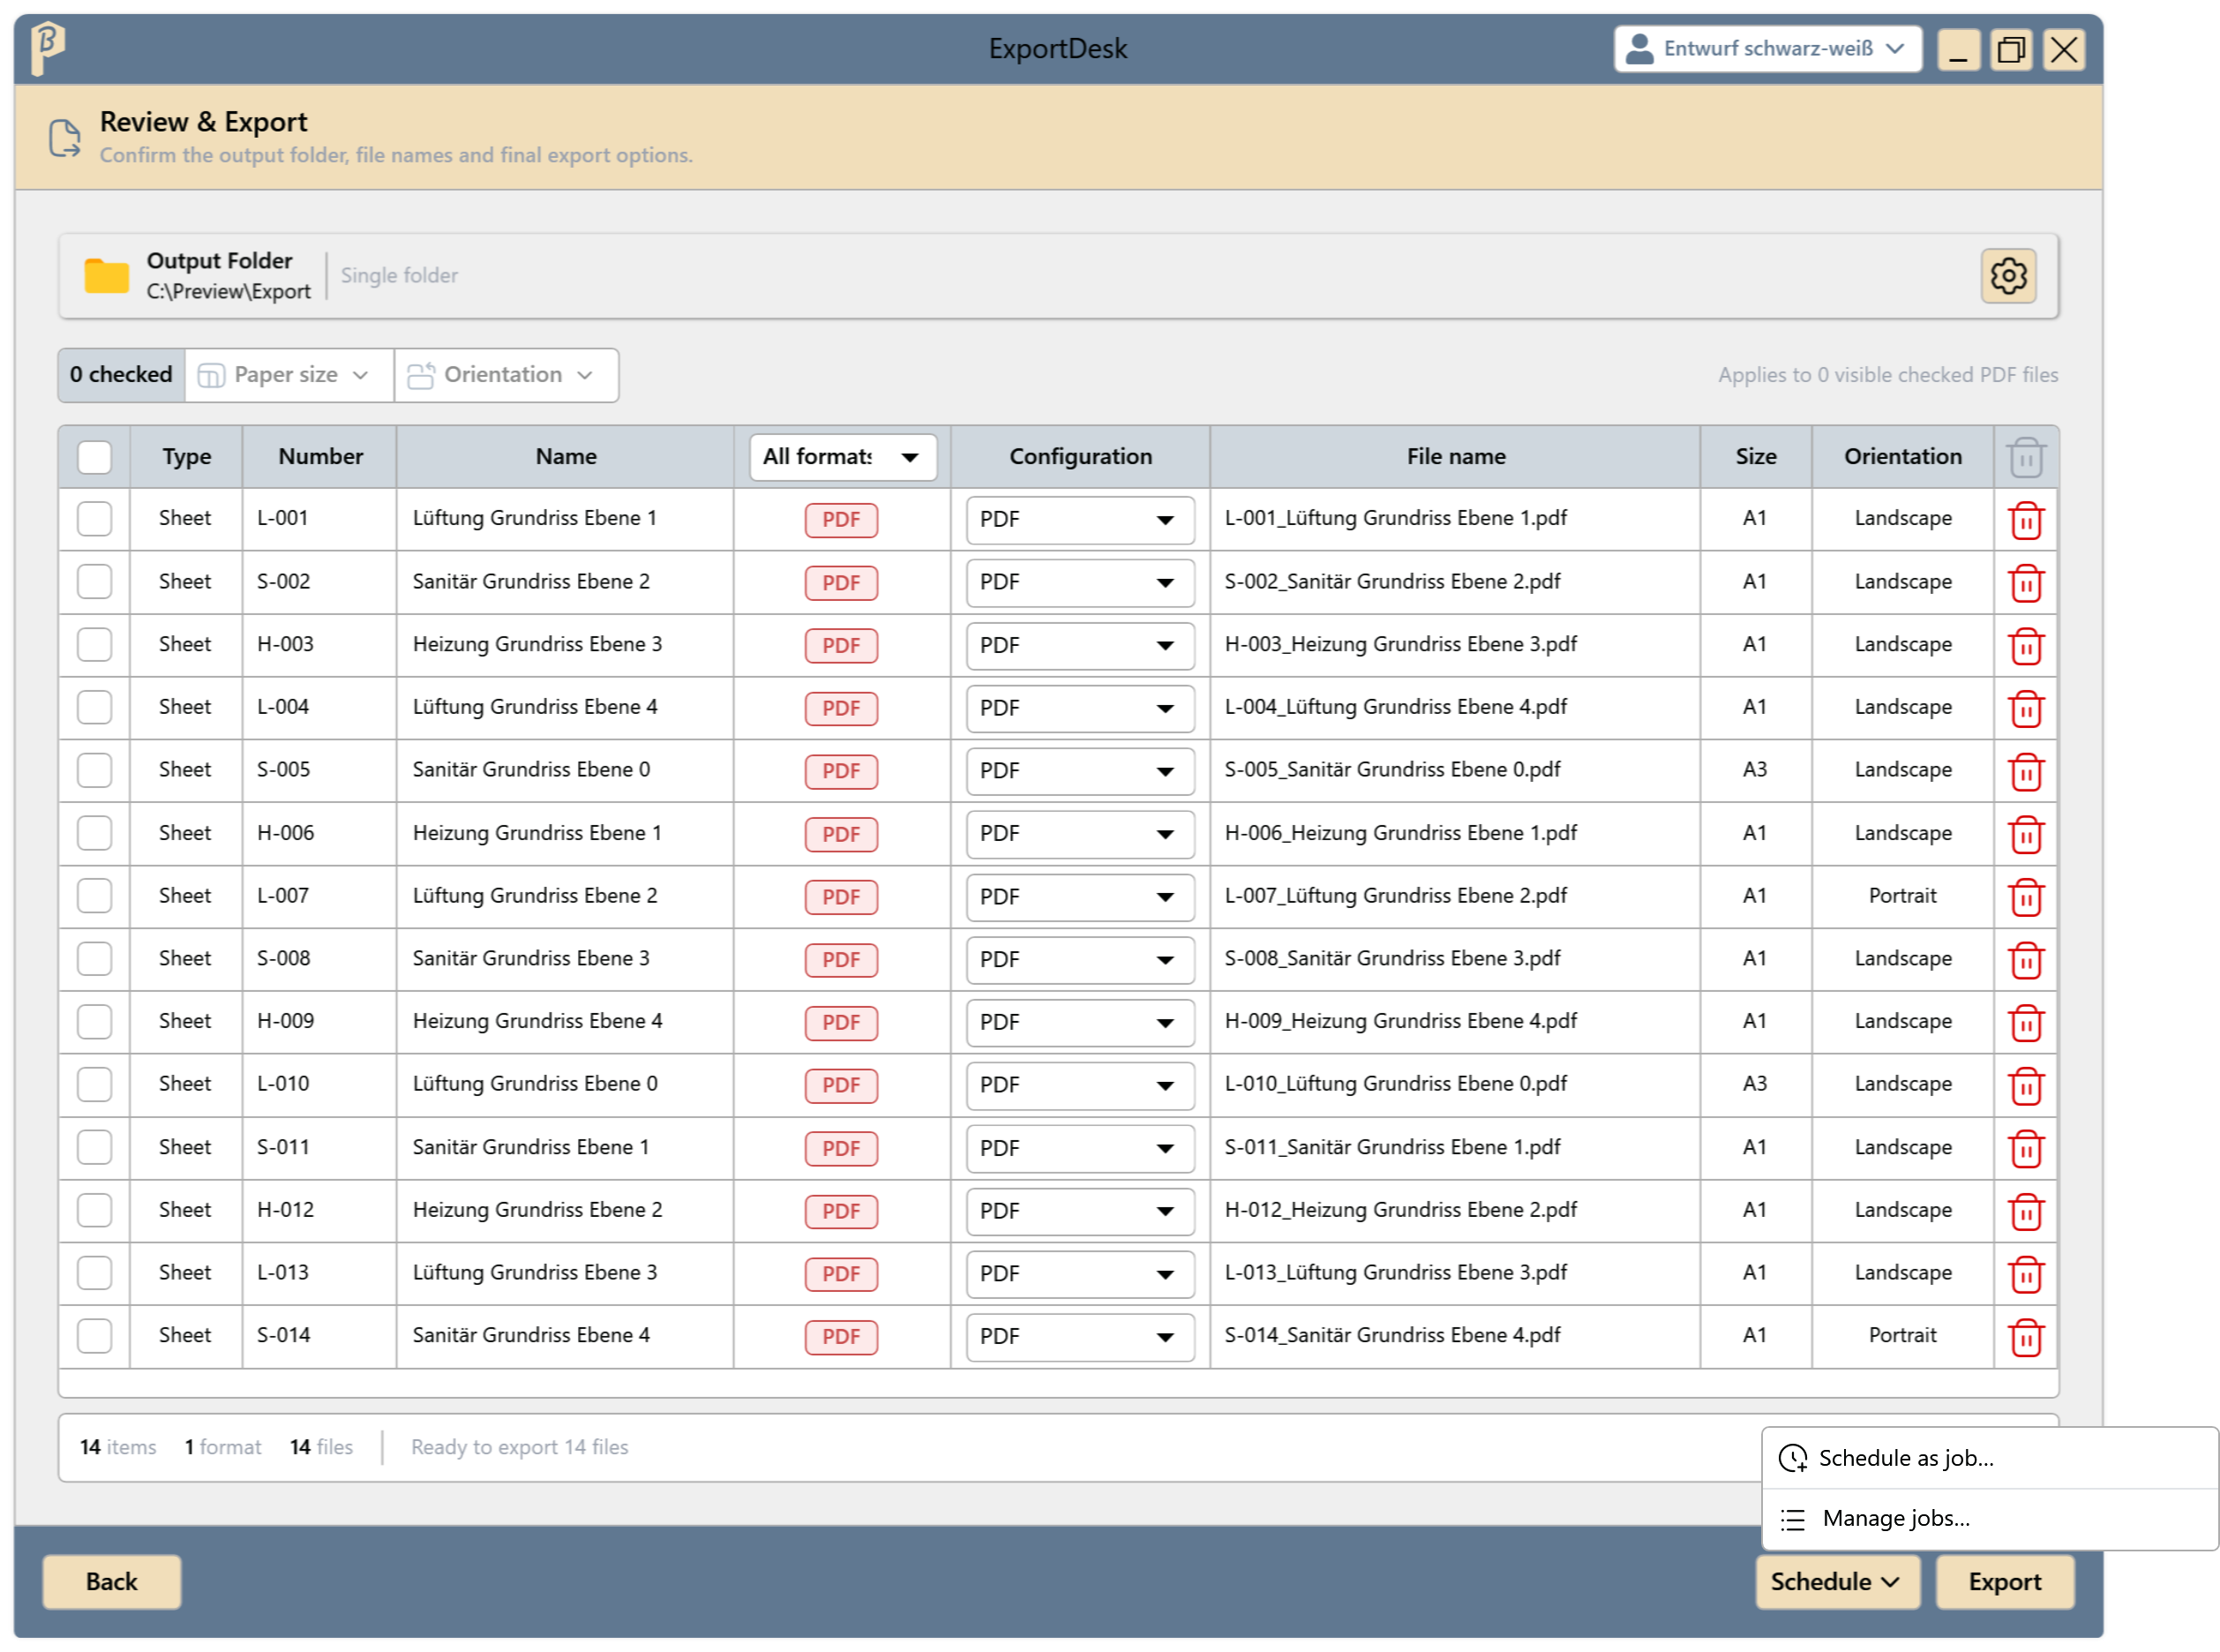
Fig. 19 · Schedule menu Set the job name, frequency, start date and start time. Then set what the job exports:
- Current selection: every run exports exactly the sheets and views of now.
- Print Set per run: every run reads the chosen print set again. Sheets added to the print set later are exported too.
- Worksets: by default, the job opens the model with all worksets. If only some are opened, elements from the closed worksets are missing from the export.
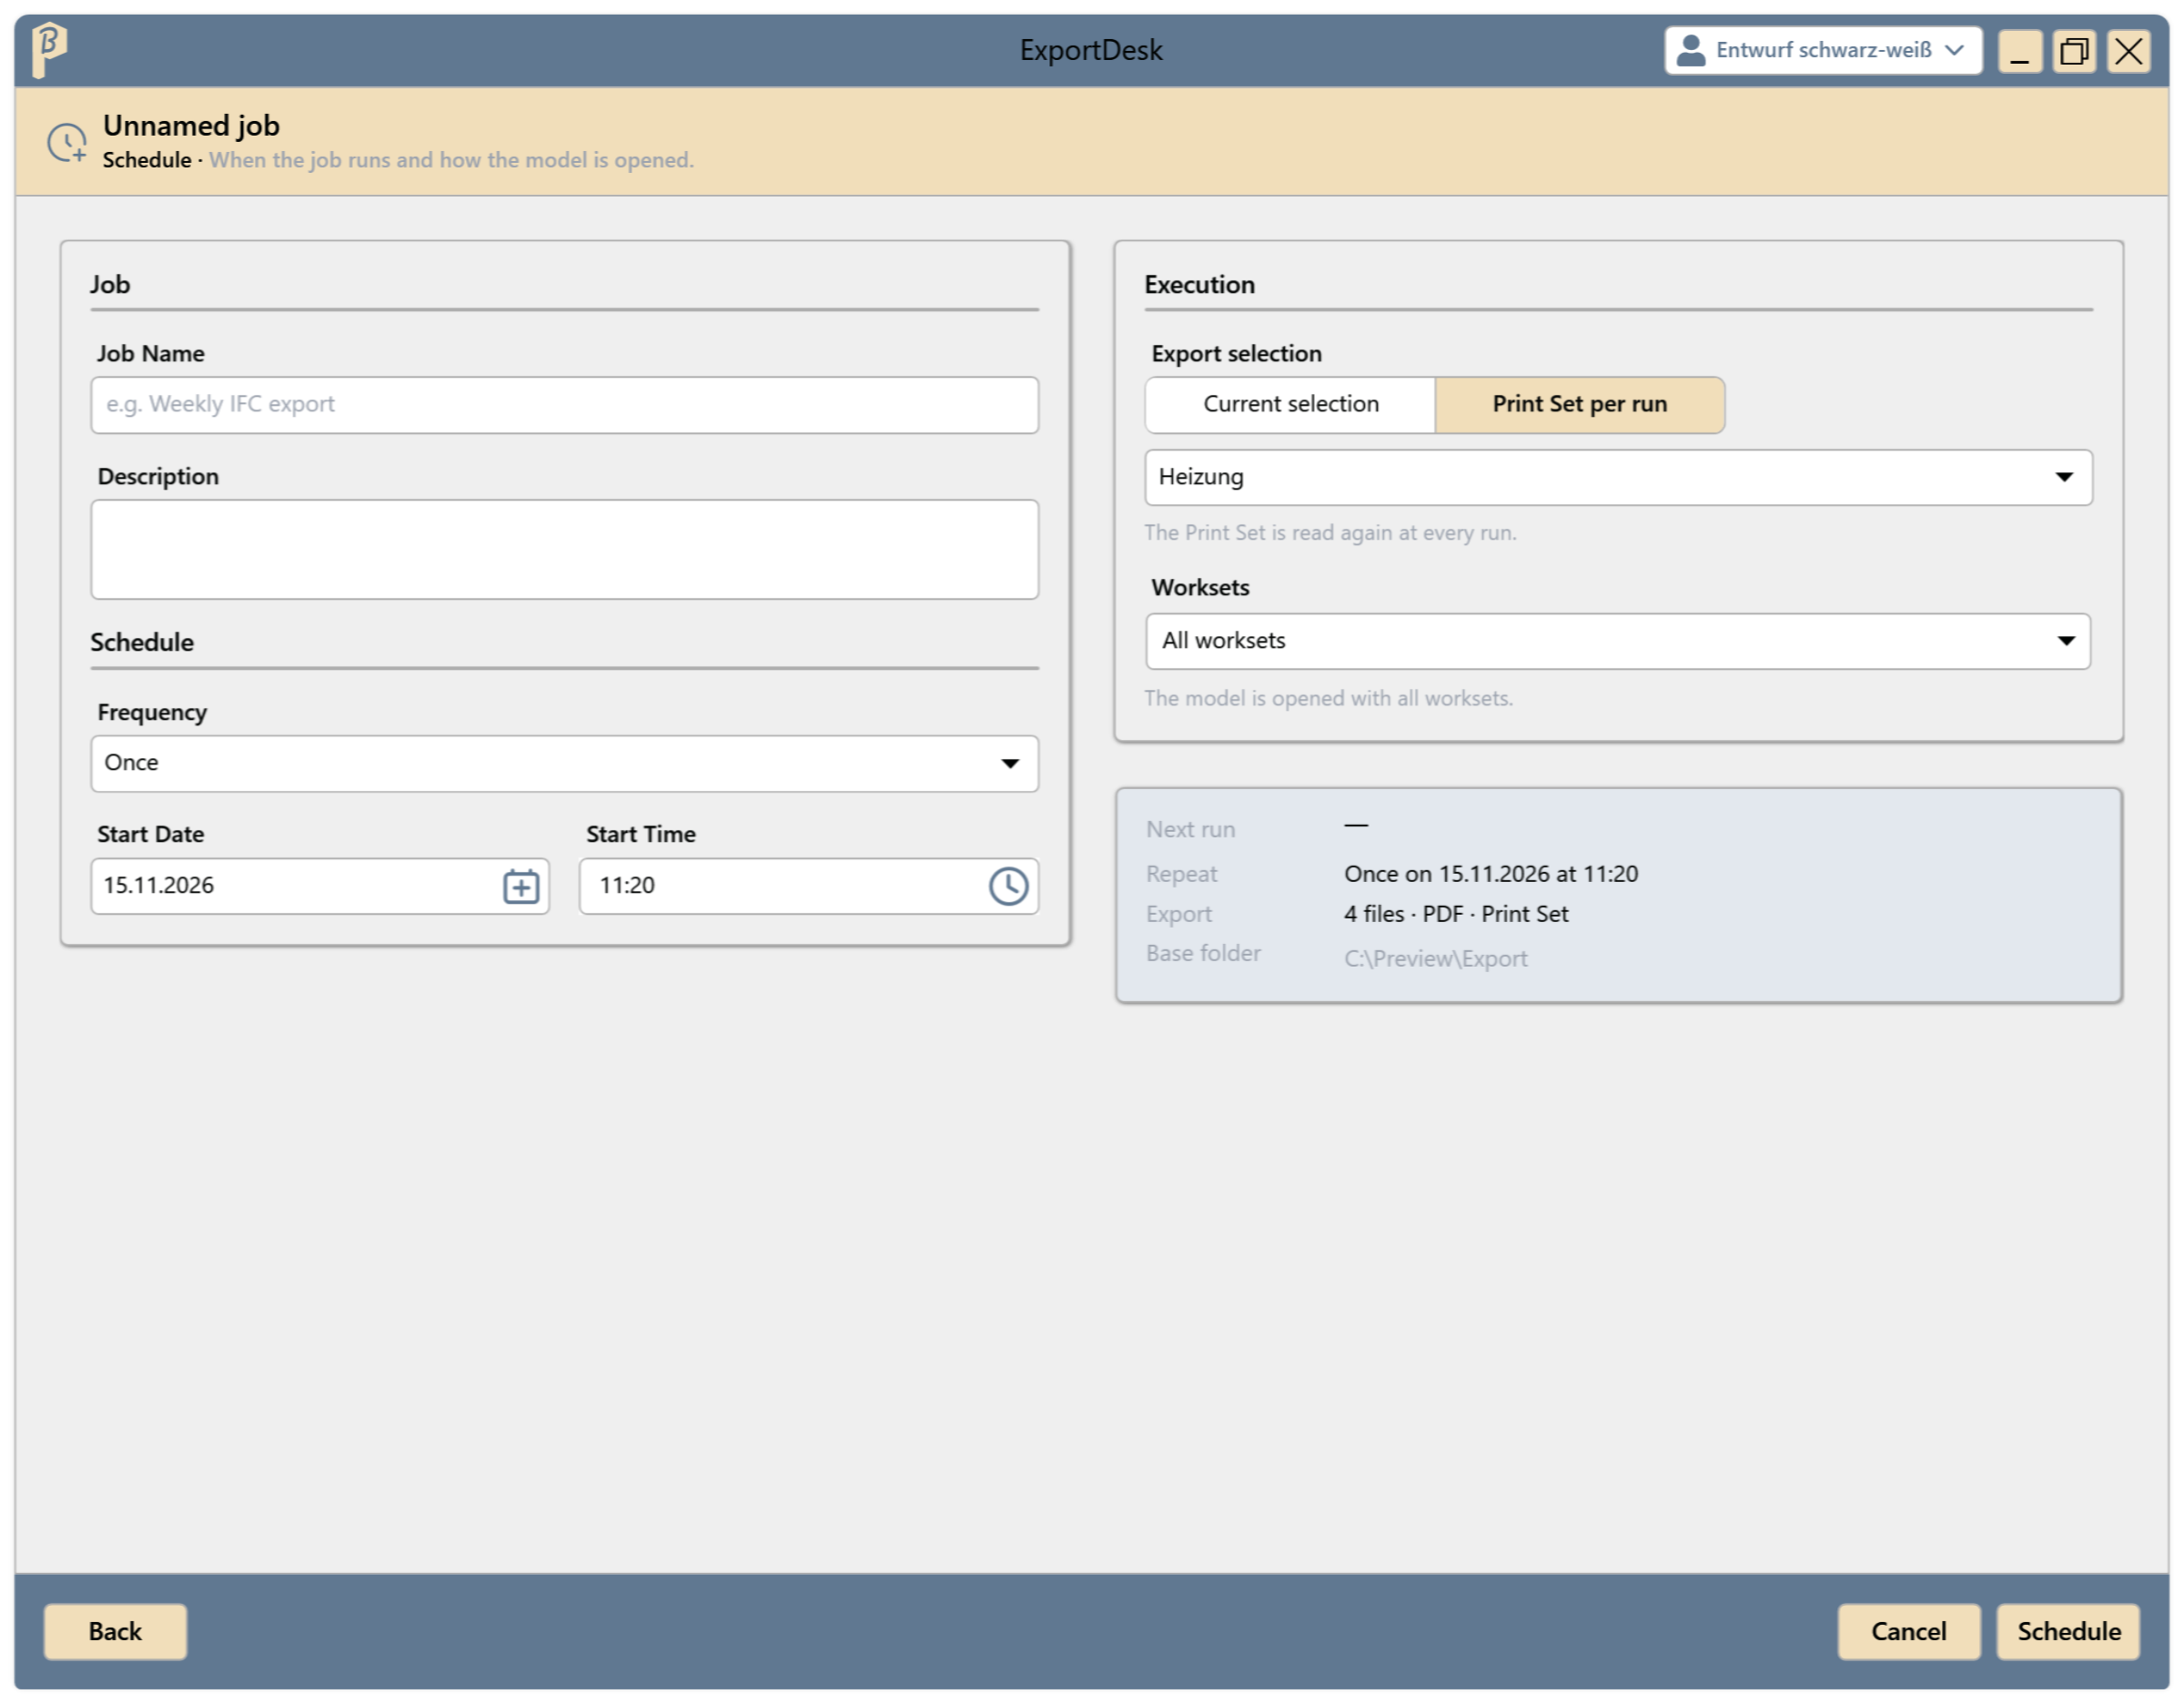
Fig. 20 · Schedule with Print Set per run 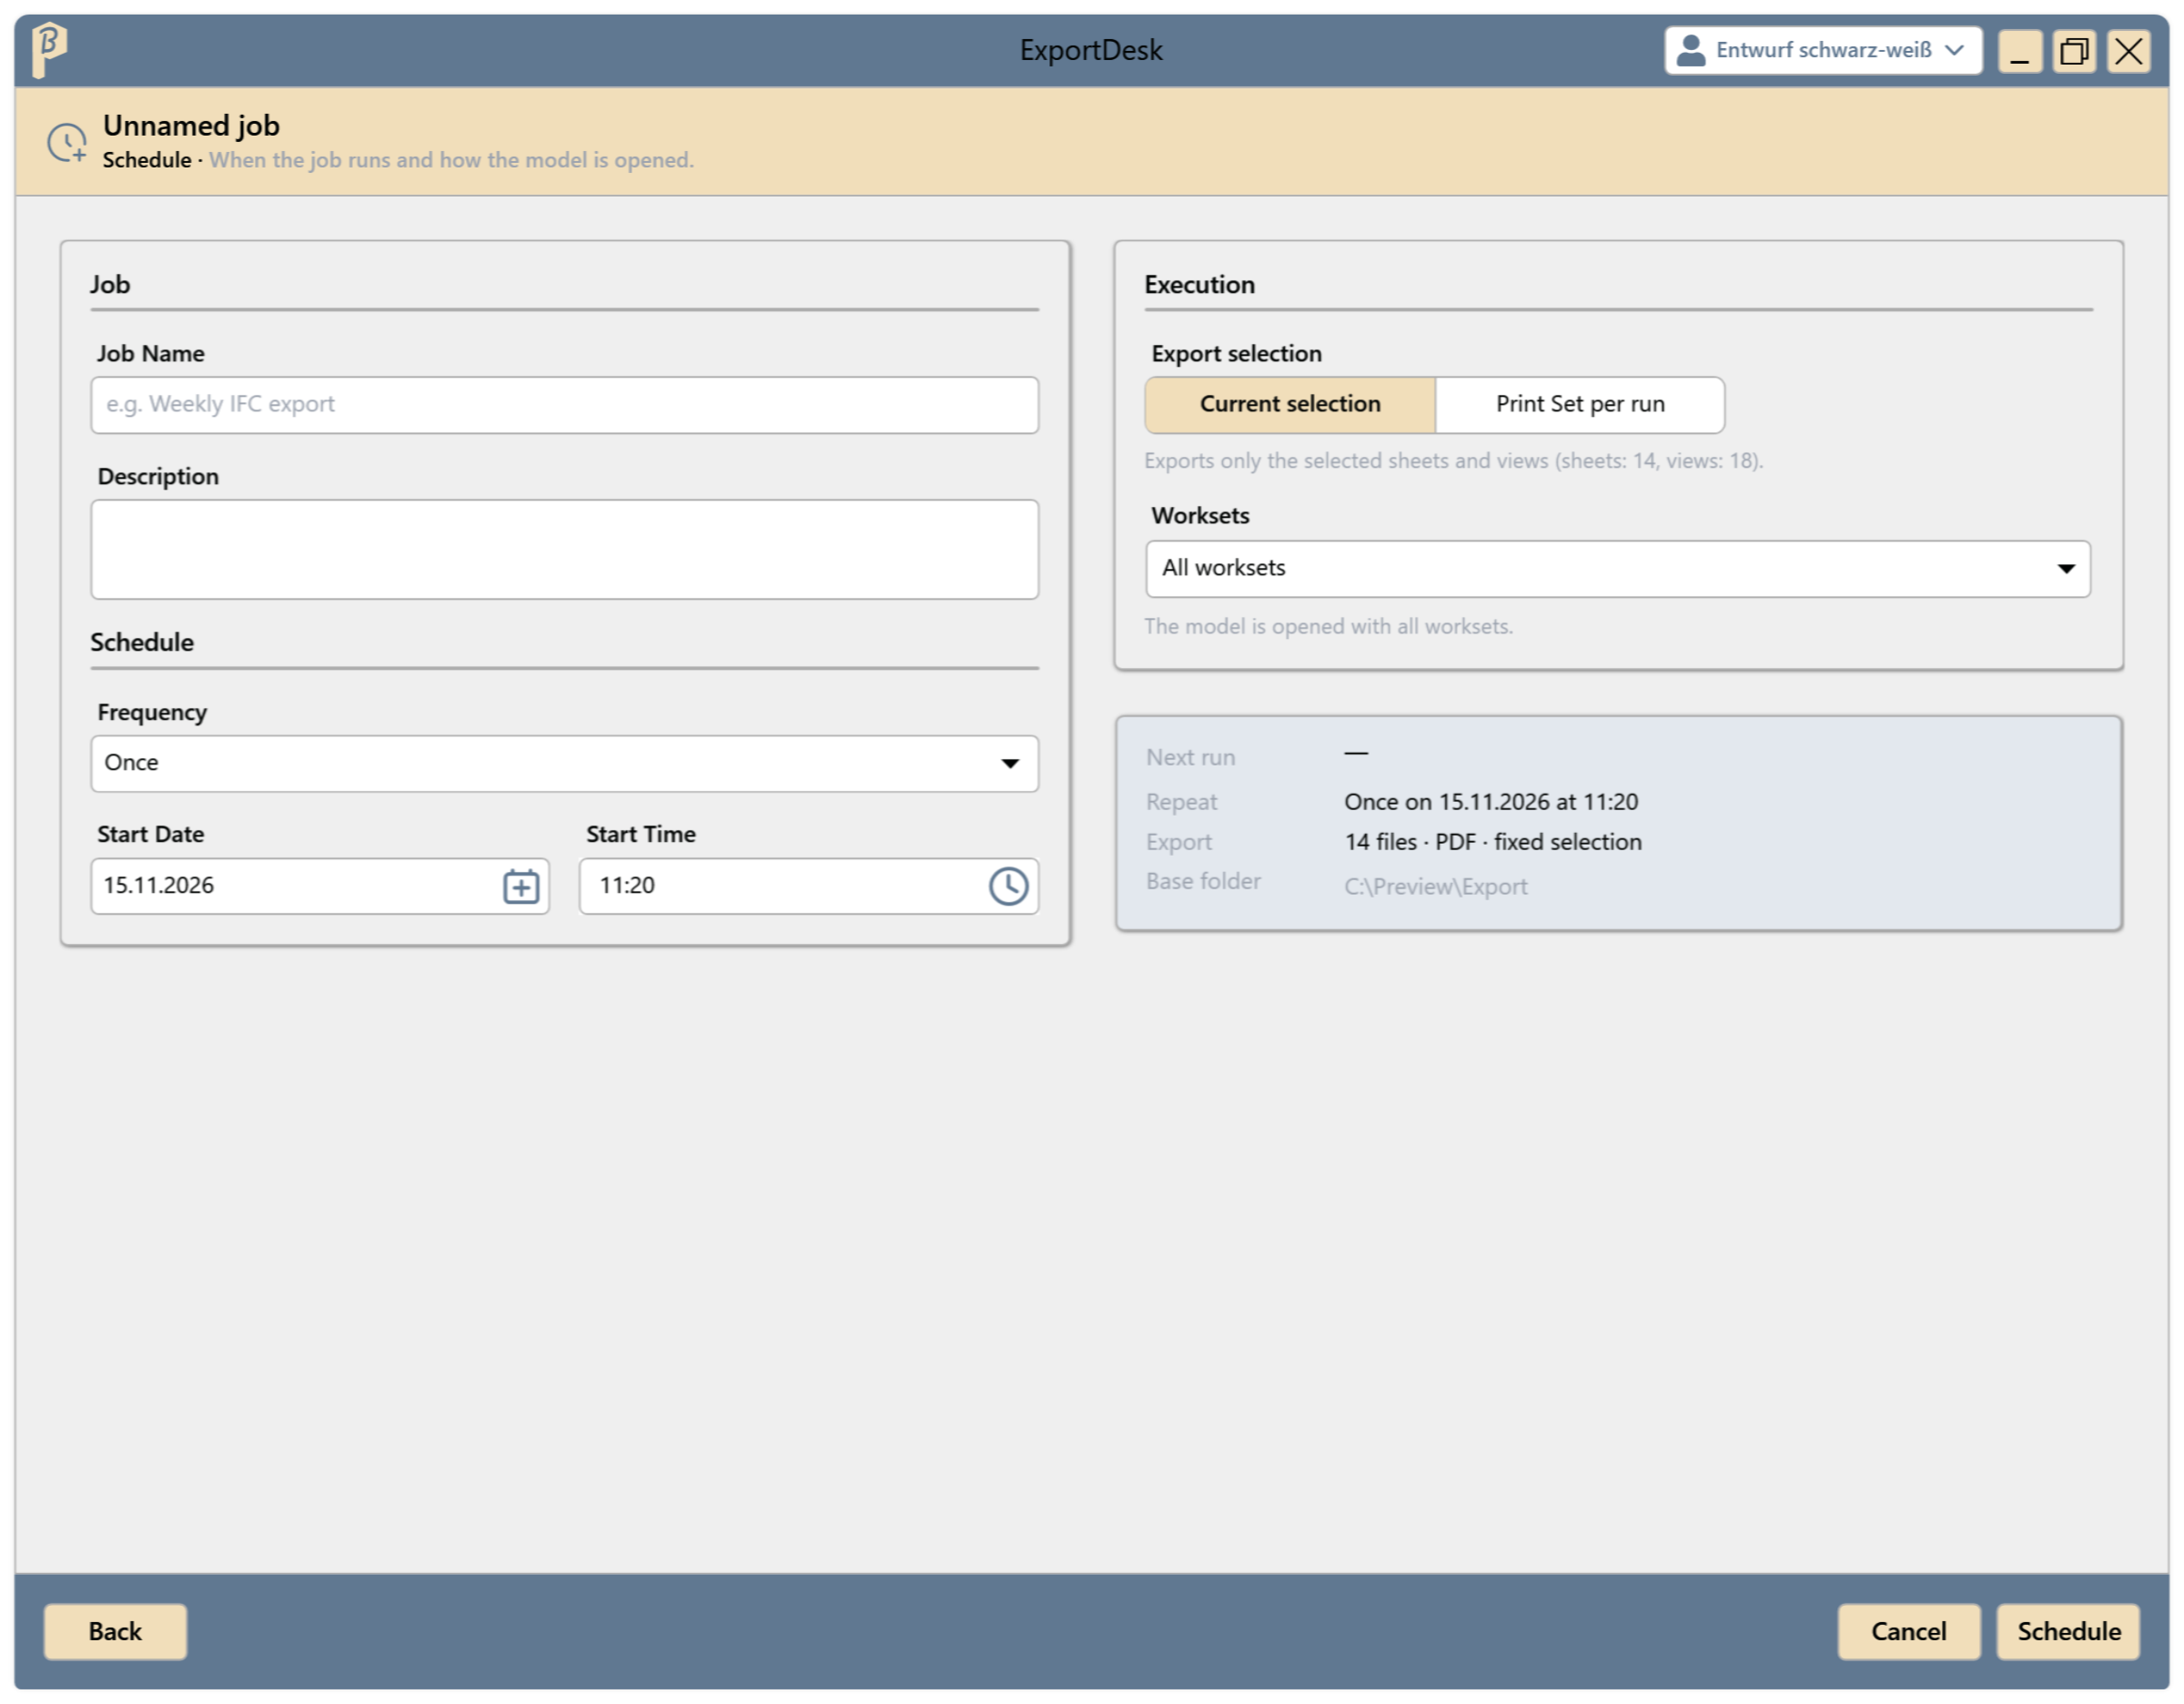
Fig. 21 · Schedule step Click Schedule. A message at the bottom right confirms Job scheduled and shows the next run; Show jobs opens the job list. If saving fails, your entries are kept and Try again saves once more.
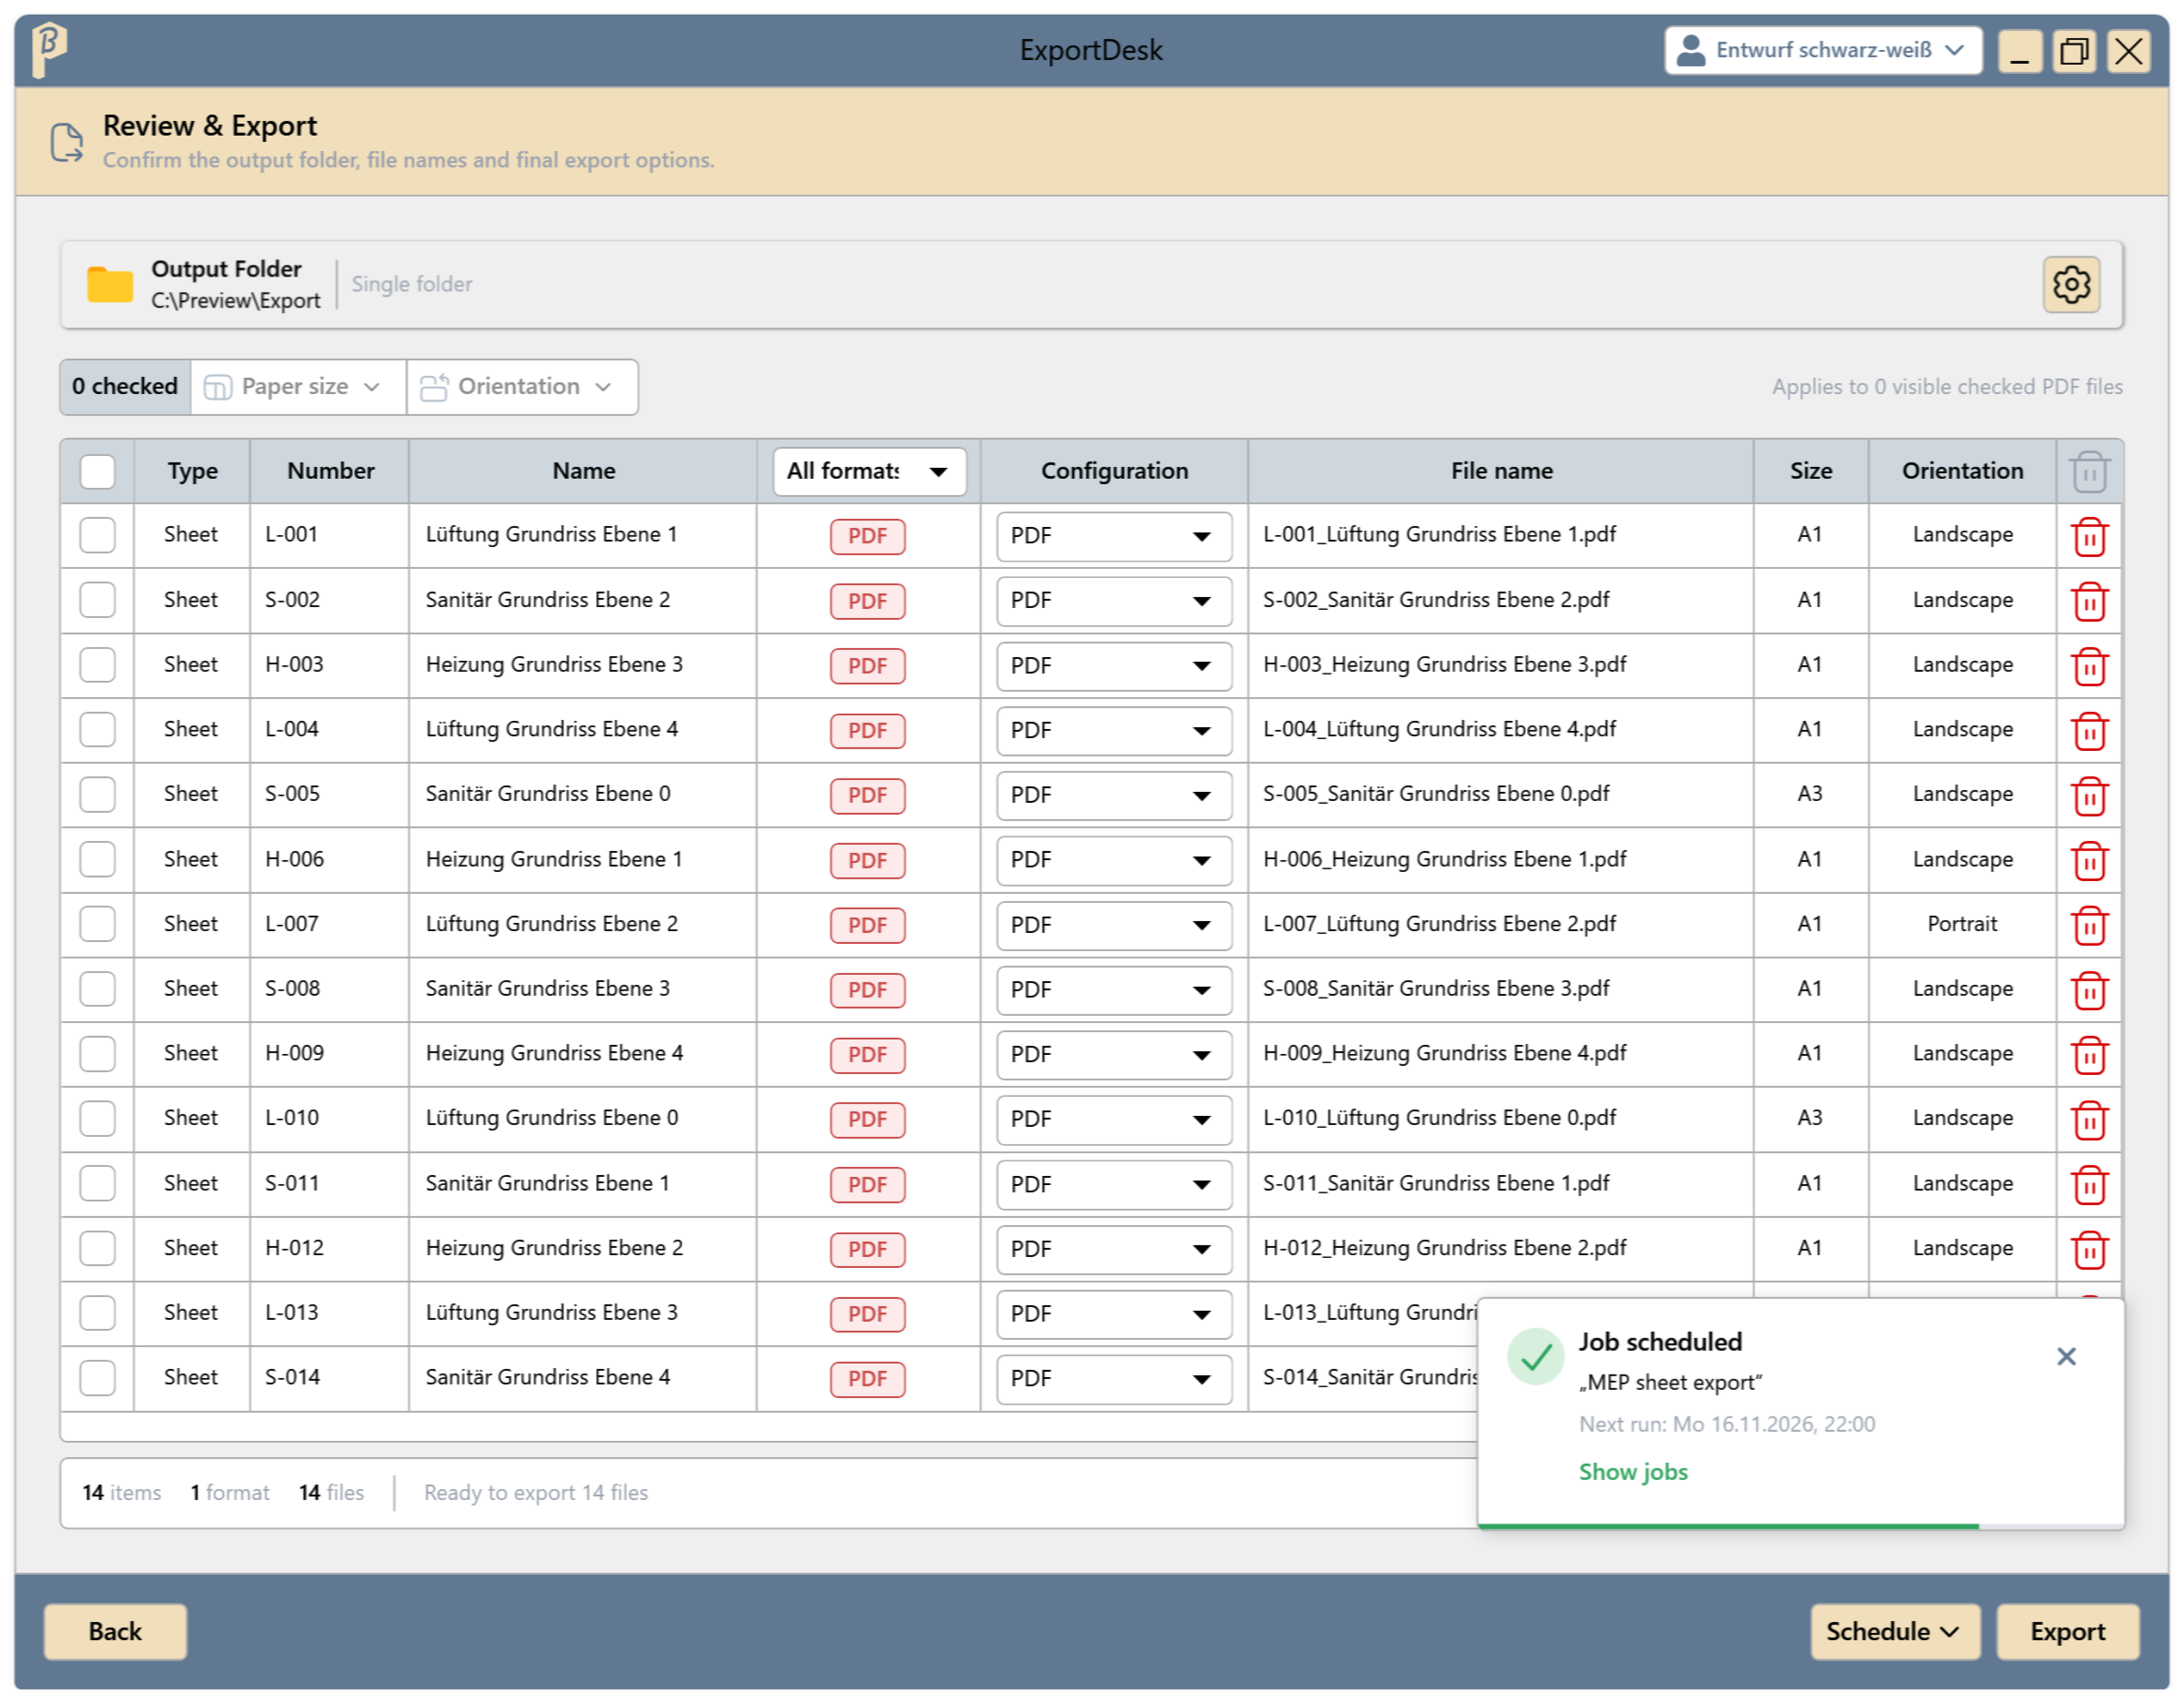
Fig. 22 · Job scheduled message
Manage jobs
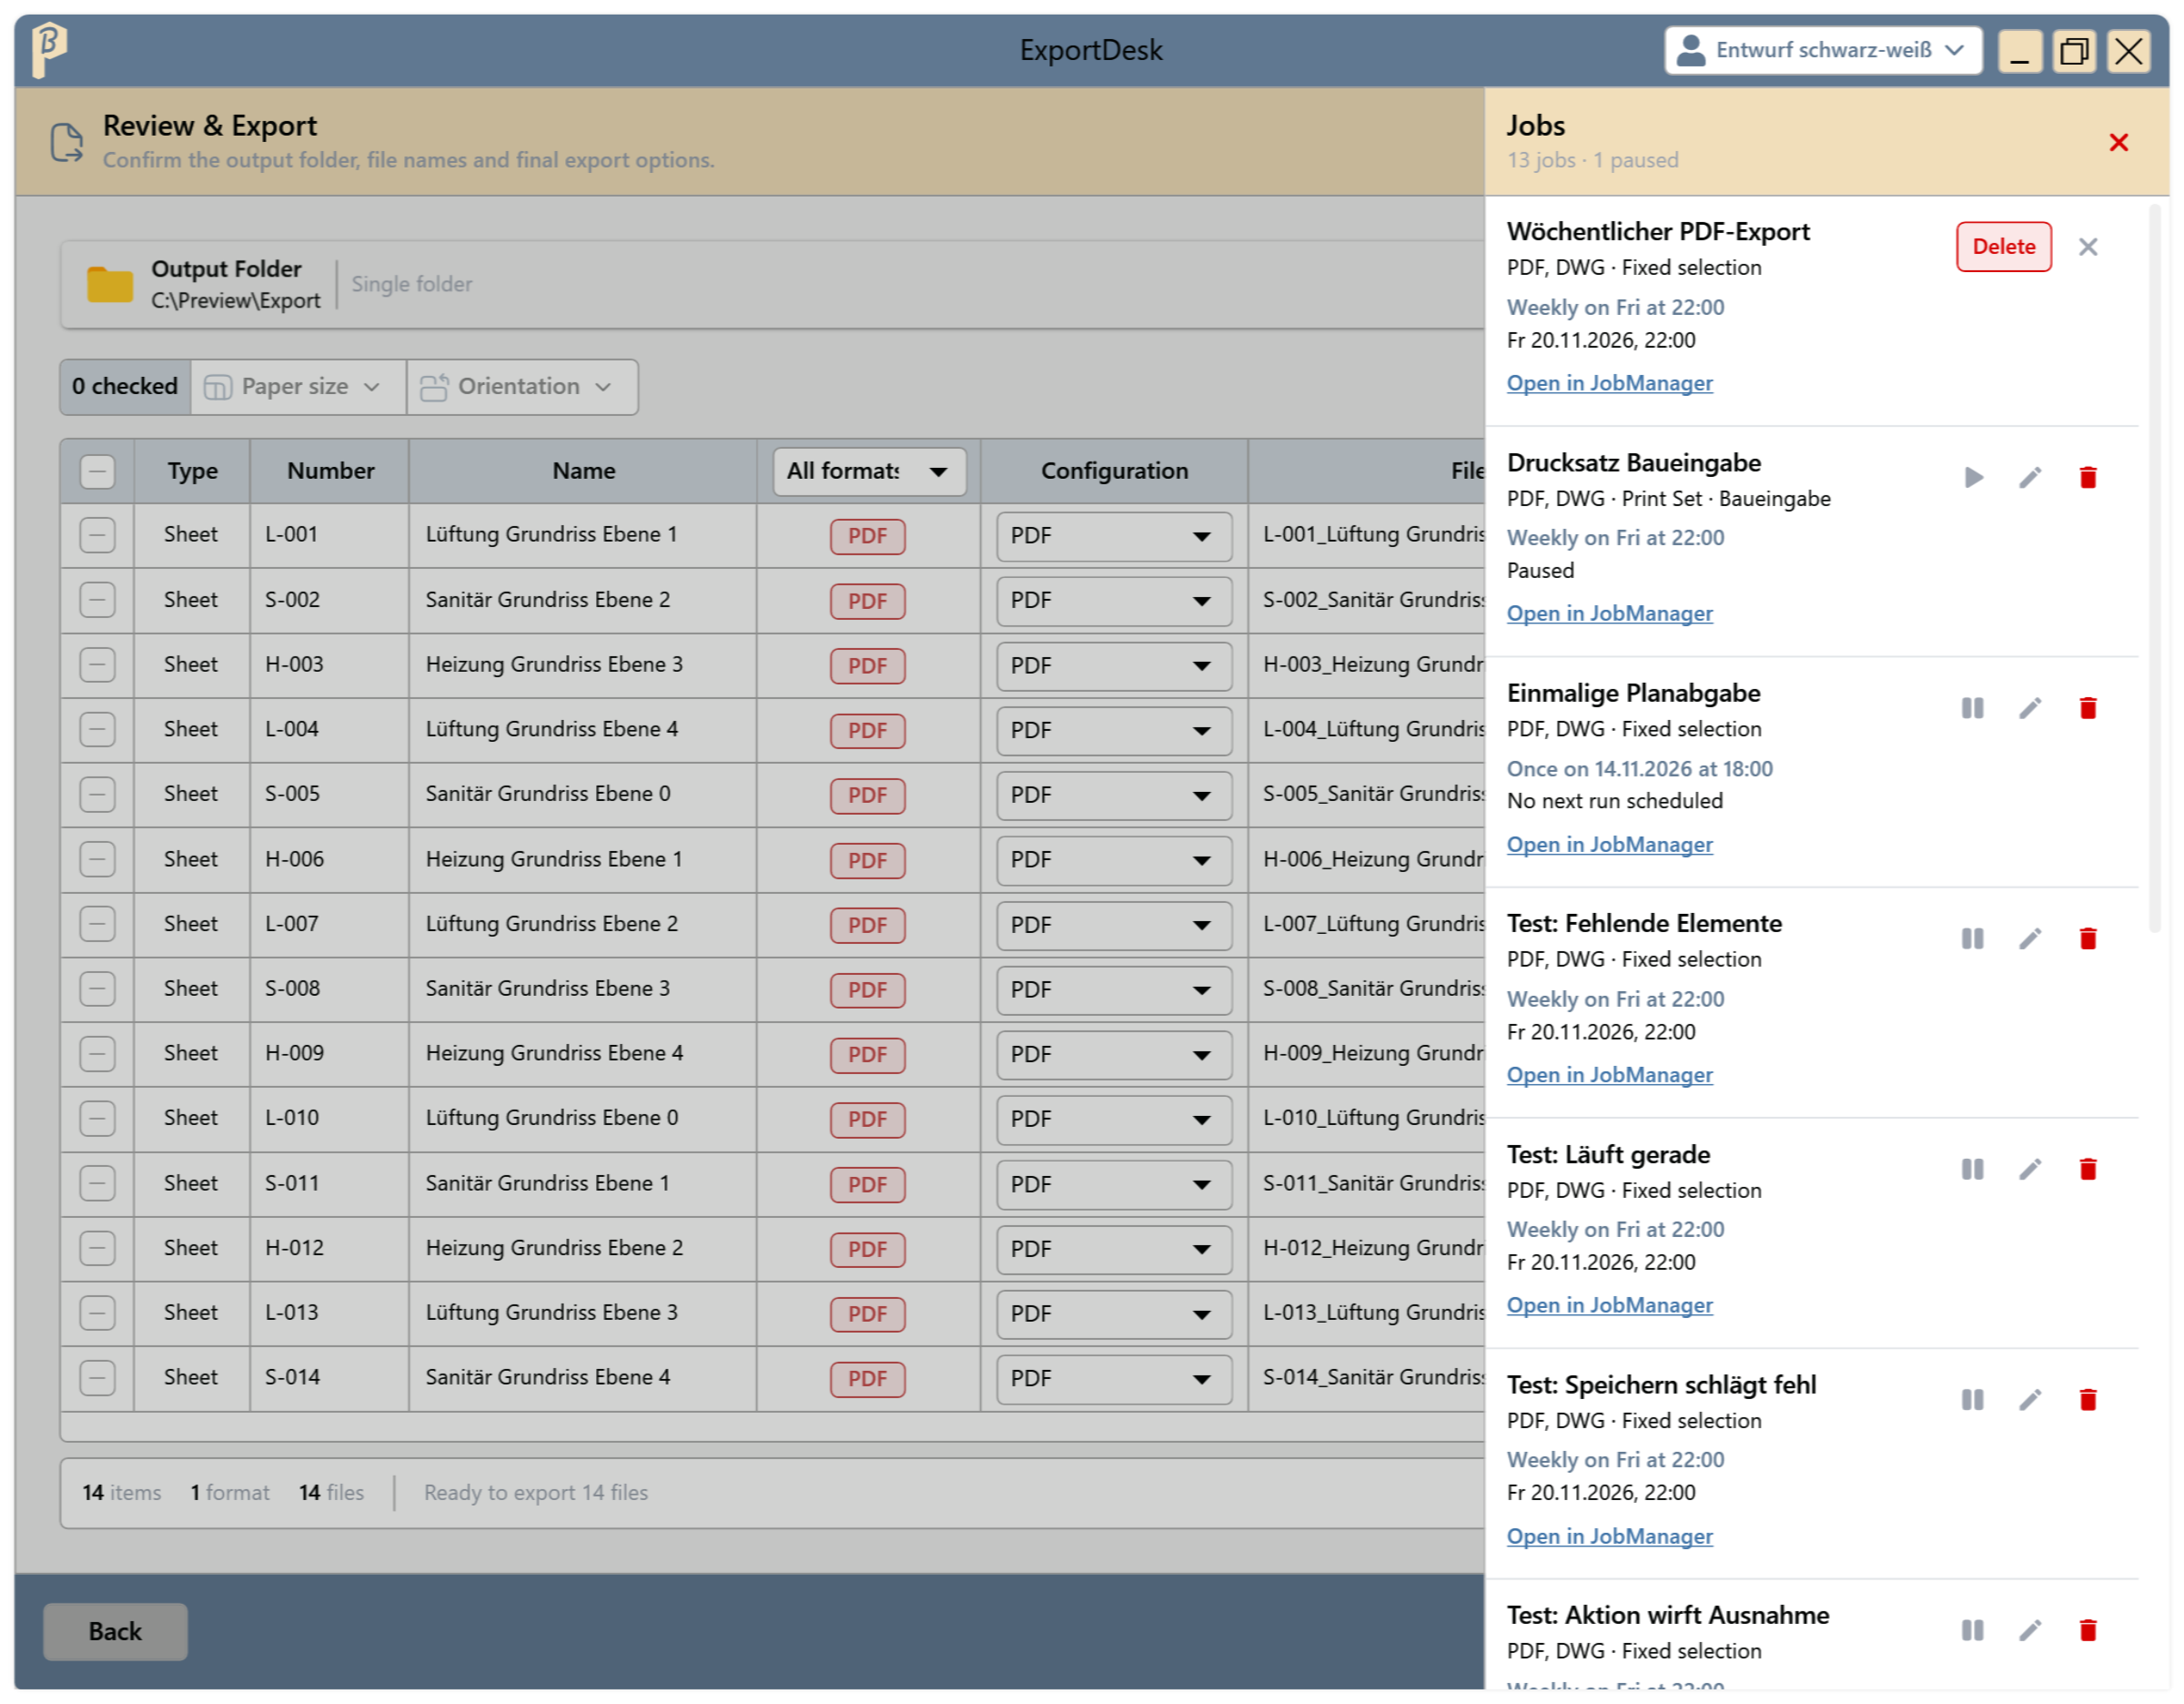
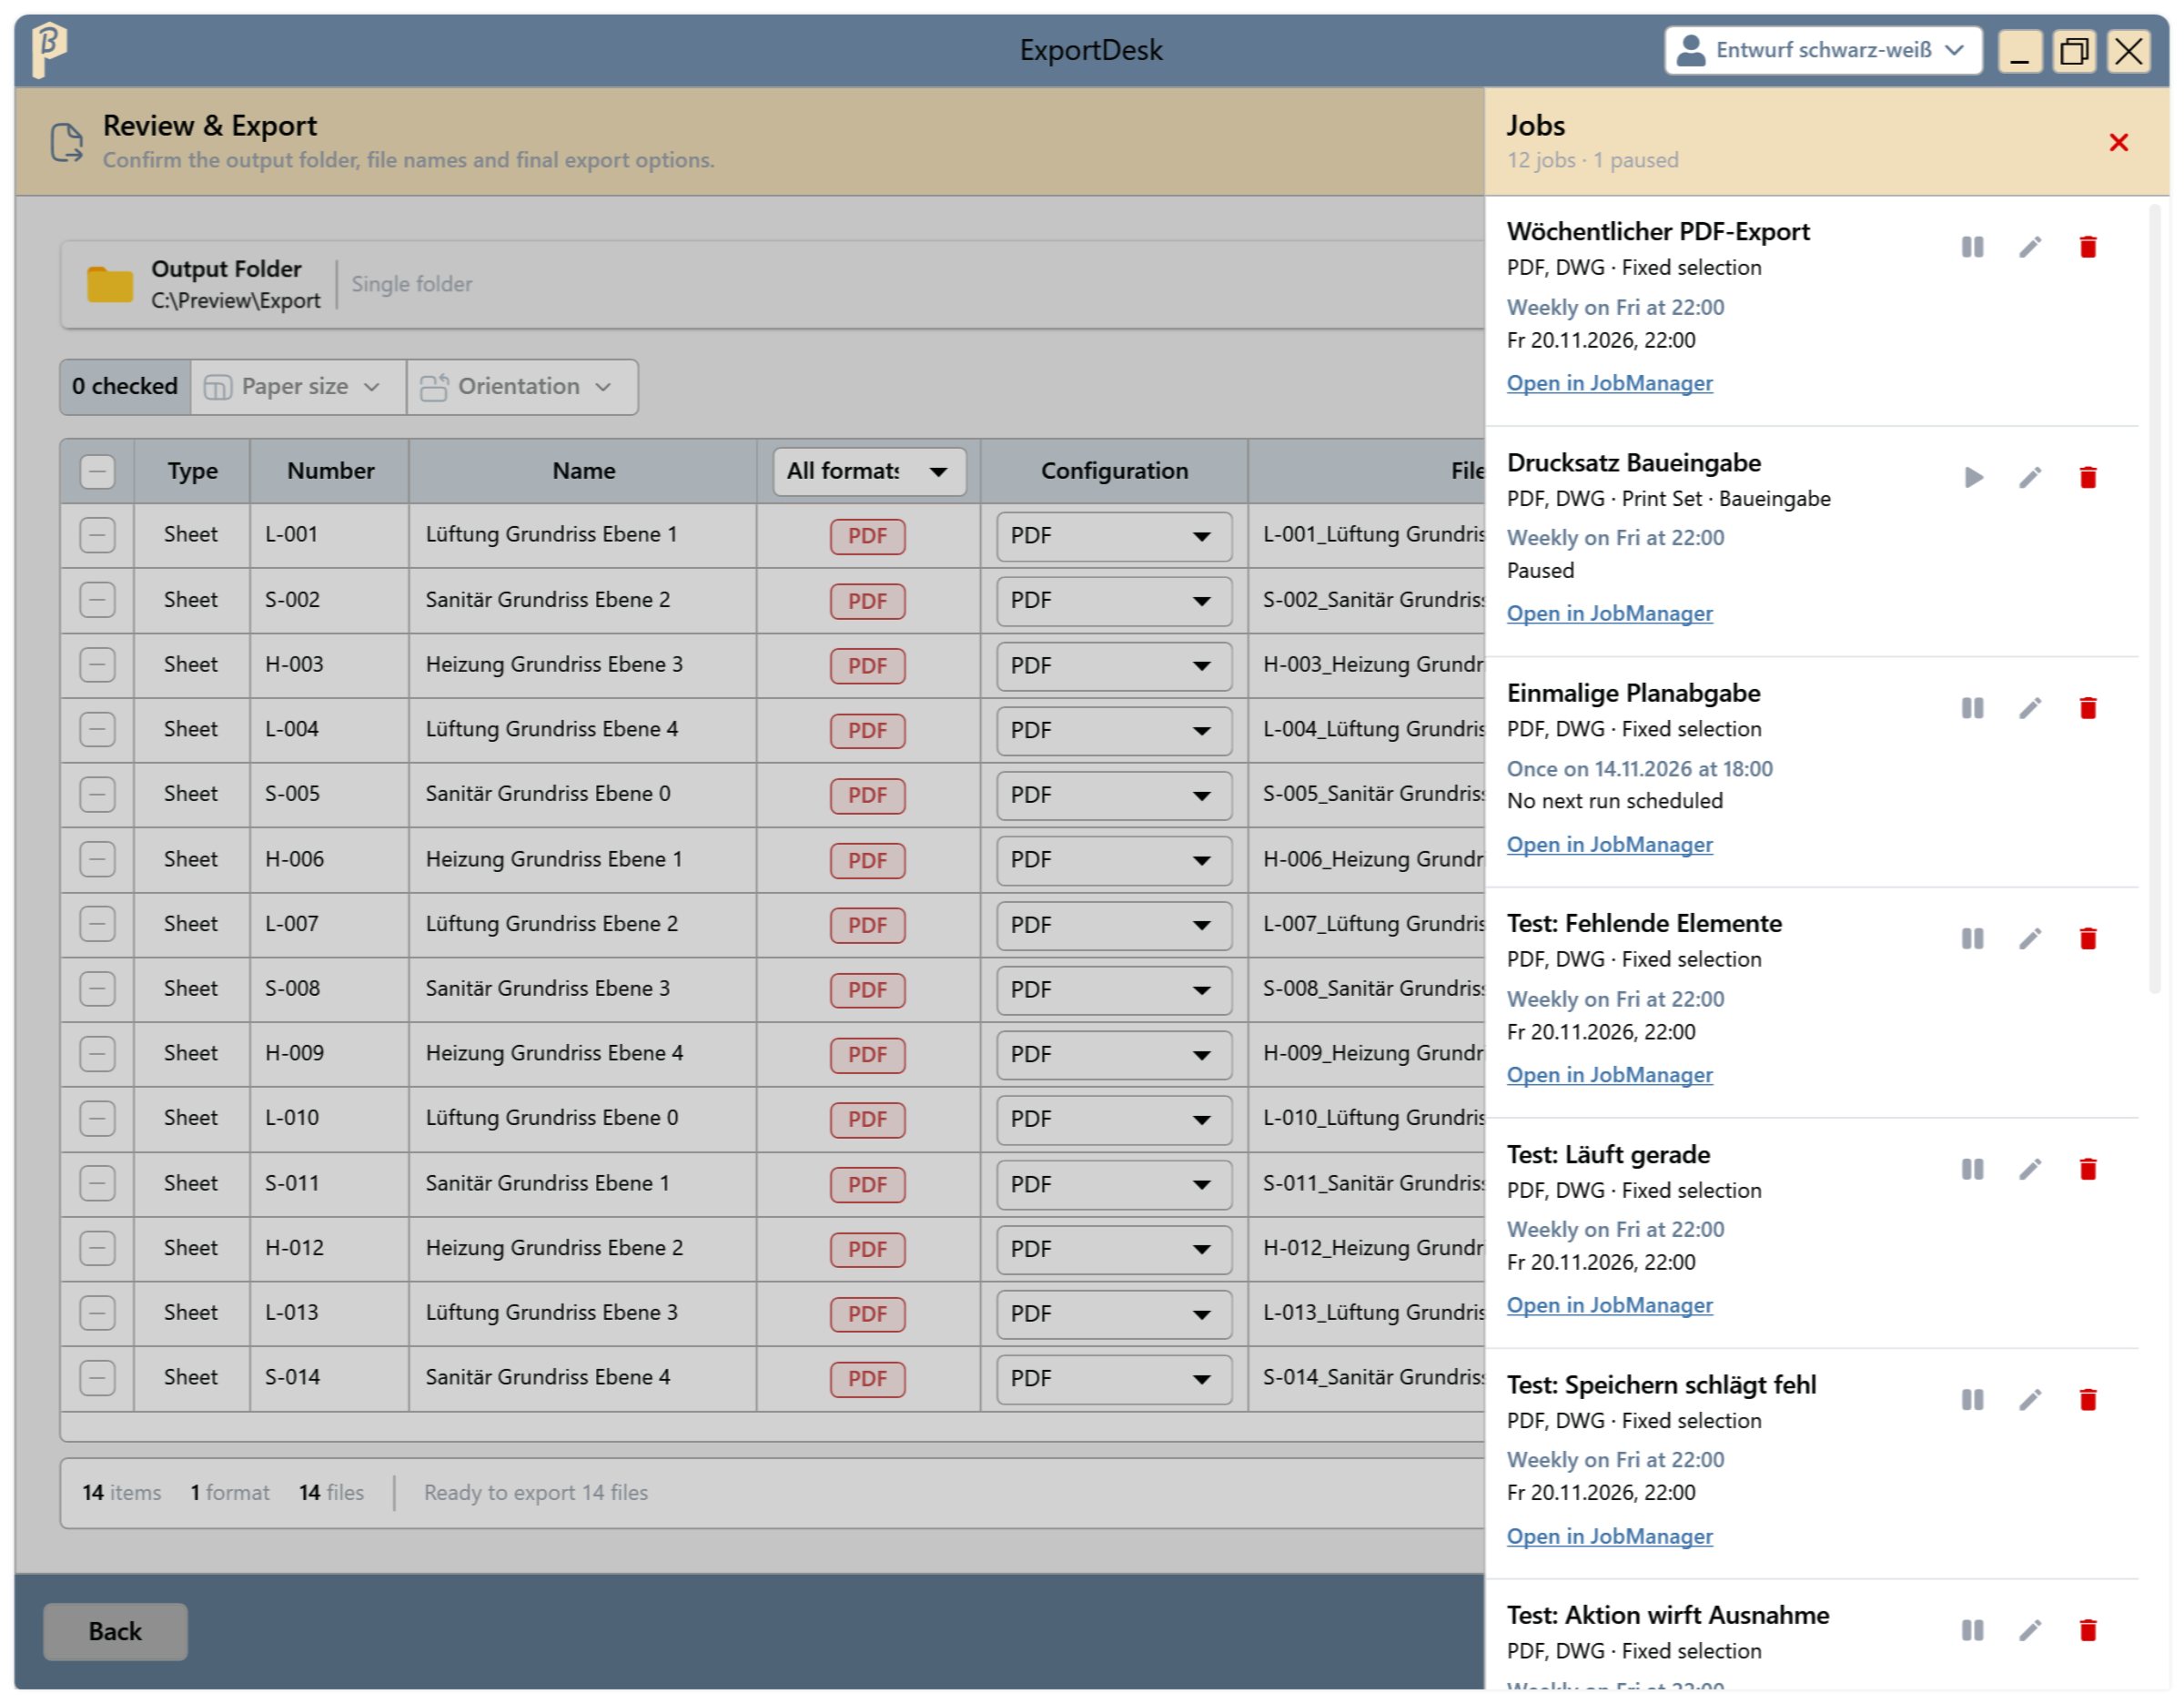
Schedule › Manage jobs… opens a panel with all jobs of this model, with schedule, next run and selection type (Fixed selection or Print Set).
- Pause and Resume stop a job without deleting it.
- Edit opens the job in the wizard, see Edit a scheduled job.
- Delete asks for confirmation; Keep job cancels.
- Open in JobManager jumps to the same job in JobManager, e.g. to see runs and logs.
Edit a scheduled job
Open the job list with Schedule › Manage jobs… and click Edit on the job. ExportDesk loads the job with its selection, formats, output folder and schedule.
Go through the steps as when creating it. The Review step shows the destination and file names the runs of this job produce. Removed rows and changed configurations of individual rows are saved with the job.
While changes are open, the window shows Unsaved. Save applies them to the job; the Job updated message shows the next run.
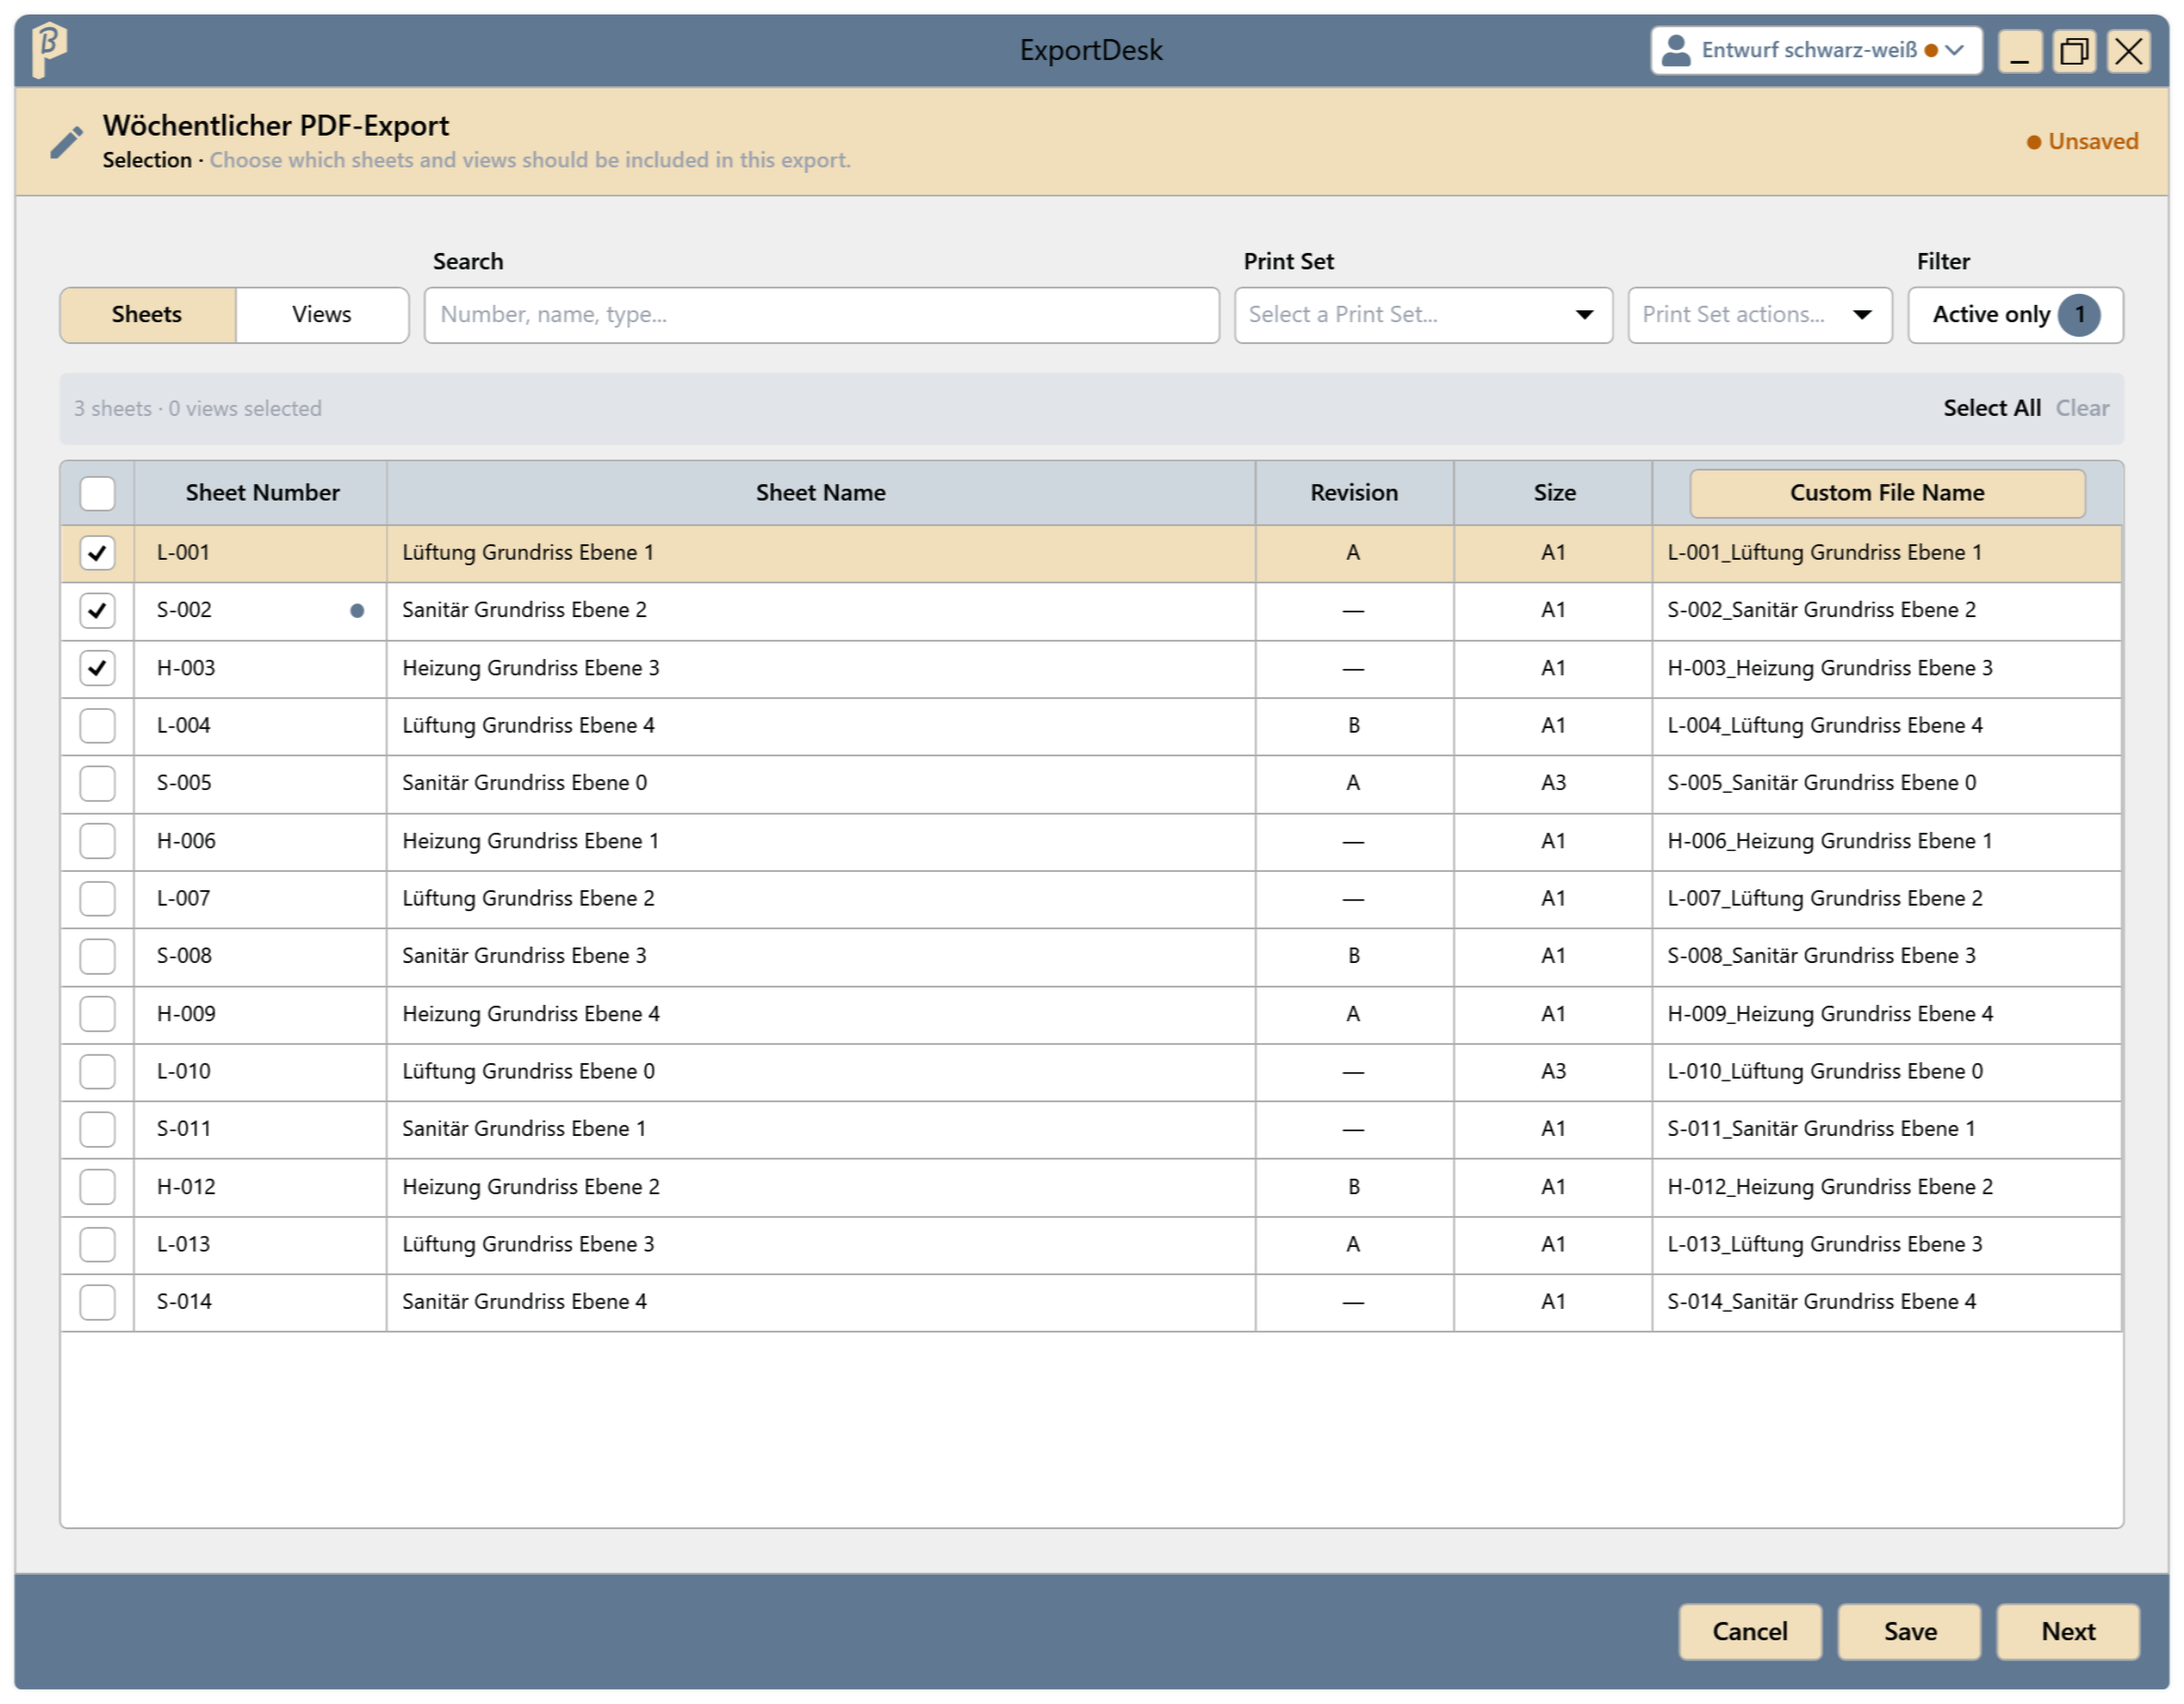
Fig. 25 · Editing a job: Unsaved 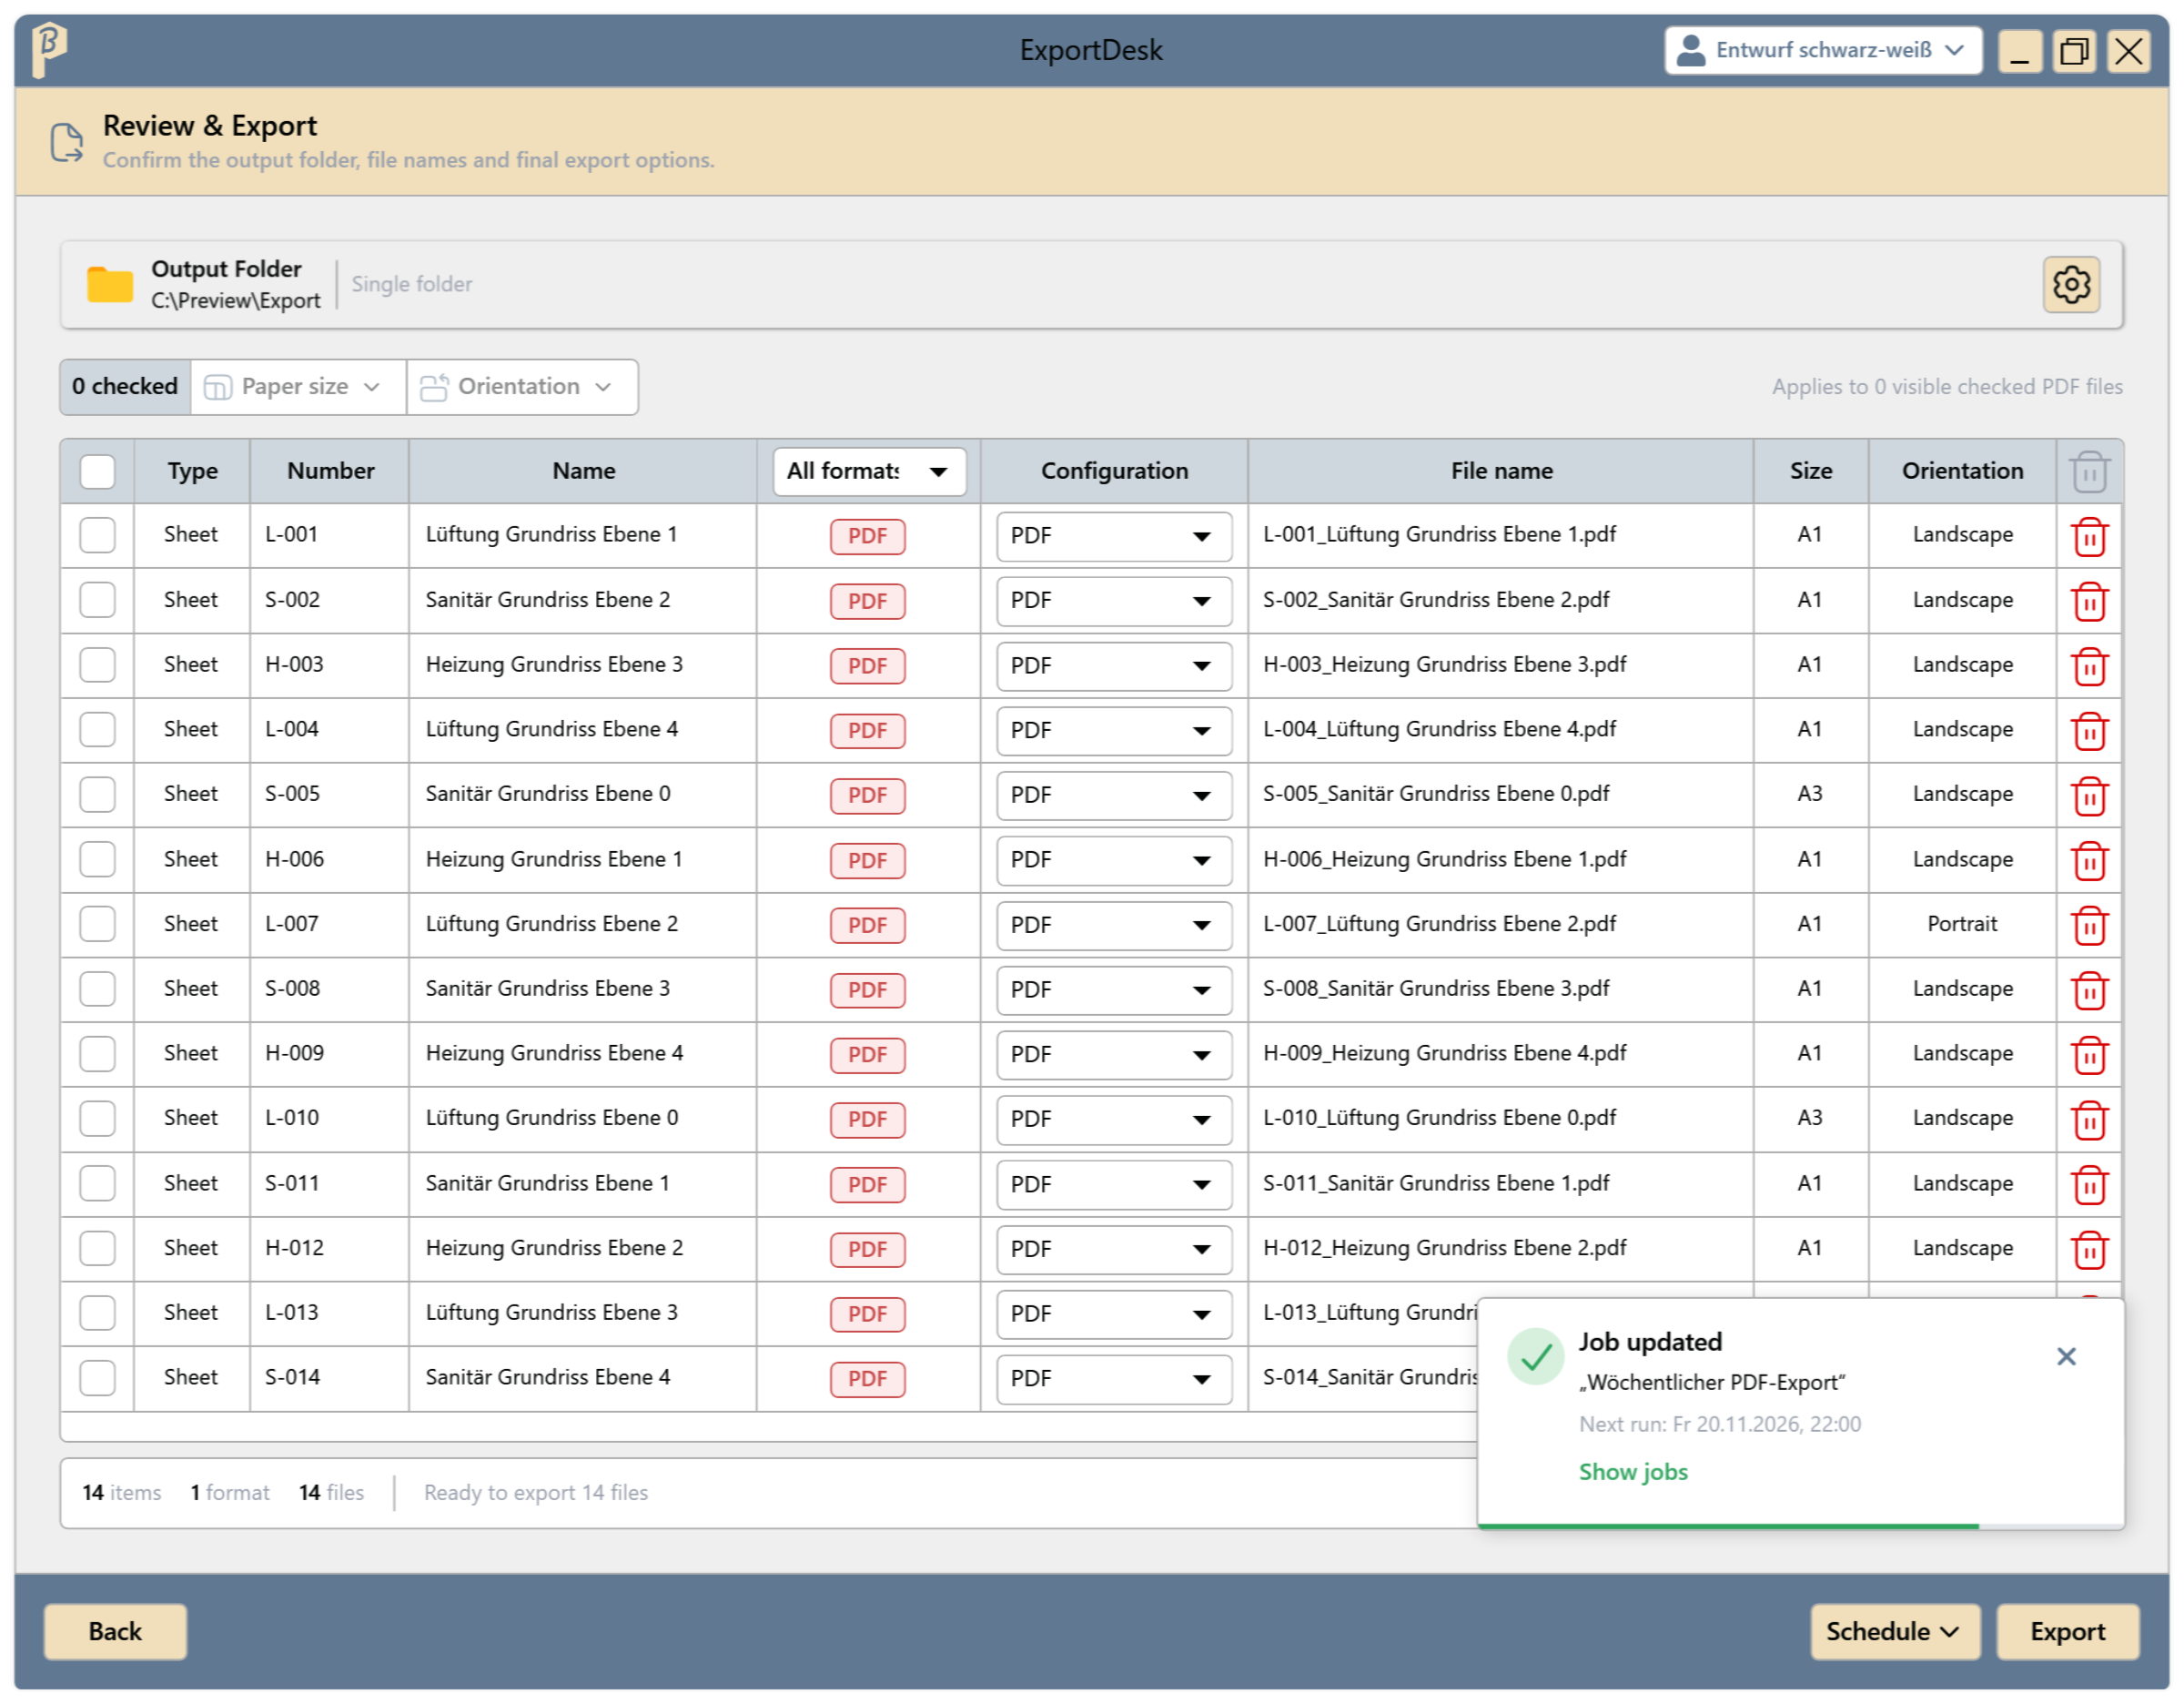
Fig. 26 · Job updated message
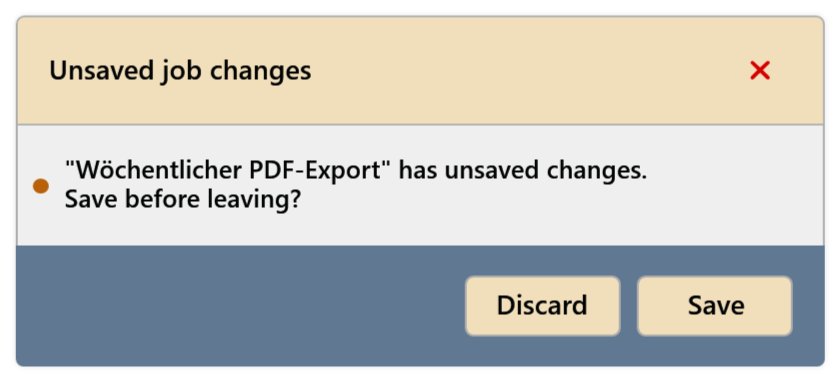
If you leave the wizard with open changes, you are asked: Discard or Save. For a new job not yet saved, ExportDesk asks whether to discard it.
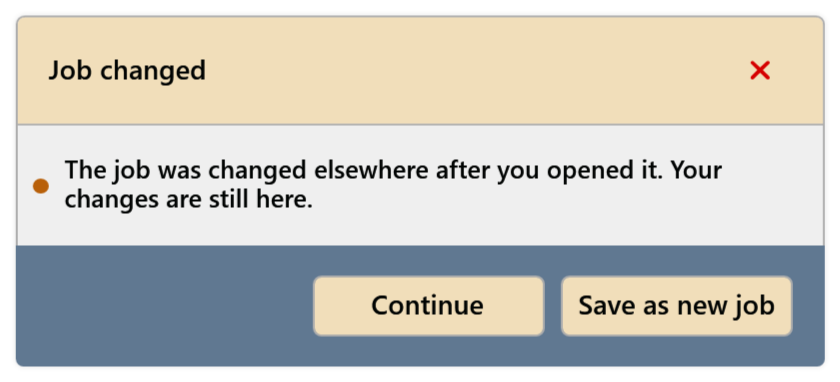
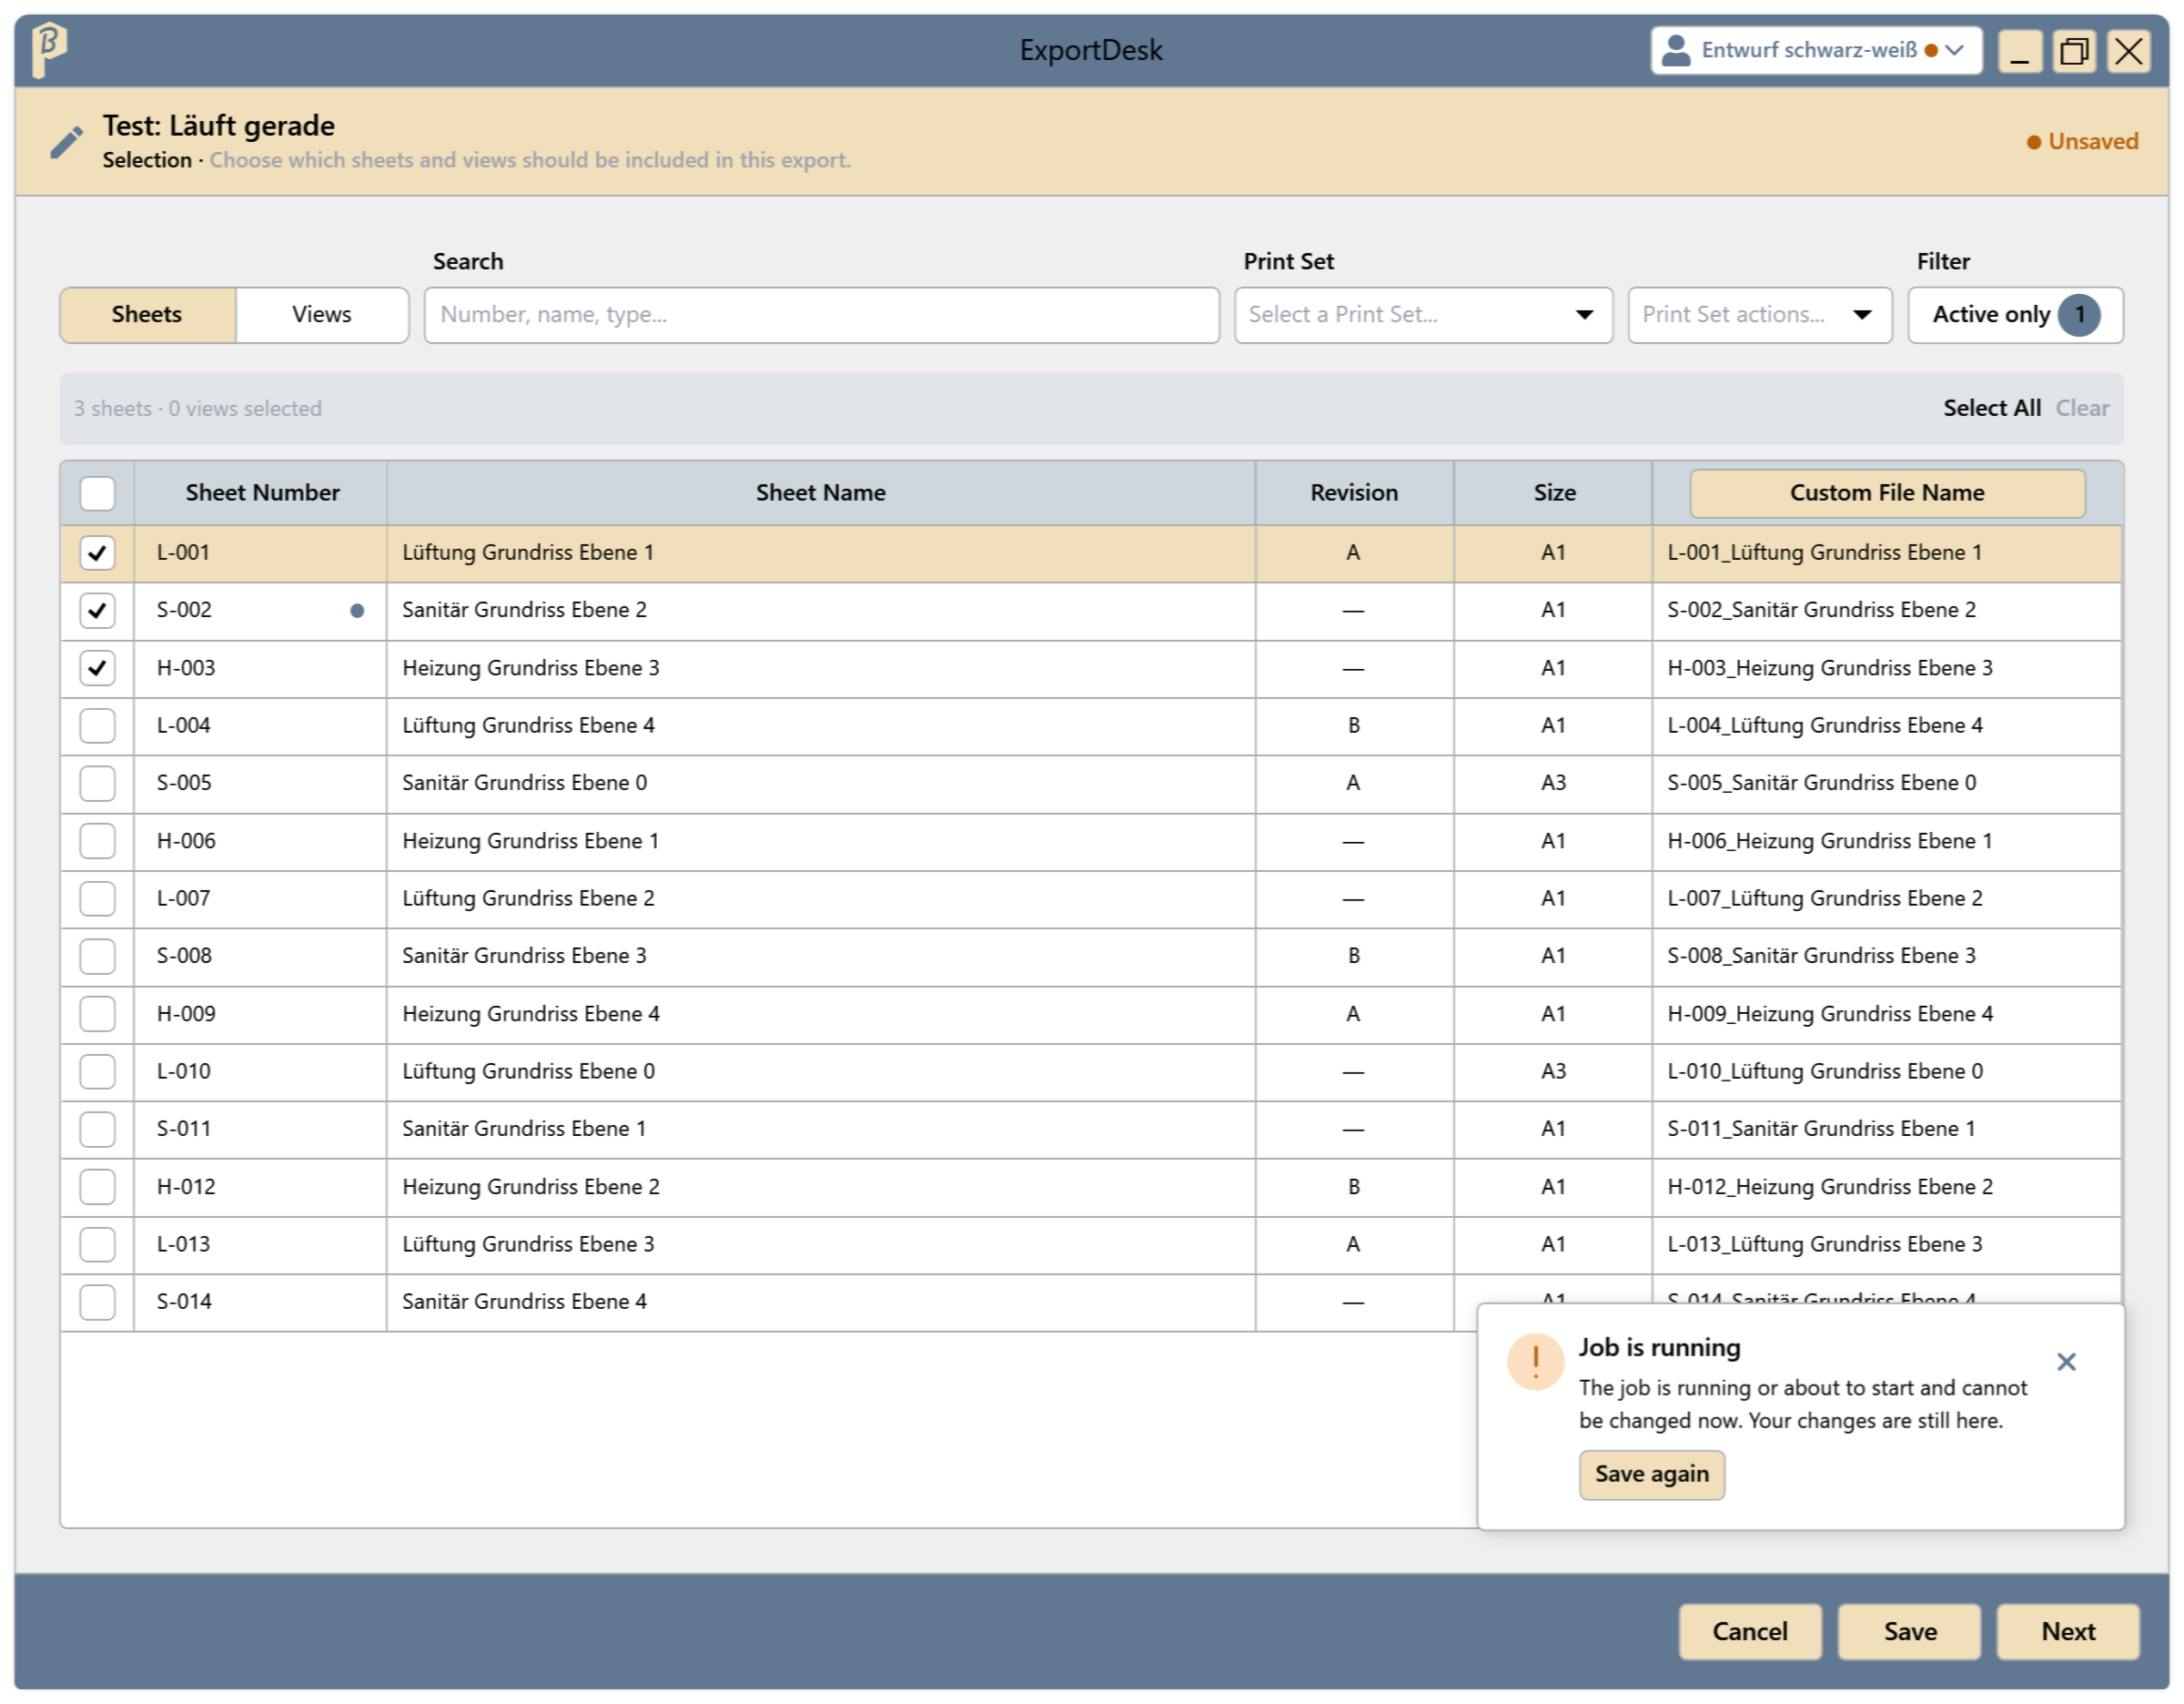
If the job has been changed elsewhere in the meantime, e.g. in JobManager, ExportDesk reports Job changed. Continue returns to editing, Save as new job creates your changes as a second job. A job that is running or about to start can only be changed afterwards; your entries are kept.
Save and share settings as a profile
A profile saves the settings, never the selection: Custom file name, format configurations, output folder and folder levels.
At the top right, click the profile and choose New profile….
Enter a name and choose whether to take over the current settings or import a file (Import from a file, a
.jsonfile with exactly one ExportDesk profile).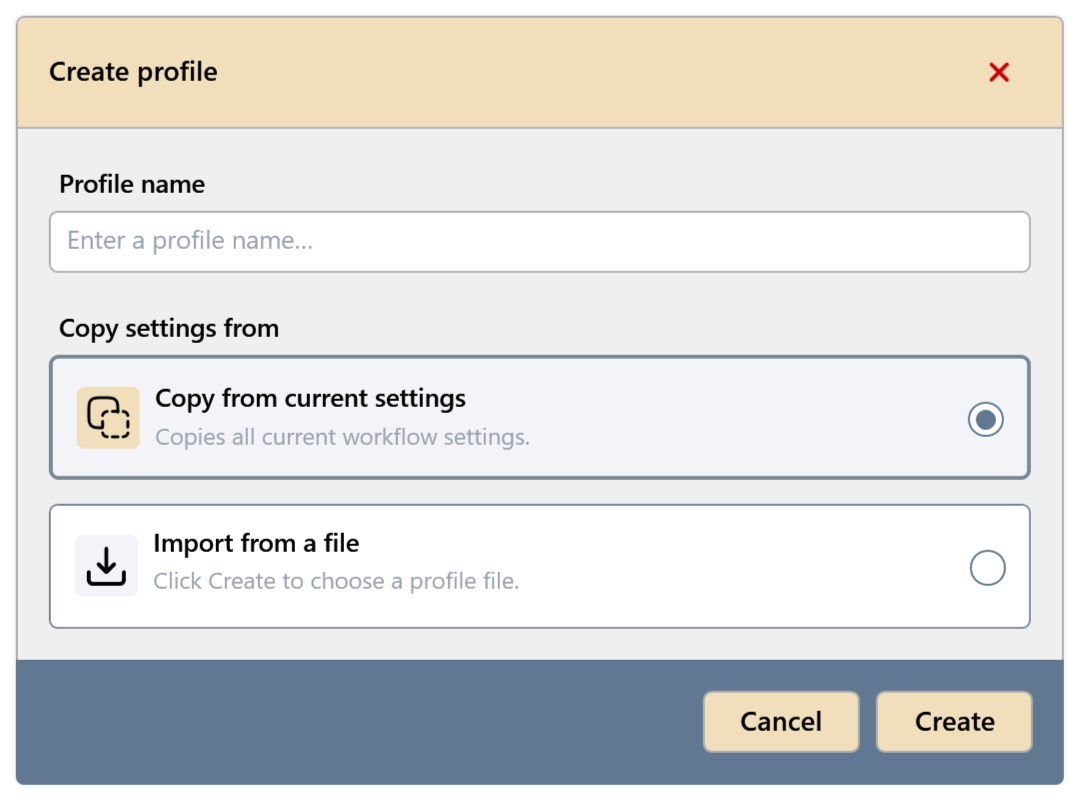
Fig. 30 · Create profile A dot on the profile shows unsaved changes. When you switch profiles, ExportDesk asks whether to save.
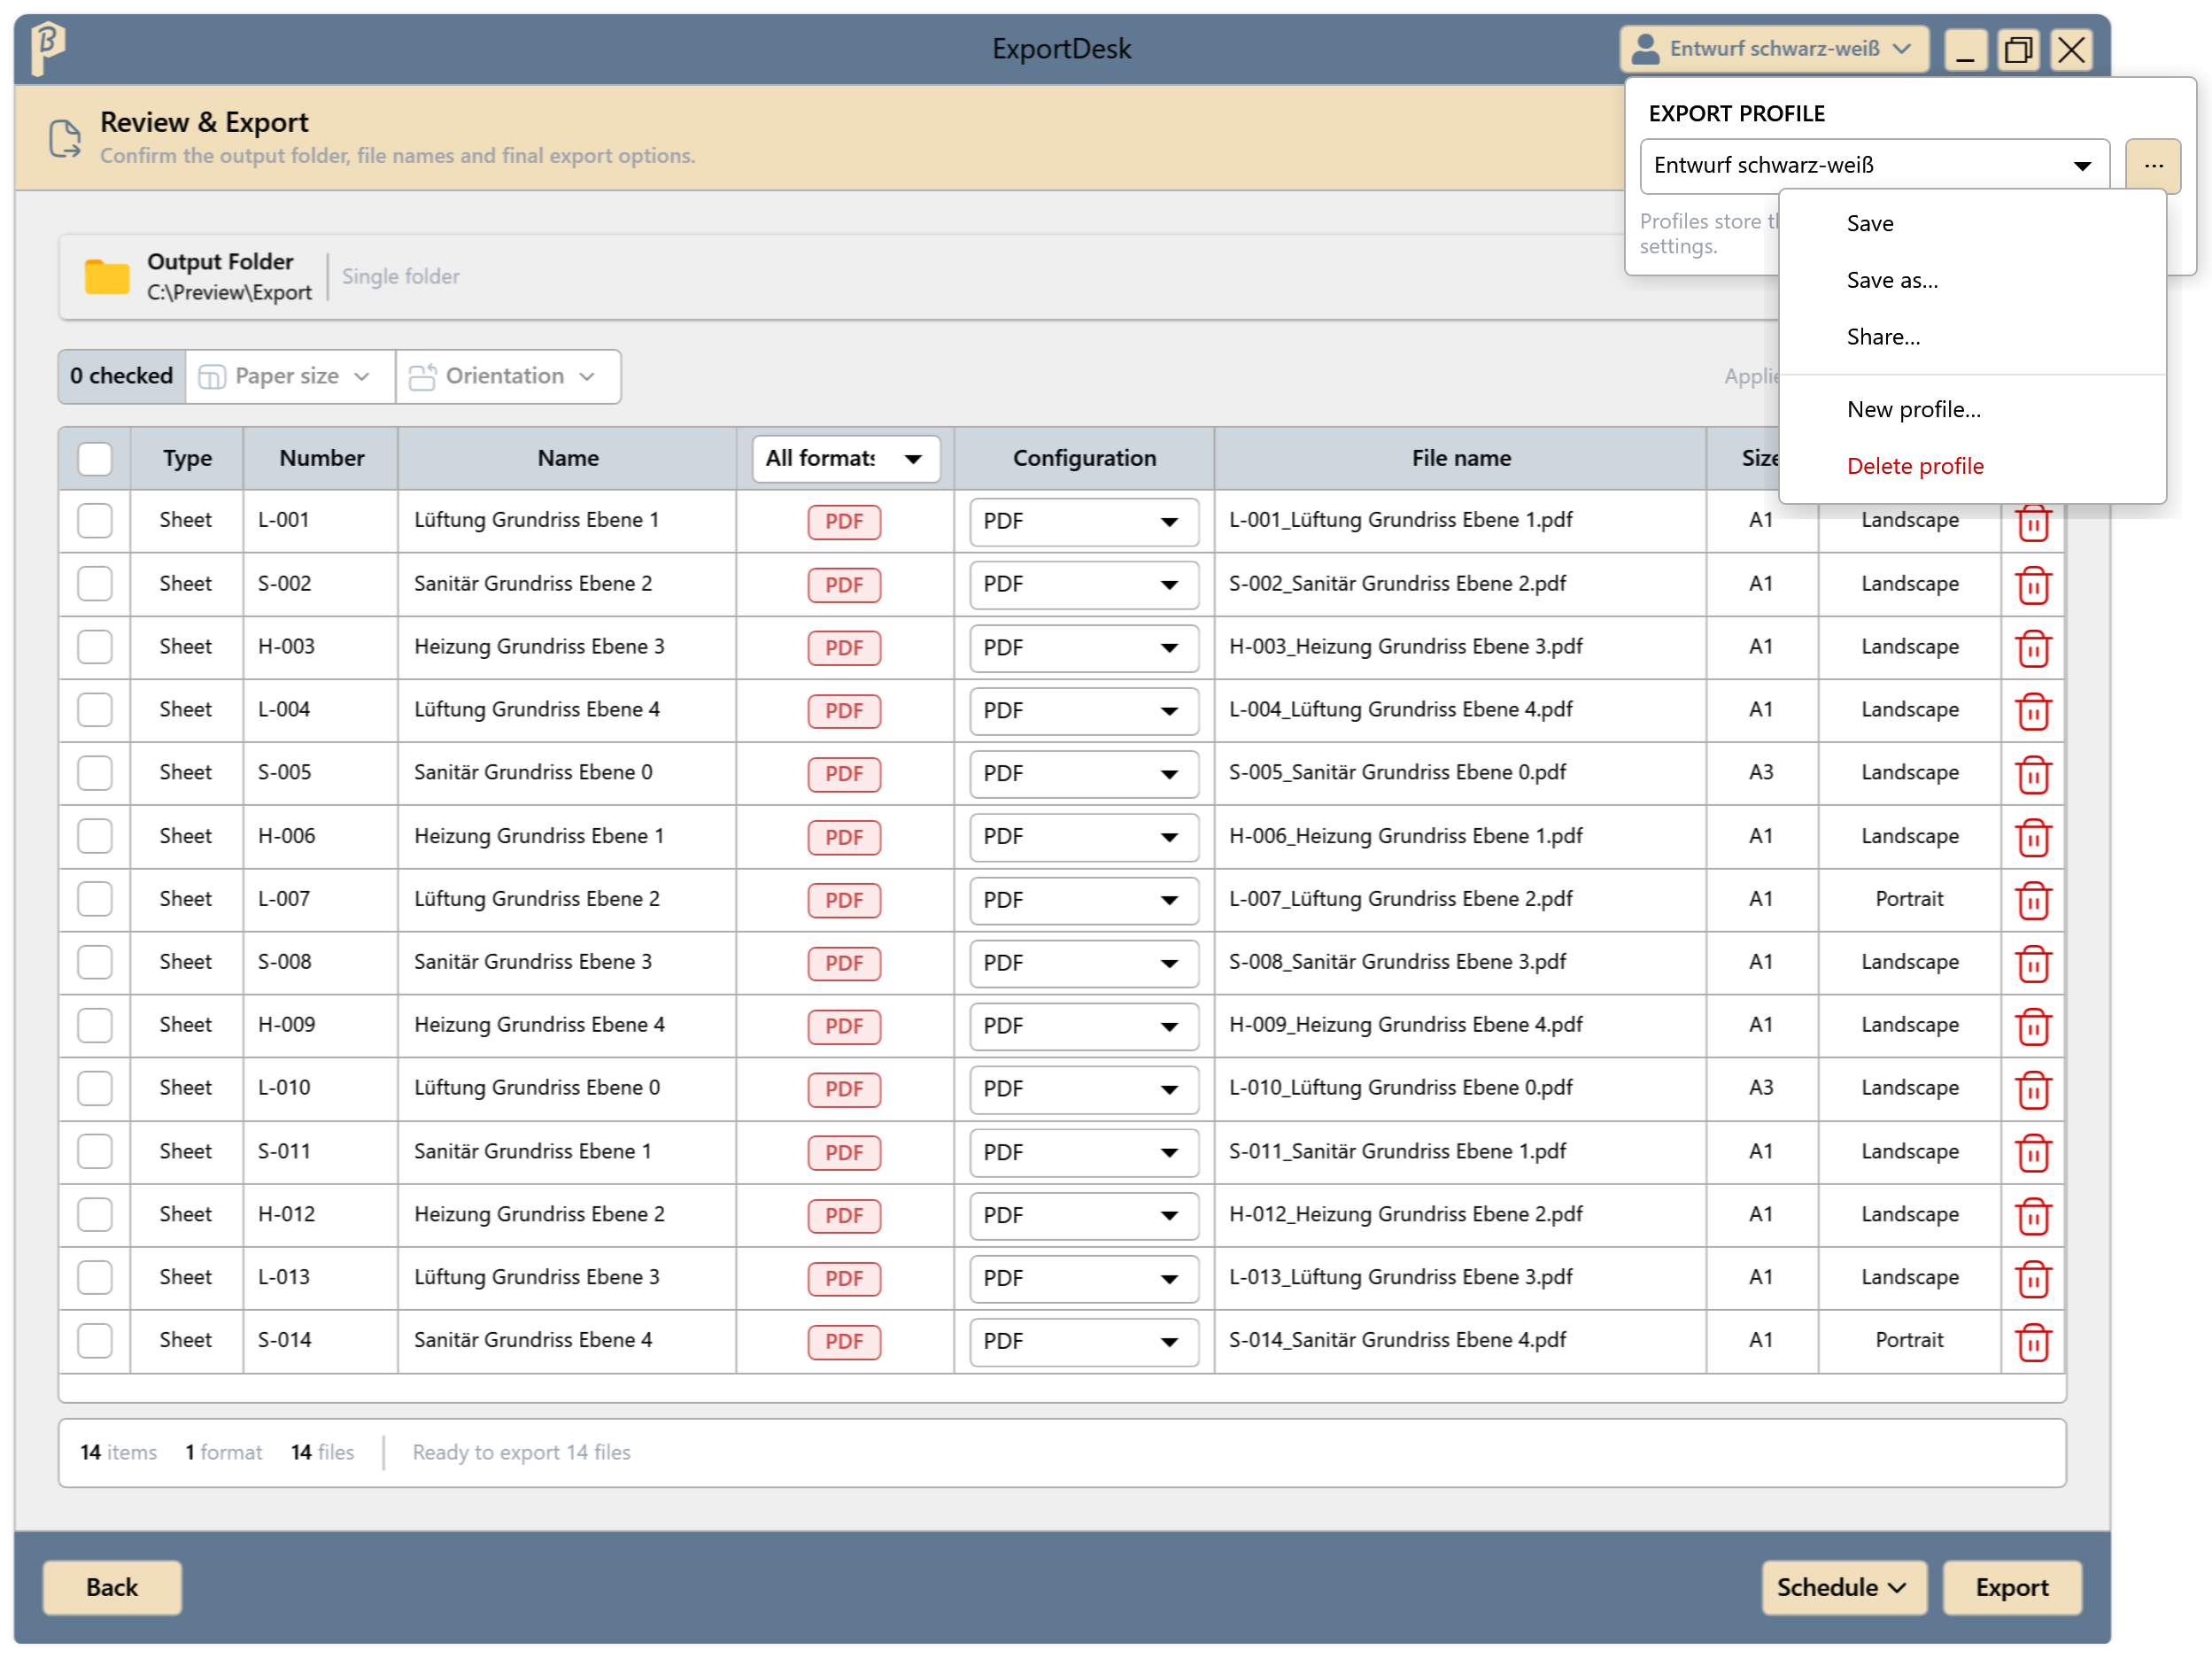
In the profile menu:
- Save writes the current settings to the chosen profile.
- Save as… creates them as a new profile; the previous profile stays unchanged.
- Share… opens Explorer with the profile file selected. Pass the file on by email or chat; recipients import it with New profile… › Import from a file.
- No profile continues without a profile.
A profile from another project may contain parameters in the Custom file name that do not exist here. ExportDesk removes them on loading and reports File naming changed. Check the Custom file name and save the profile if needed.
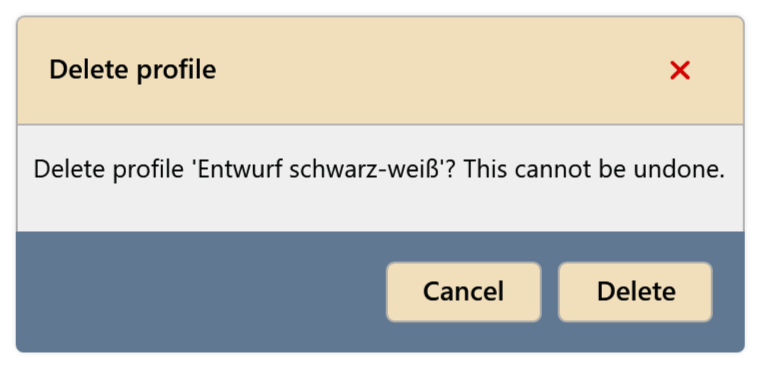
A profile can be deleted from the profile menu; ExportDesk asks first.
Common problems
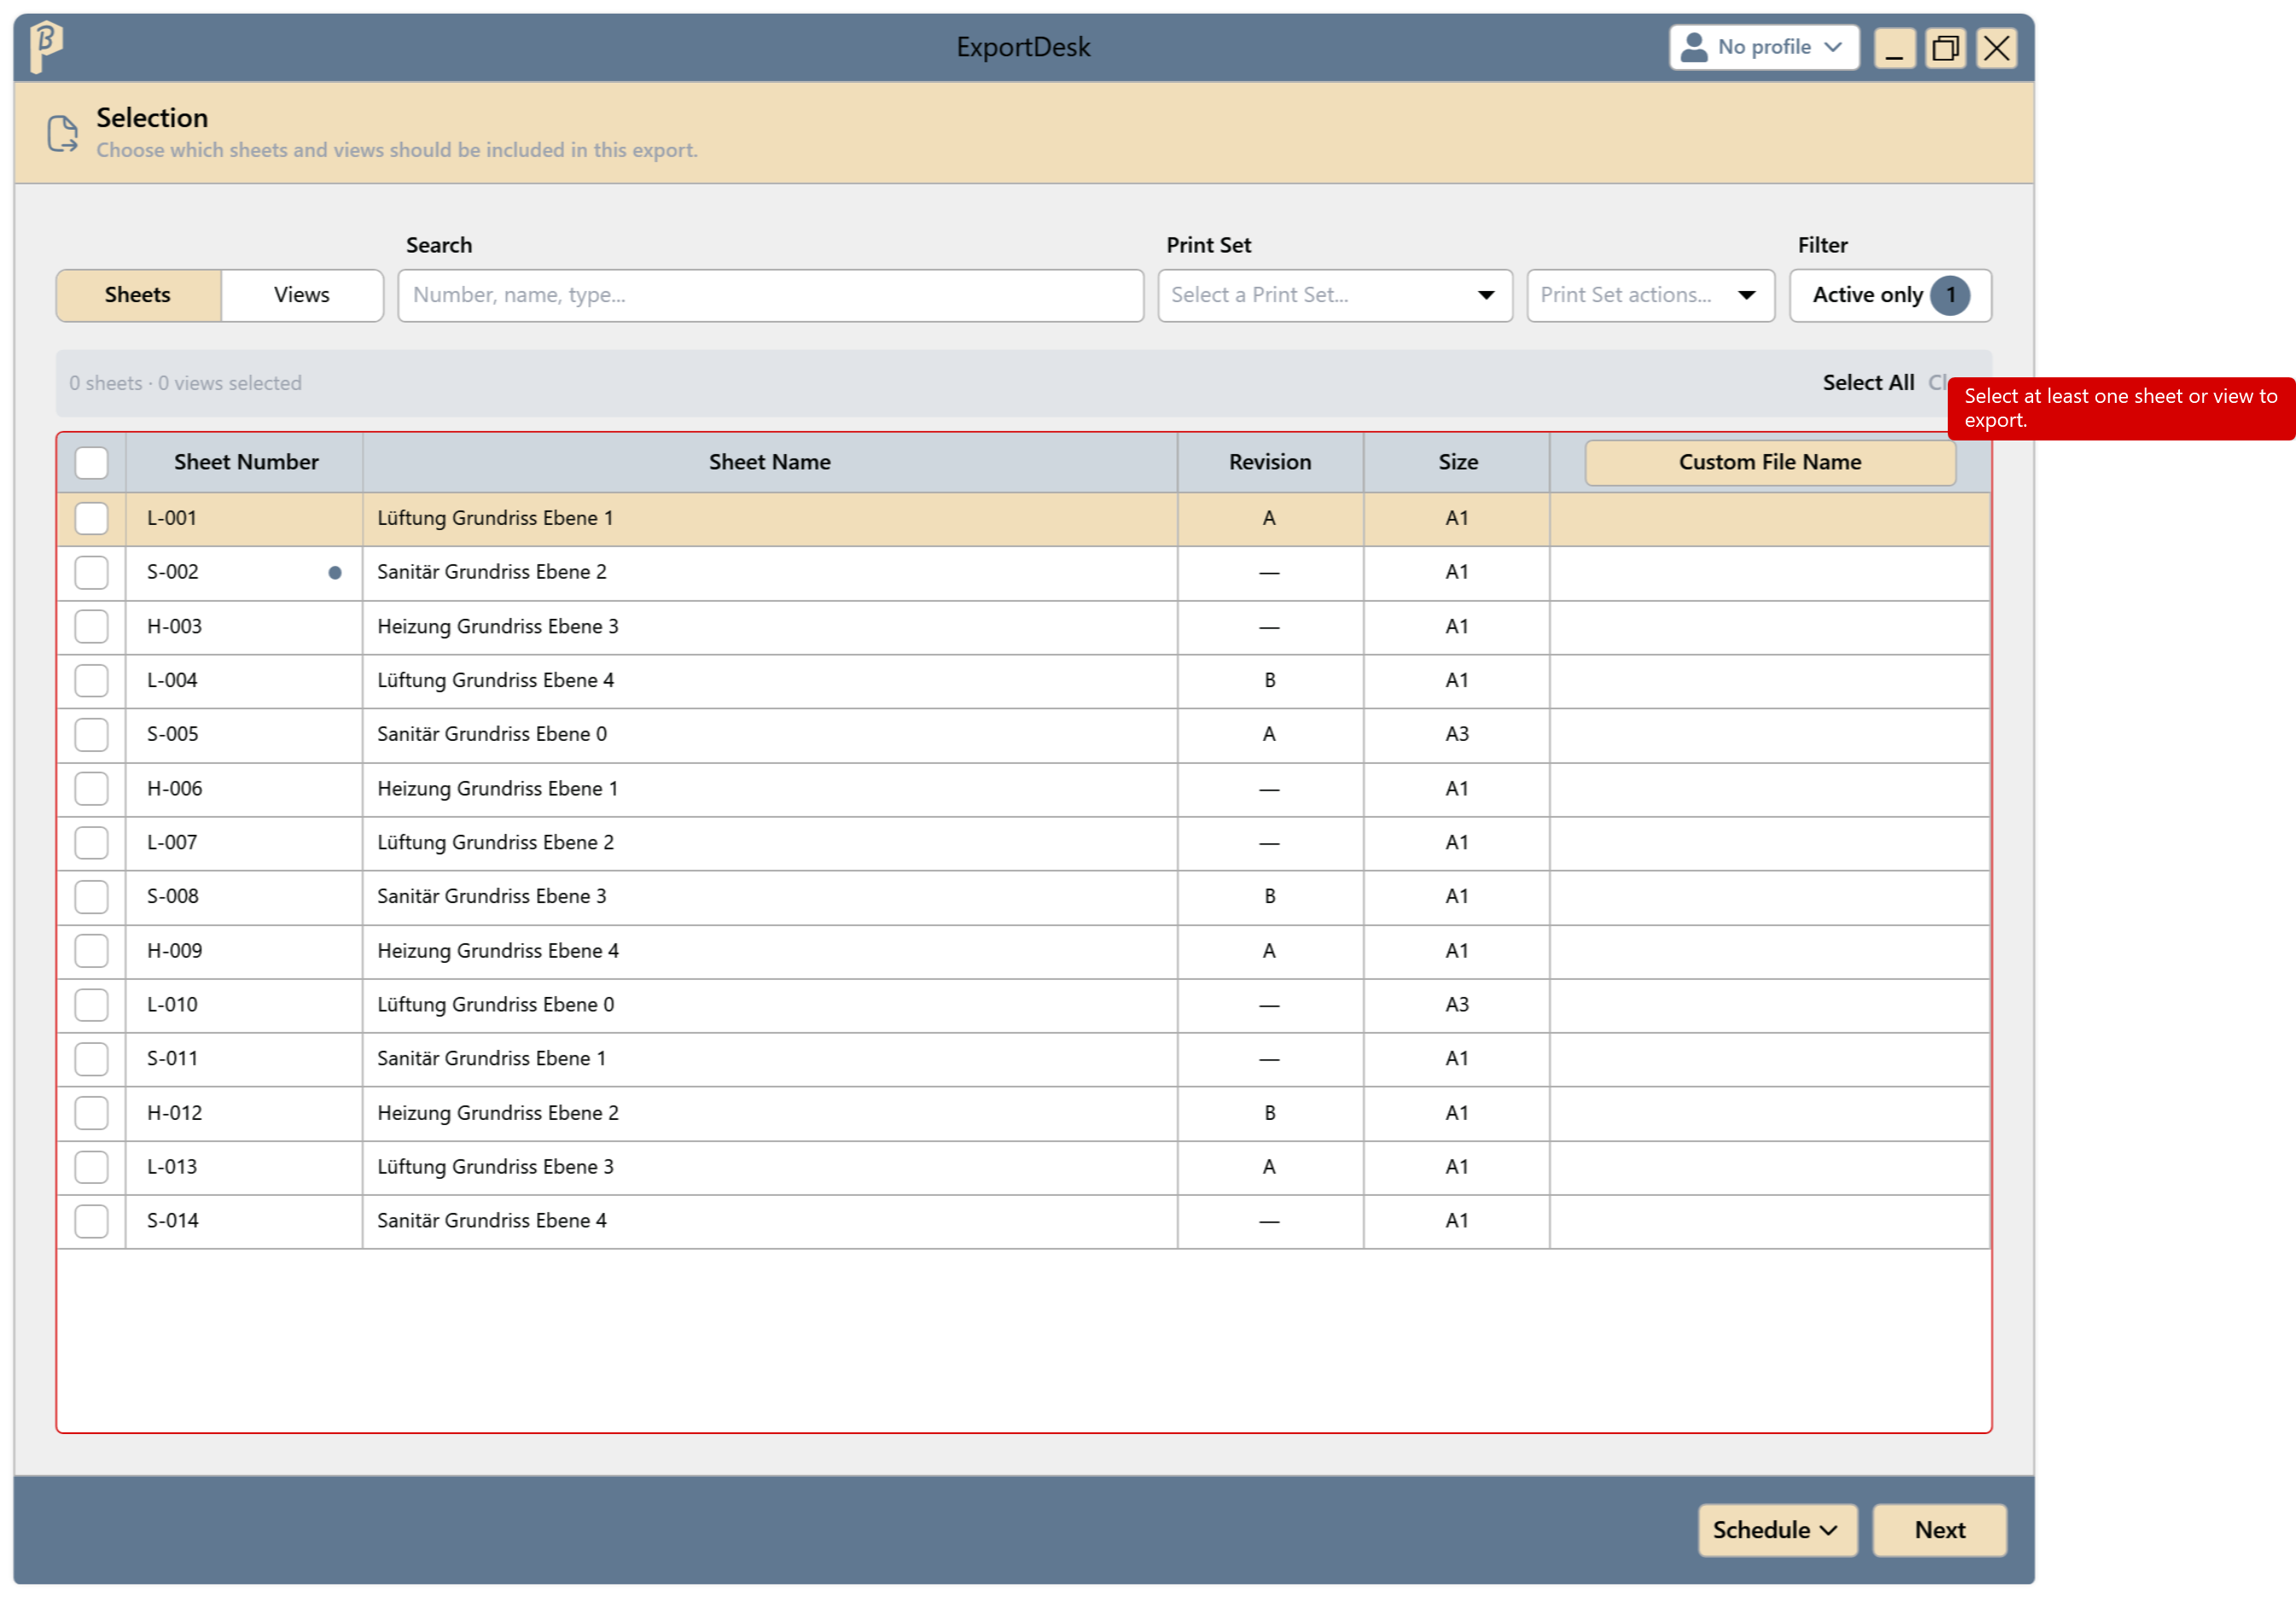
“Next” does not work: nothing selected
Check at least one sheet or view.
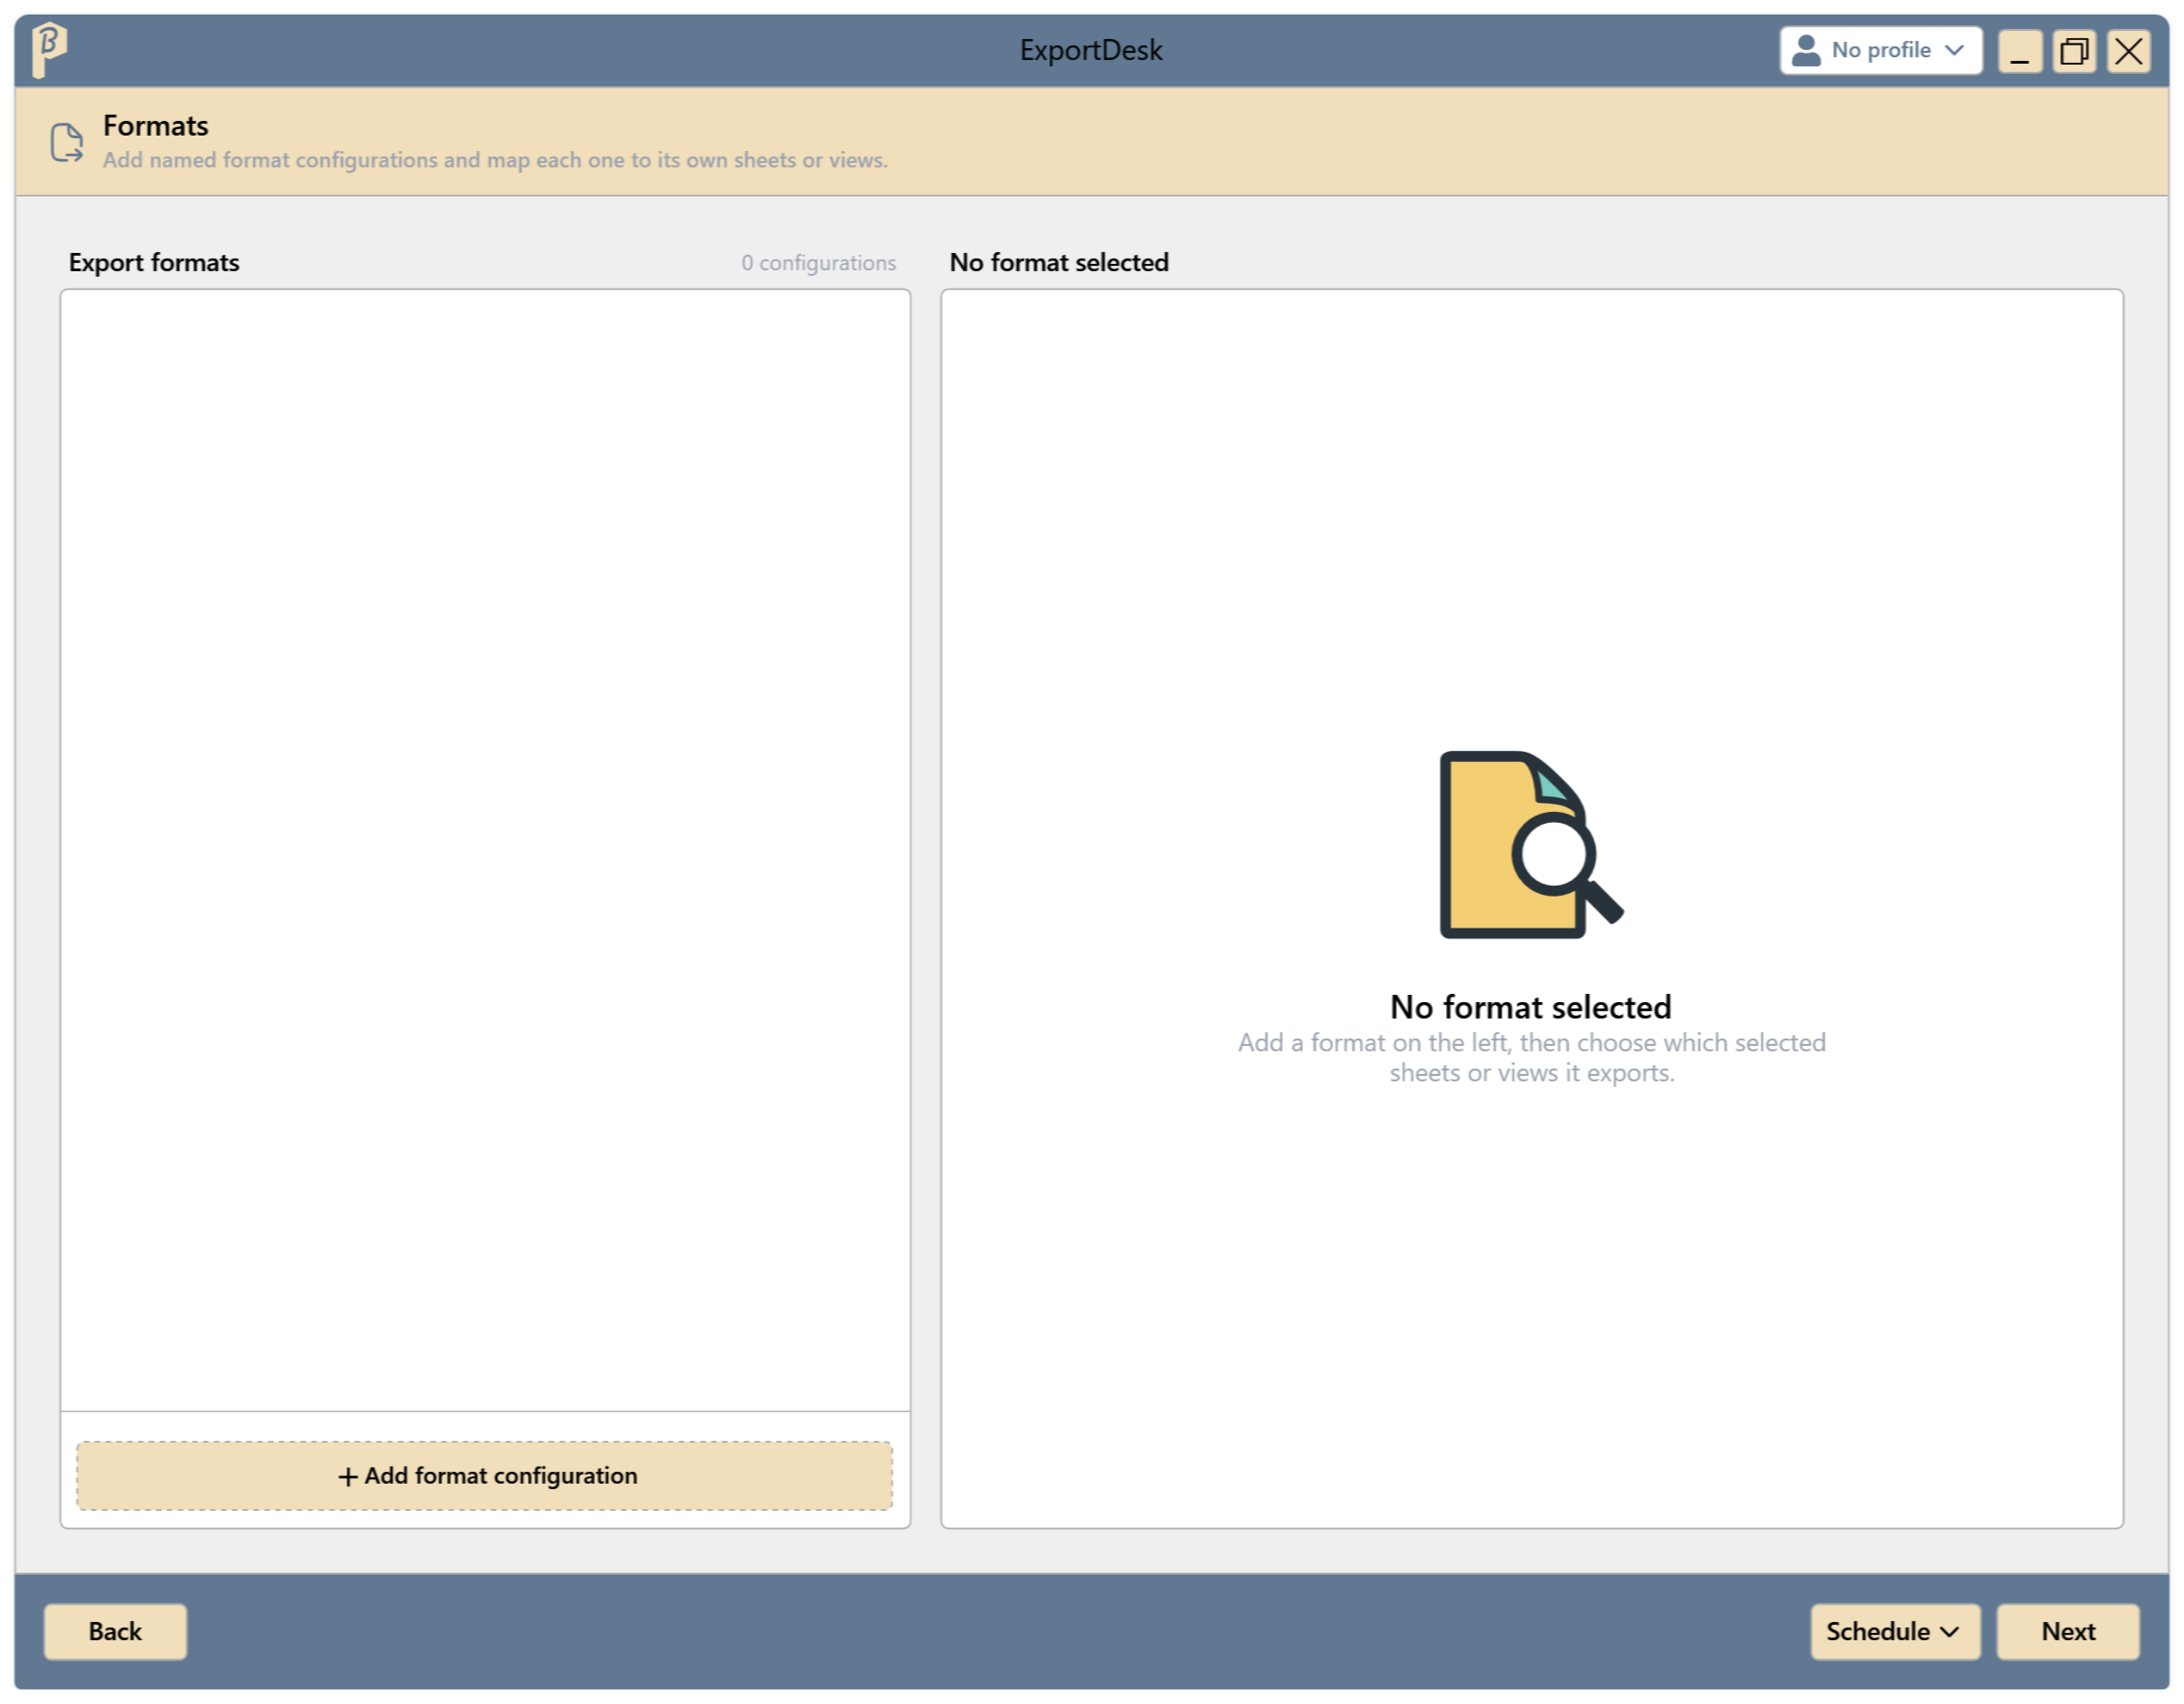
“Next” does not work in the Formats step
A format configuration is missing, or a configuration exports no file, e.g. IFC without a selected 3D view.
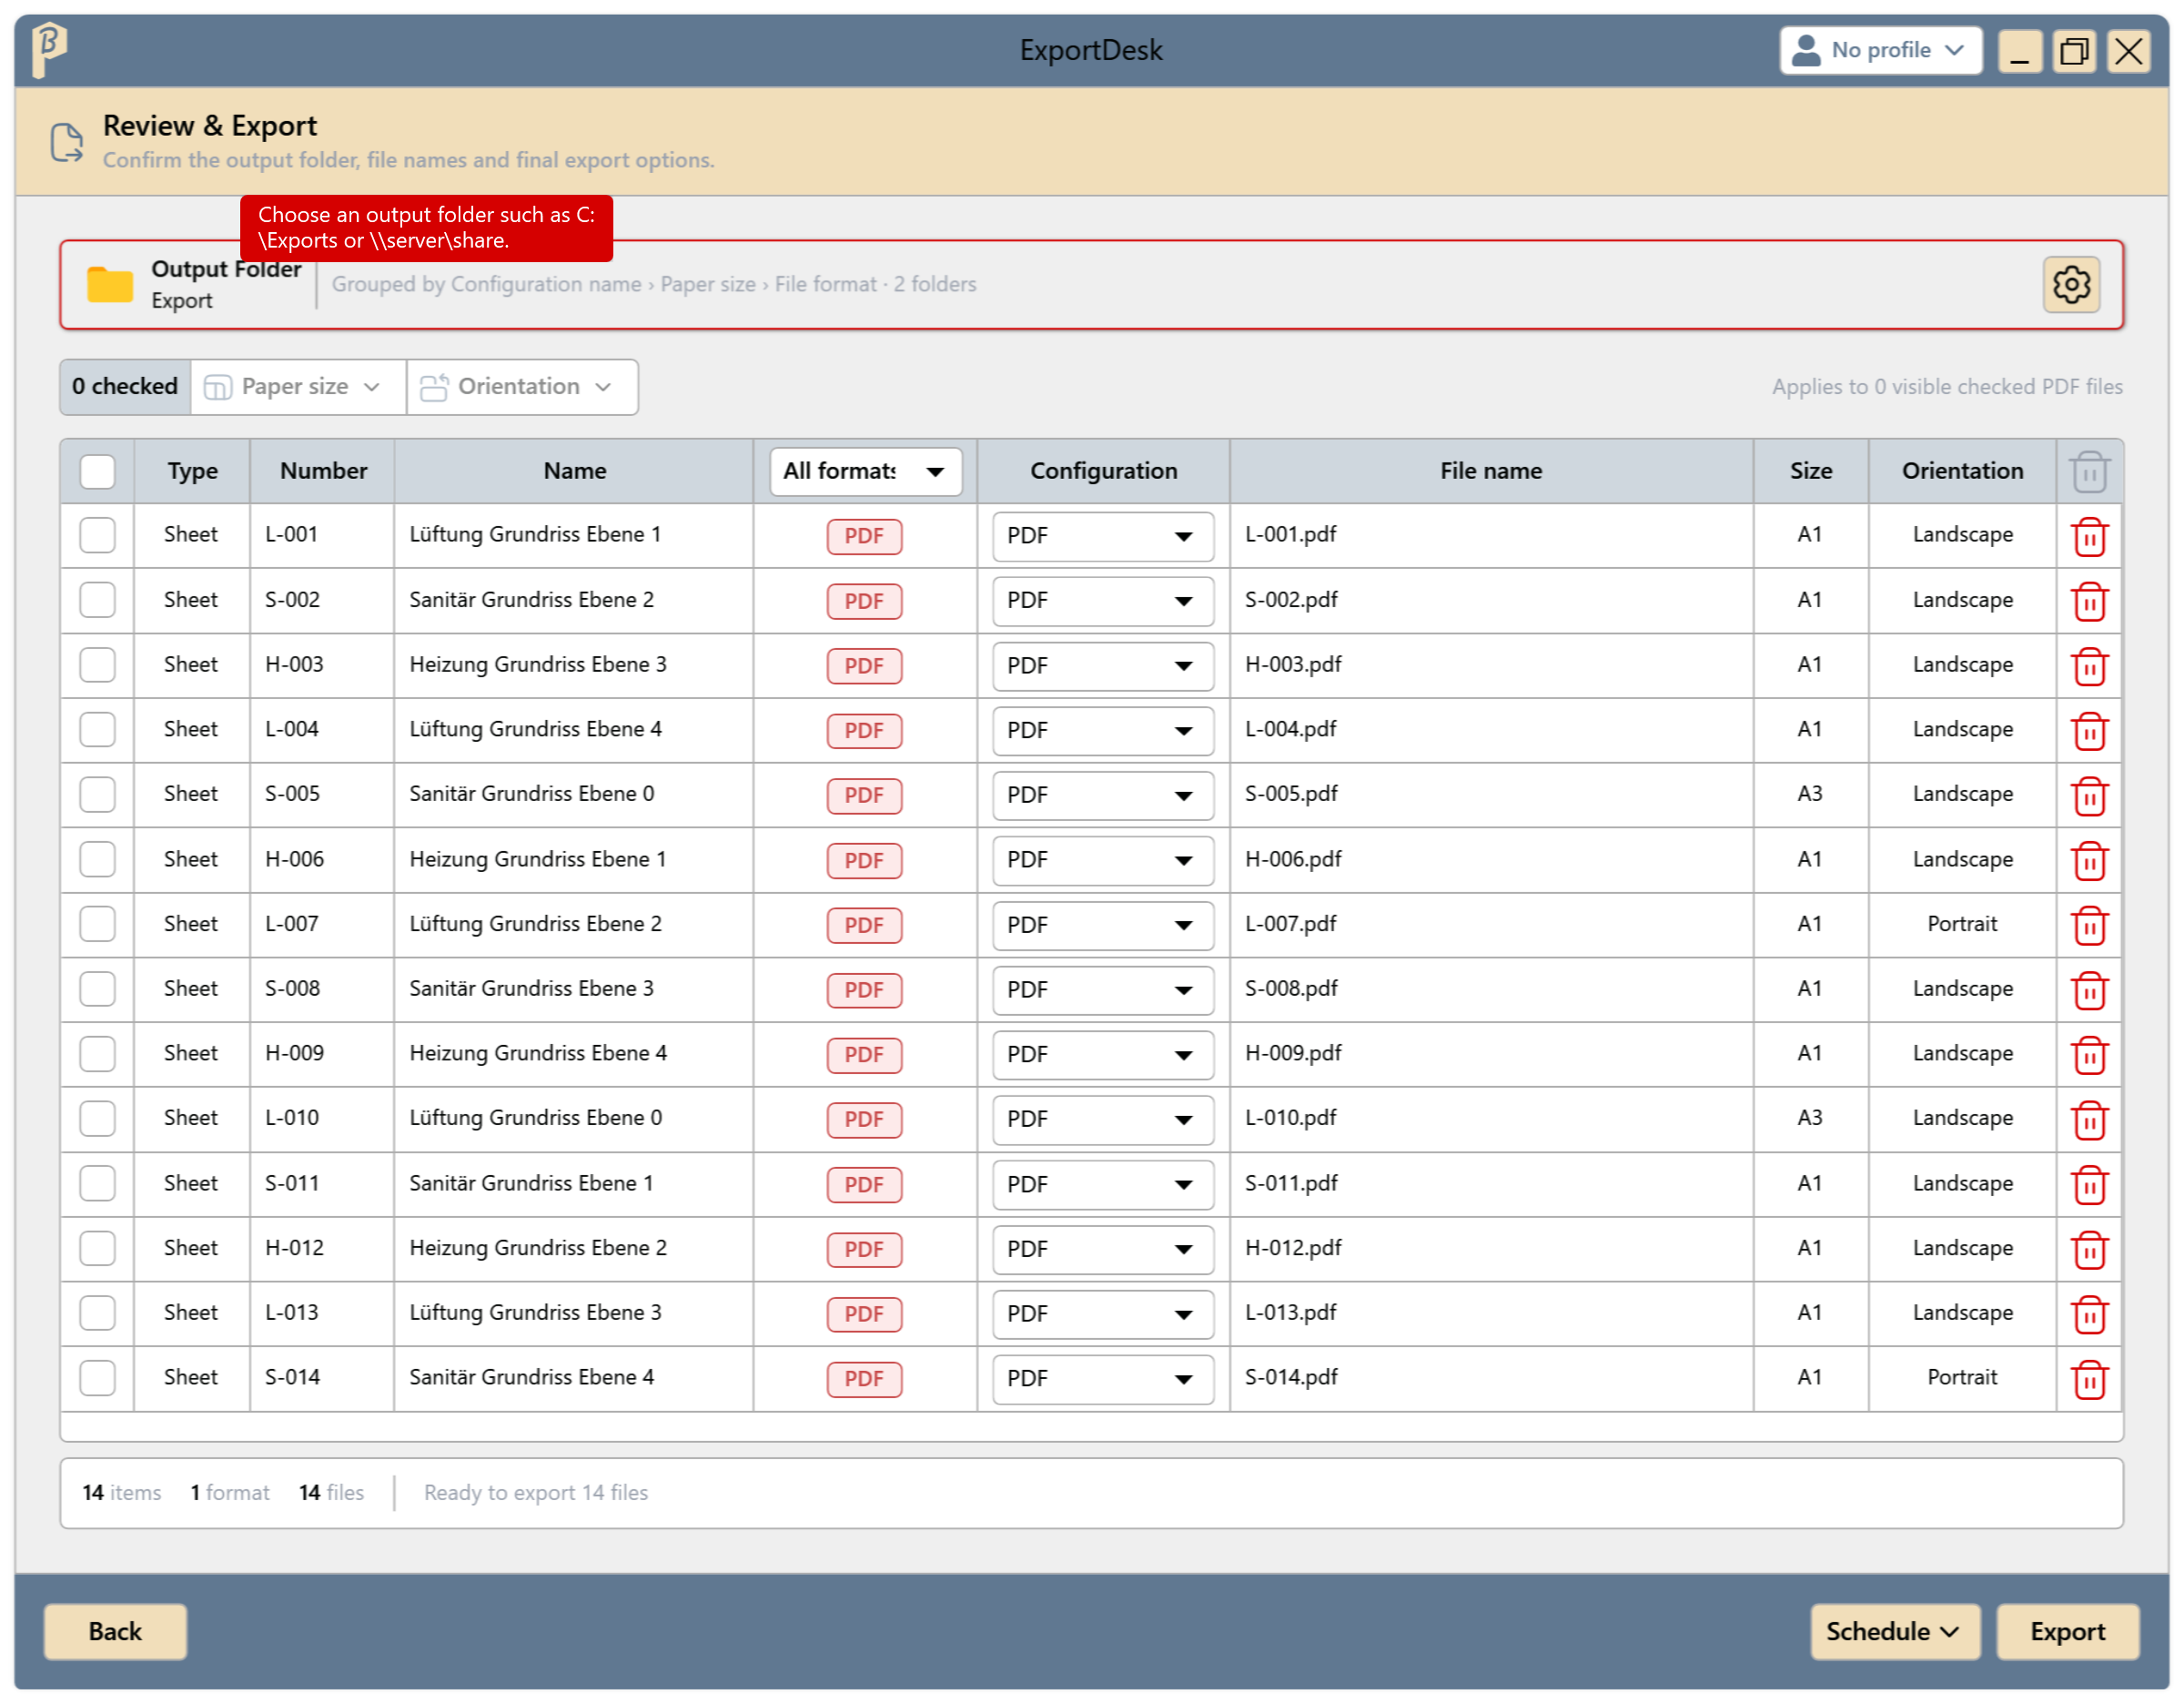
The output folder is not accepted
The base folder must be a drive path (C:\…) or UNC path (\\server\share).
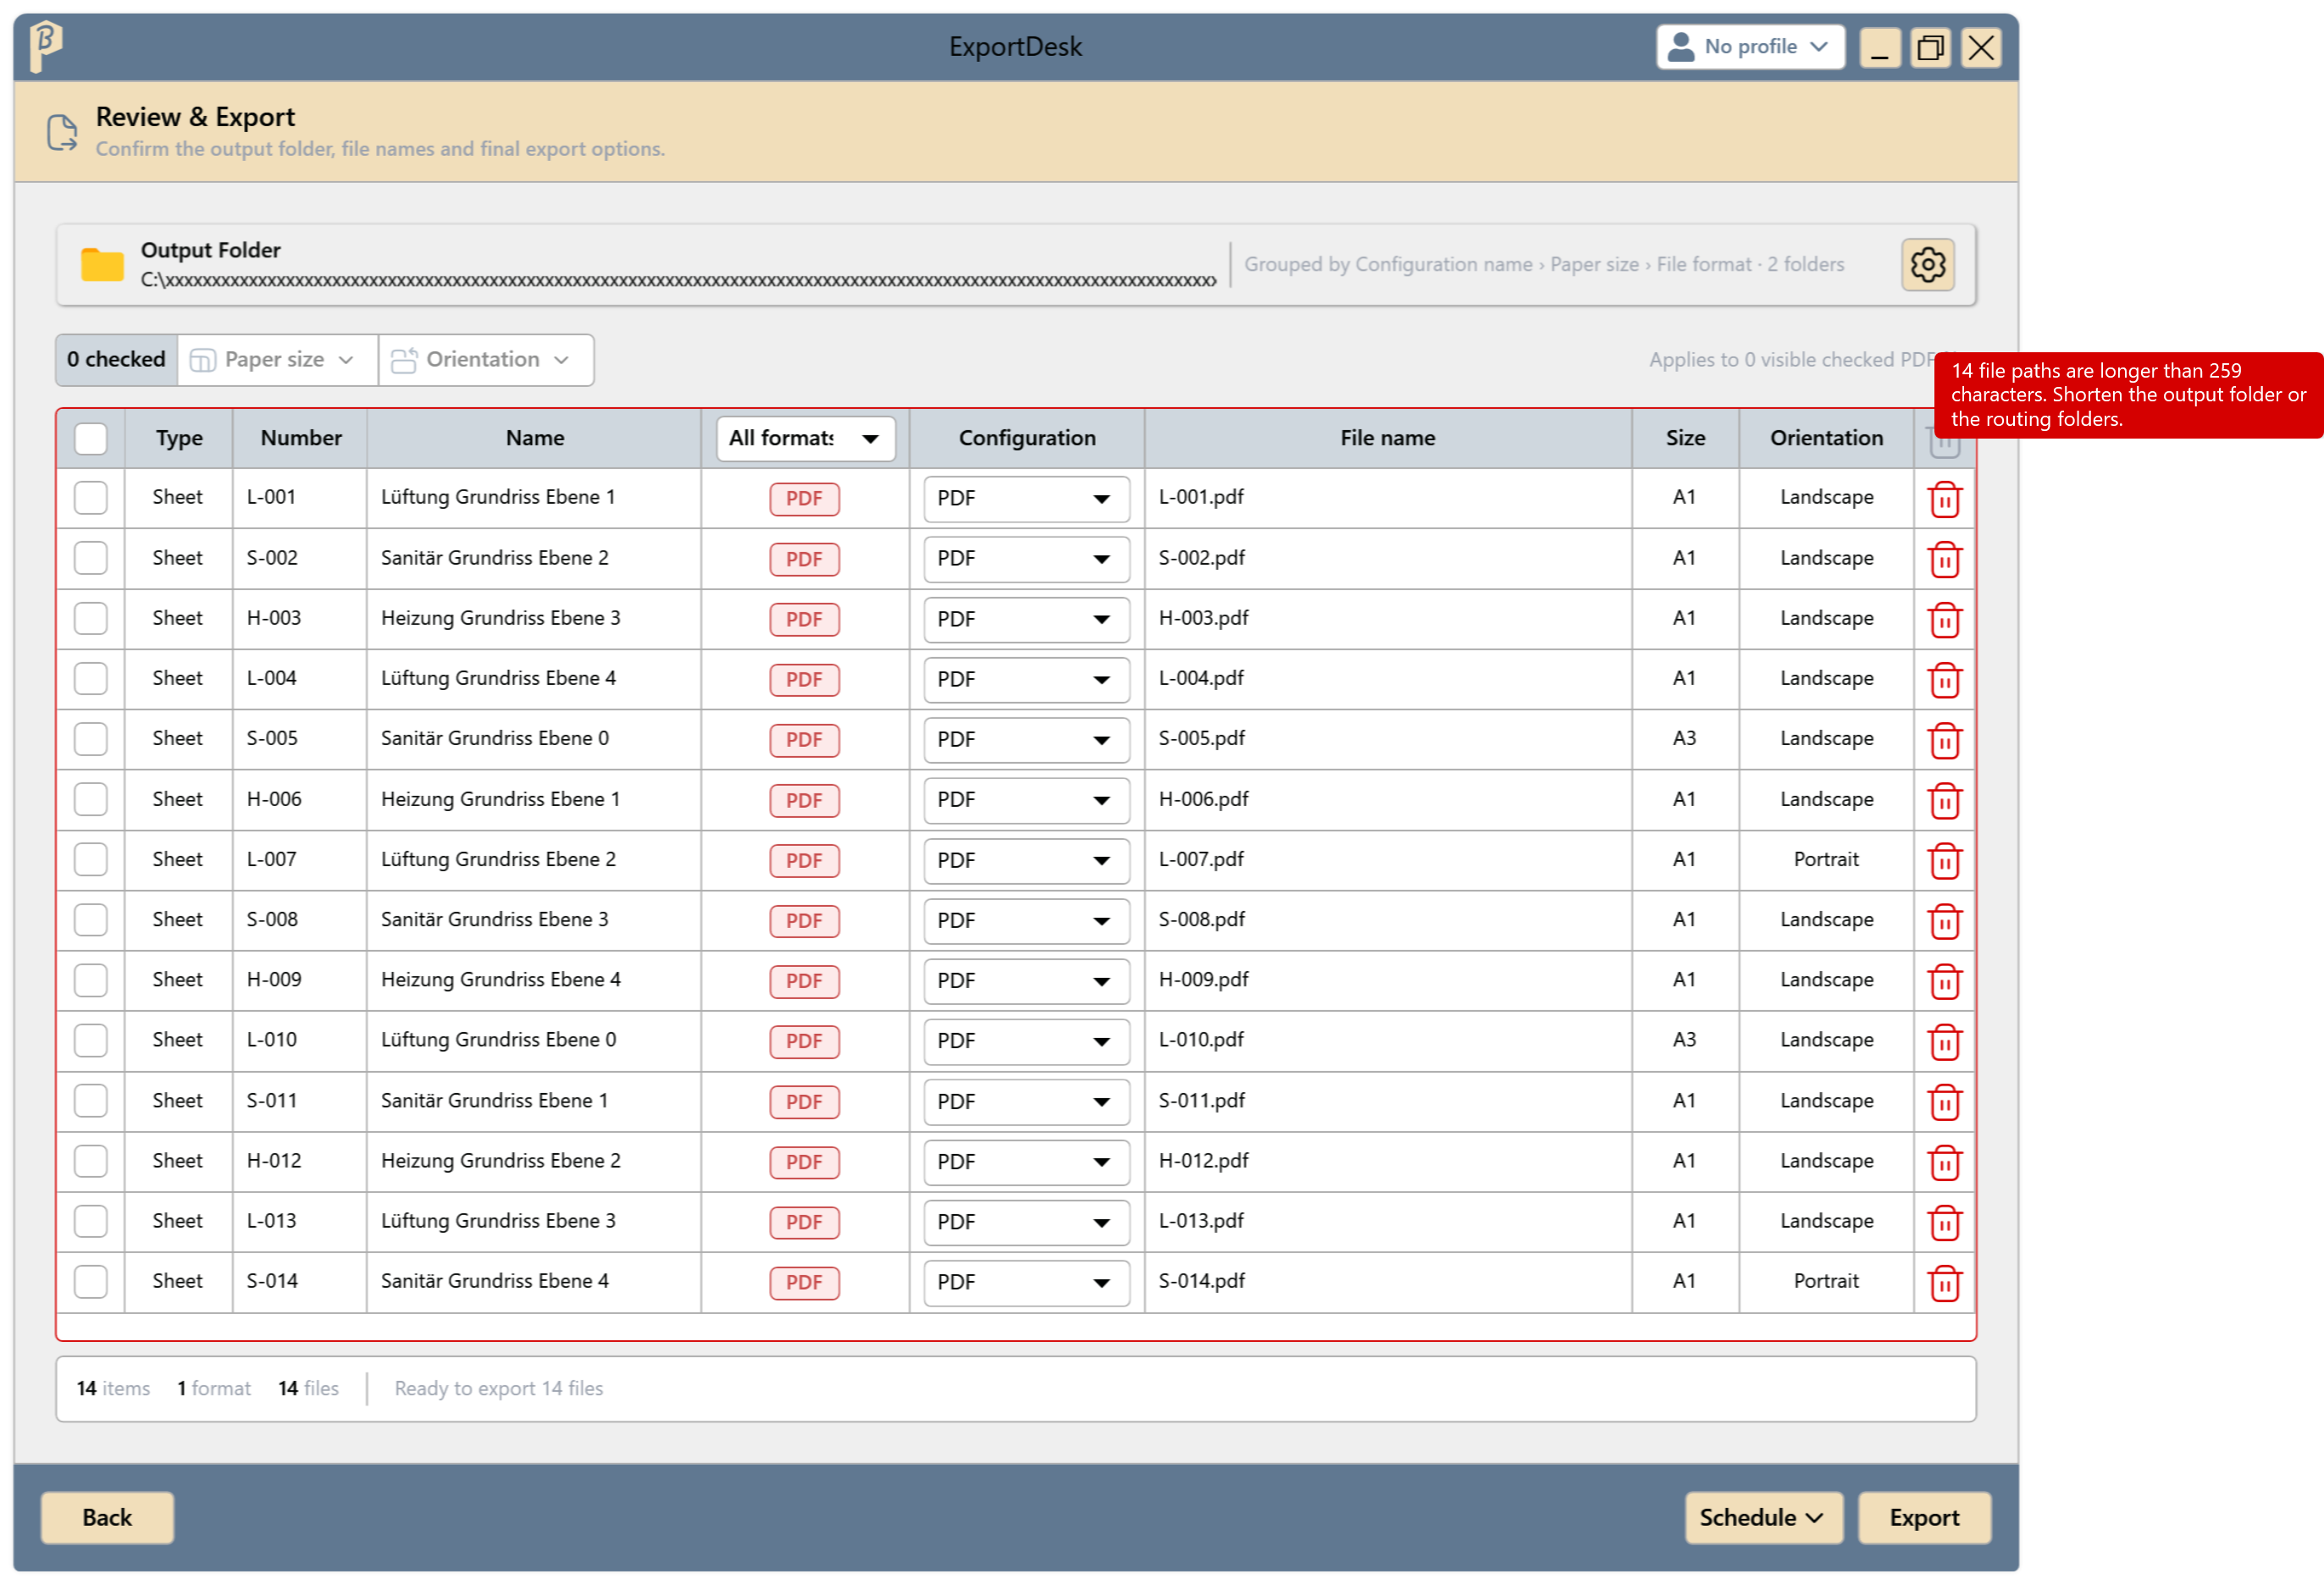
Path too long
A file path may be at most 259 characters long. Choose a shorter base folder, fewer folder levels or a shorter Custom file name.
PDF export blocked: paper size missing
For some PDF rows no paper size is known. Select the rows and set Paper size and Orientation in the Review & Export step.
DWG failed: AutoCAD could not bind the images
The DWG was written, but the images were not bound. Possible reasons: AutoCAD 2019 or later is not installed, the ExportDesk AutoCAD plug-in is missing next to PluBIM, or AutoCAD did not answer in time. Install AutoCAD or turn off Bind images as OLE in the DWG file in the DWG settings.
The job cannot be saved
If the job is running or about to start, it cannot be changed; click Save again after the run. If ExportDesk reports Job changed, the job was edited elsewhere: Save as new job or reconcile the changes in JobManager.
Two rows write the same file
File names must be unique, also across folders. Add a distinguishing parameter to the Custom file name.
The window closes by itself
ExportDesk closes when another Revit document becomes active. Open ExportDesk again in the model you want.