 PluBIM Help

NightShift
Create and manage scheduled Revit automation jobs.
- Ribbon group
- Automation
- Version
- PluBIM 1.5.0
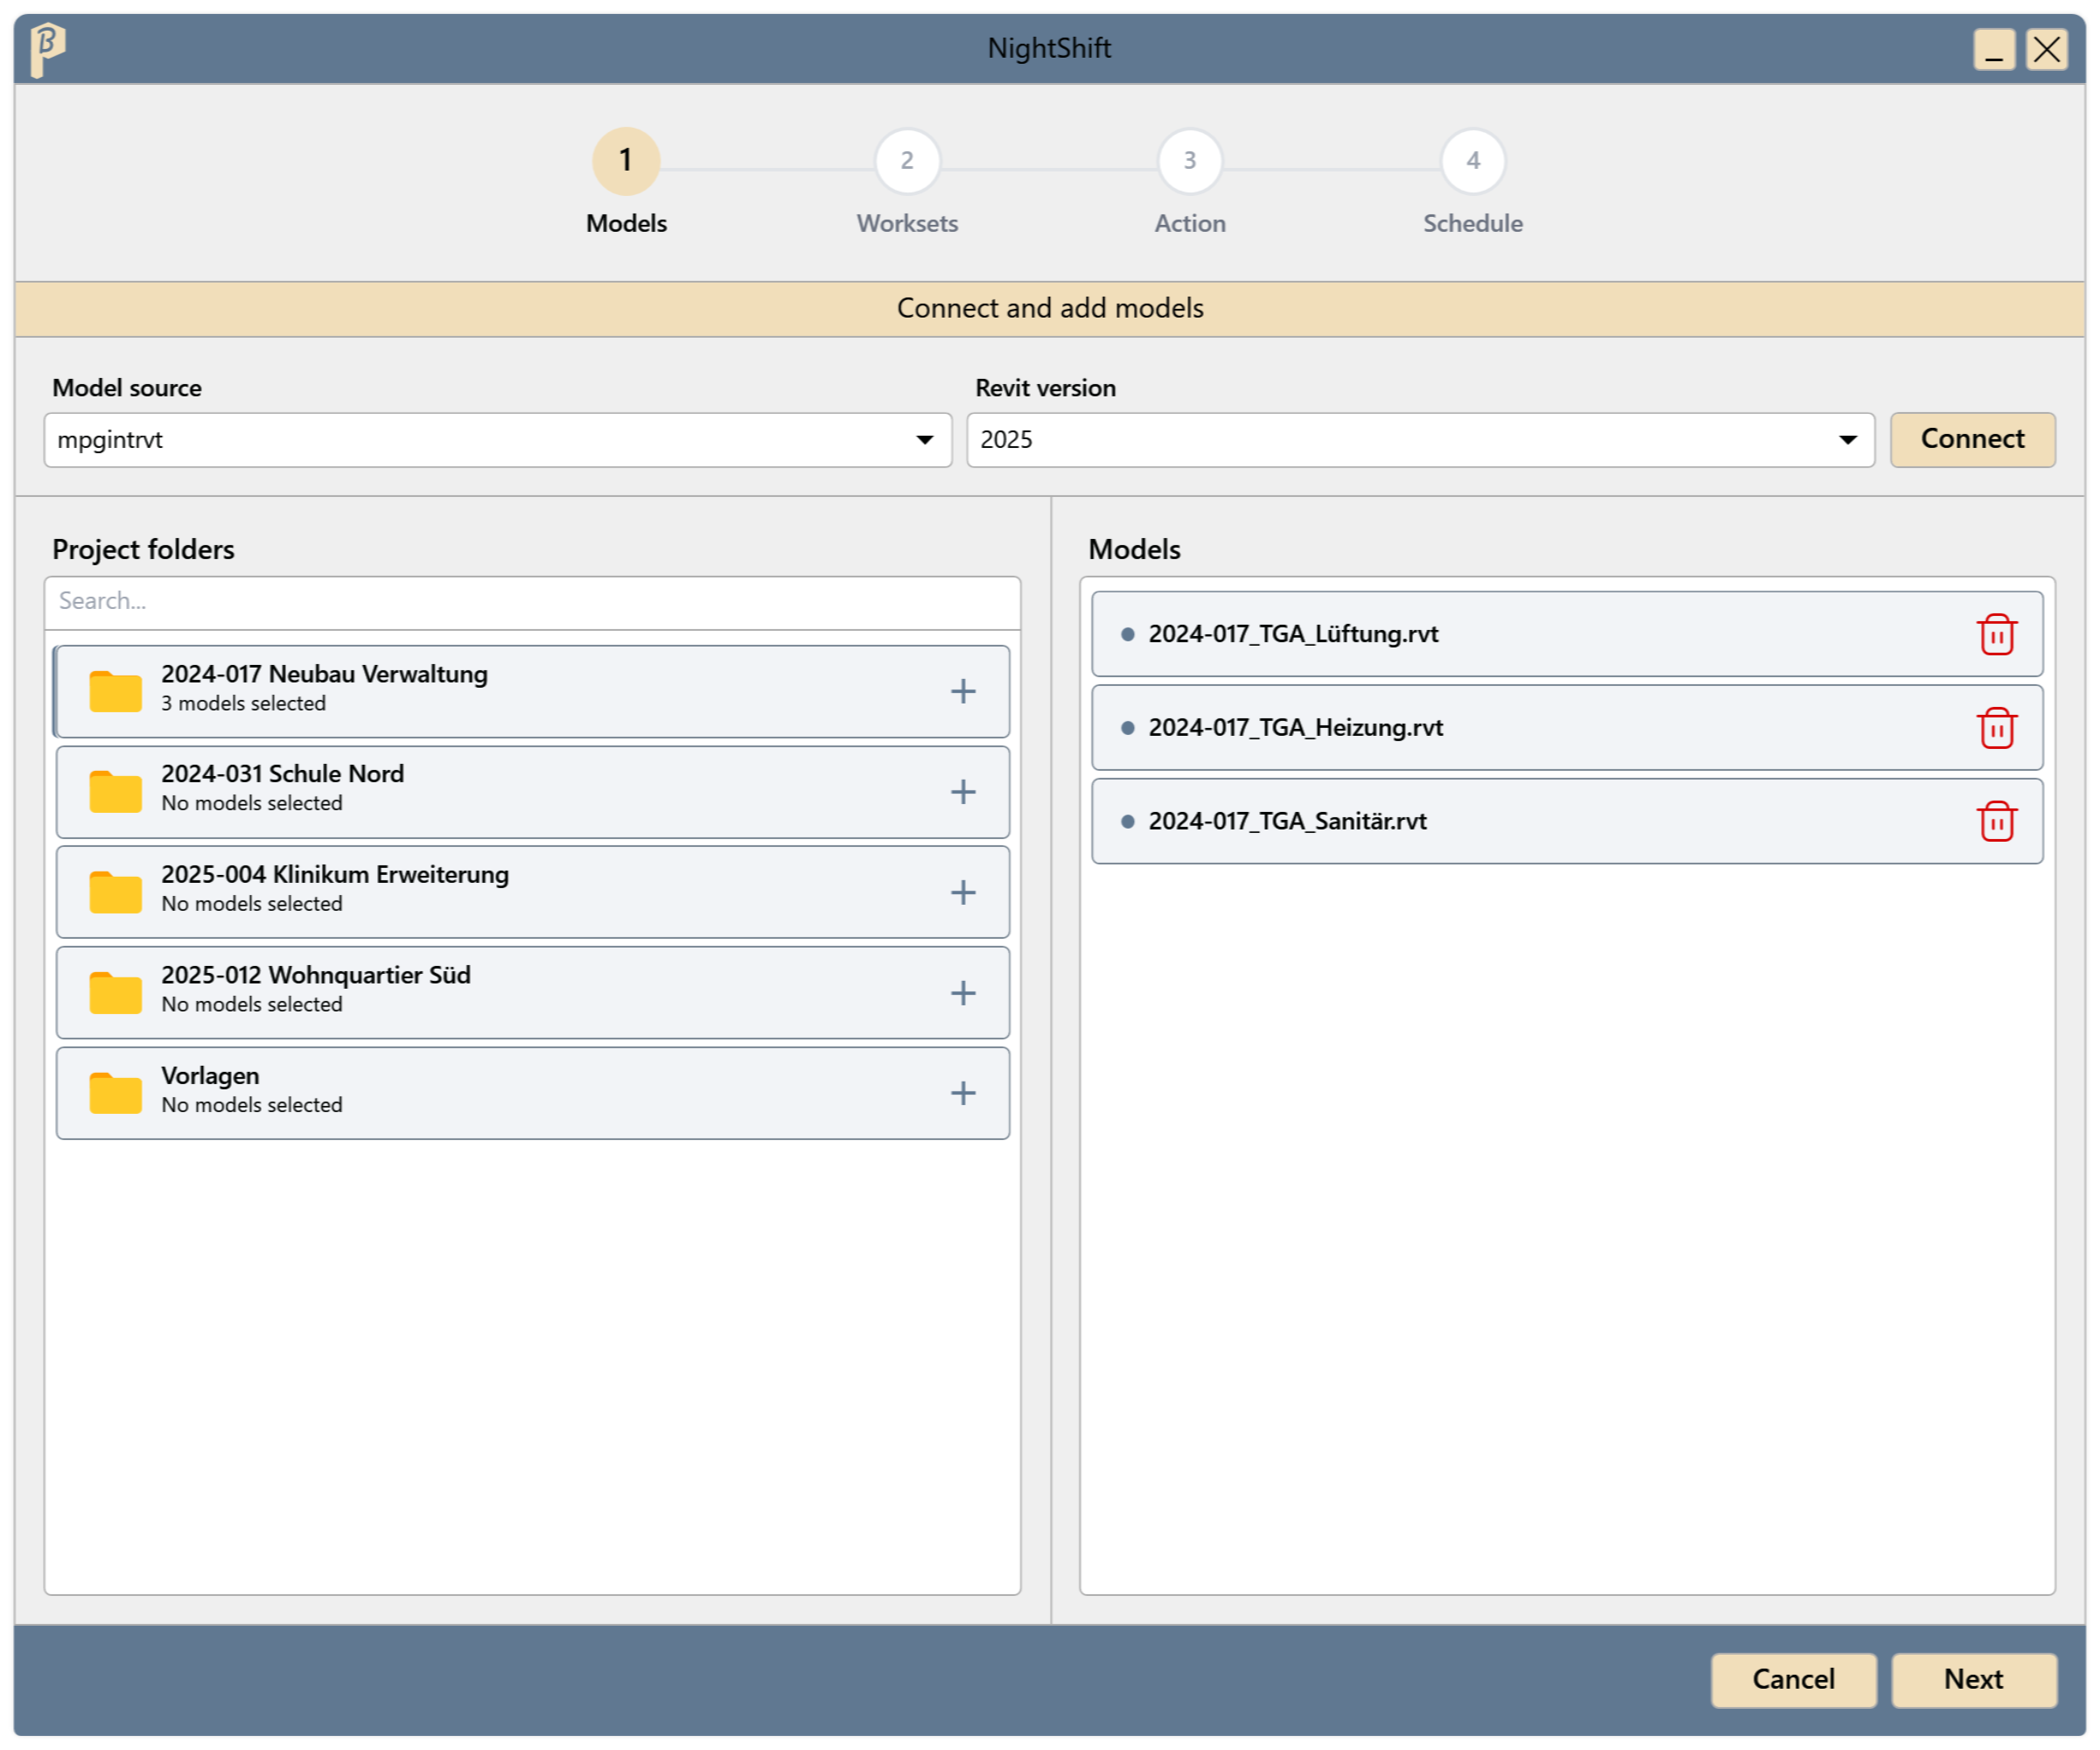
A NightShift job is created in four steps: Models, Worksets, Action and Schedule. The settings of each action are described on their own pages.
When to use it
| You want to … | How |
|---|---|
| Open models at night and synchronize them with central | Create a job with the action Open Local Files |
| Save models to an archive folder automatically | Create a job with the action Archive Models |
| Export 3D views as IFC on a regular basis | Create a job with the action Export Ifc |
| Run Dynamo scripts on several models | Create a job with the action Run Dynamo |
| Check whether a job has run, or change it | Open JobManager |
Requirements
- Access to the models: to Revit Server (in the company network or via VPN) or to Forma (BIM360/ACC).
- The Revit version of the models is installed on the computer.
- The computer is switched on at the scheduled time and you are signed in. The screen may be locked; signing out prevents the run. If the computer was off at the scheduled time, the job starts as soon as it is available again.
The NightShift window
Actions
- Open Local Files – Open models and optionally sync to central server.
- Archive Models – Save selected models to a specified archive folder.
- Export Ifc – Export listed 3D views as IFC with their own settings.
- Run Dynamo – Execute Dynamo scripts on models.
Create a job
In the ribbon, click PluBIM › Automation › NightShift.
Models step: under Model source, choose where the models are stored:
- a Revit Server: then also choose the Revit version.
- BIM360/ACC: after Connect, sign-in opens in the browser. After “Authentication complete”, close the browser tab.
Then click Connect. The Project folders are loaded; Search... filters the list.
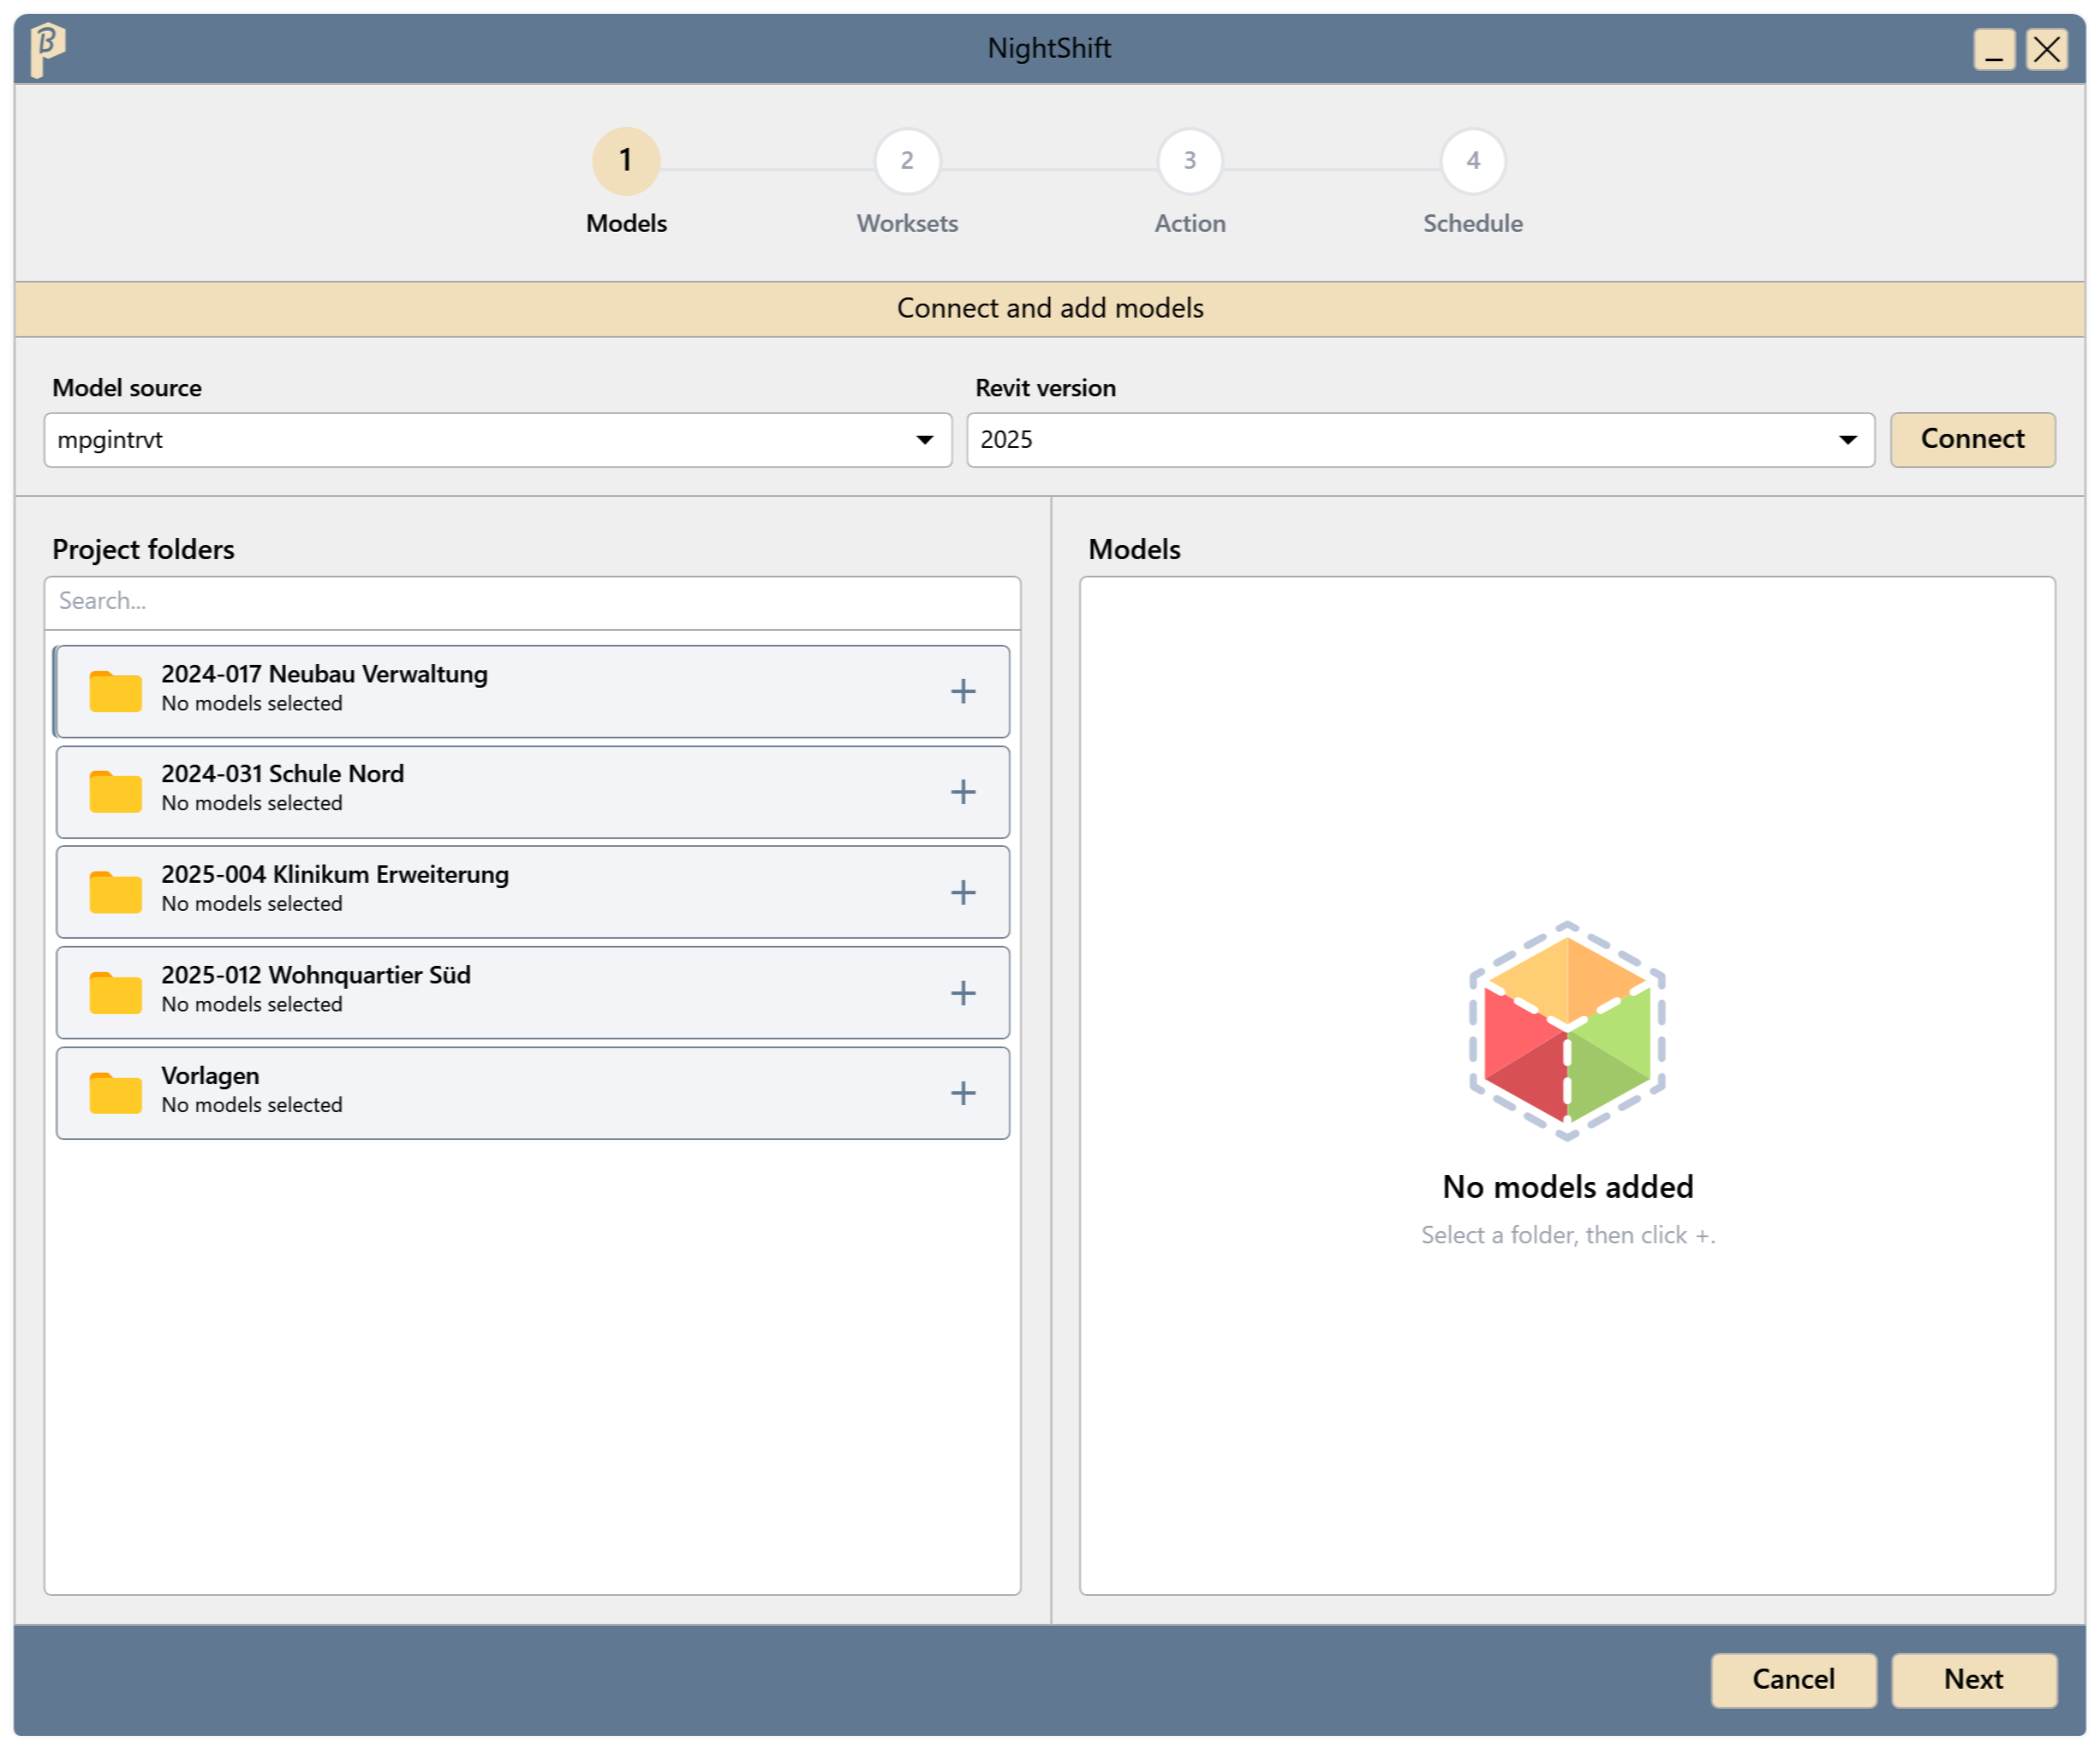
Fig. 2 · Models step – Connect Under Project folders, choose a folder, then click +, check the models in the Select Models for Project window (or Select All) and click Apply. You can add models from several project folders one after another; the trash can in the row removes a model again.
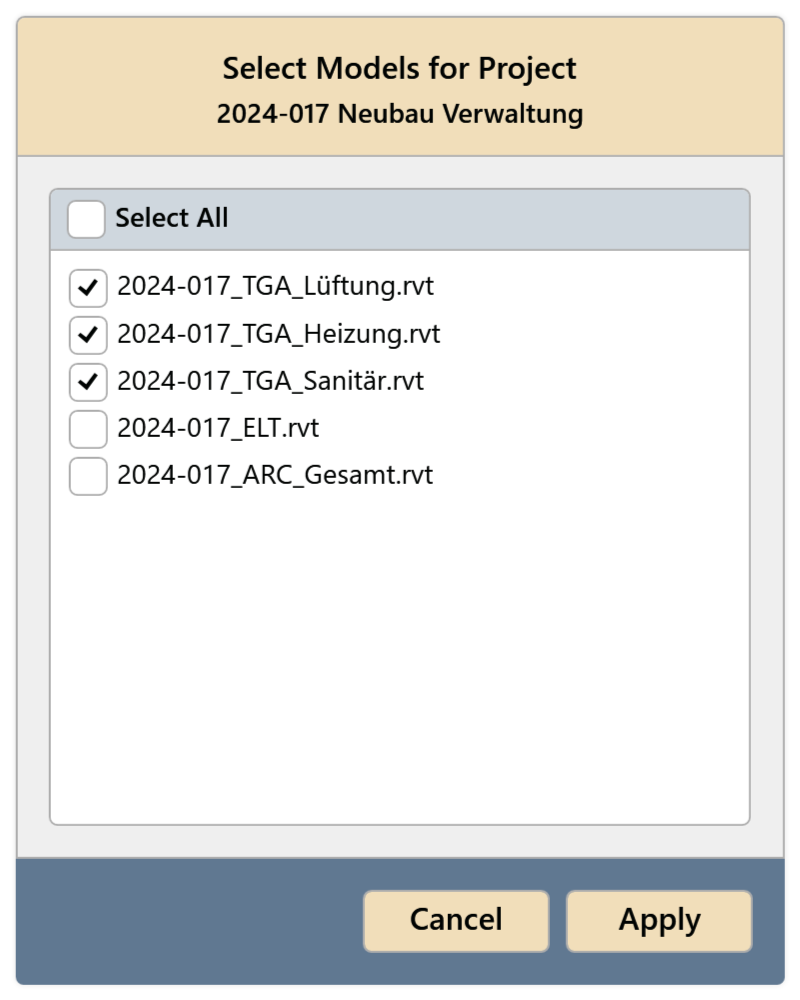
Fig. 3 · Select Models for Project Worksets step: for each model, set which worksets are opened:
- Close All Worksets
- Keep All Open
- Keep only Selected Open – then click + in the model's row and set the worksets (see below). The arrow icon (Refresh worksets) reads the model's worksets again; on the right are the worksets of the selected model, the trash can removes one.
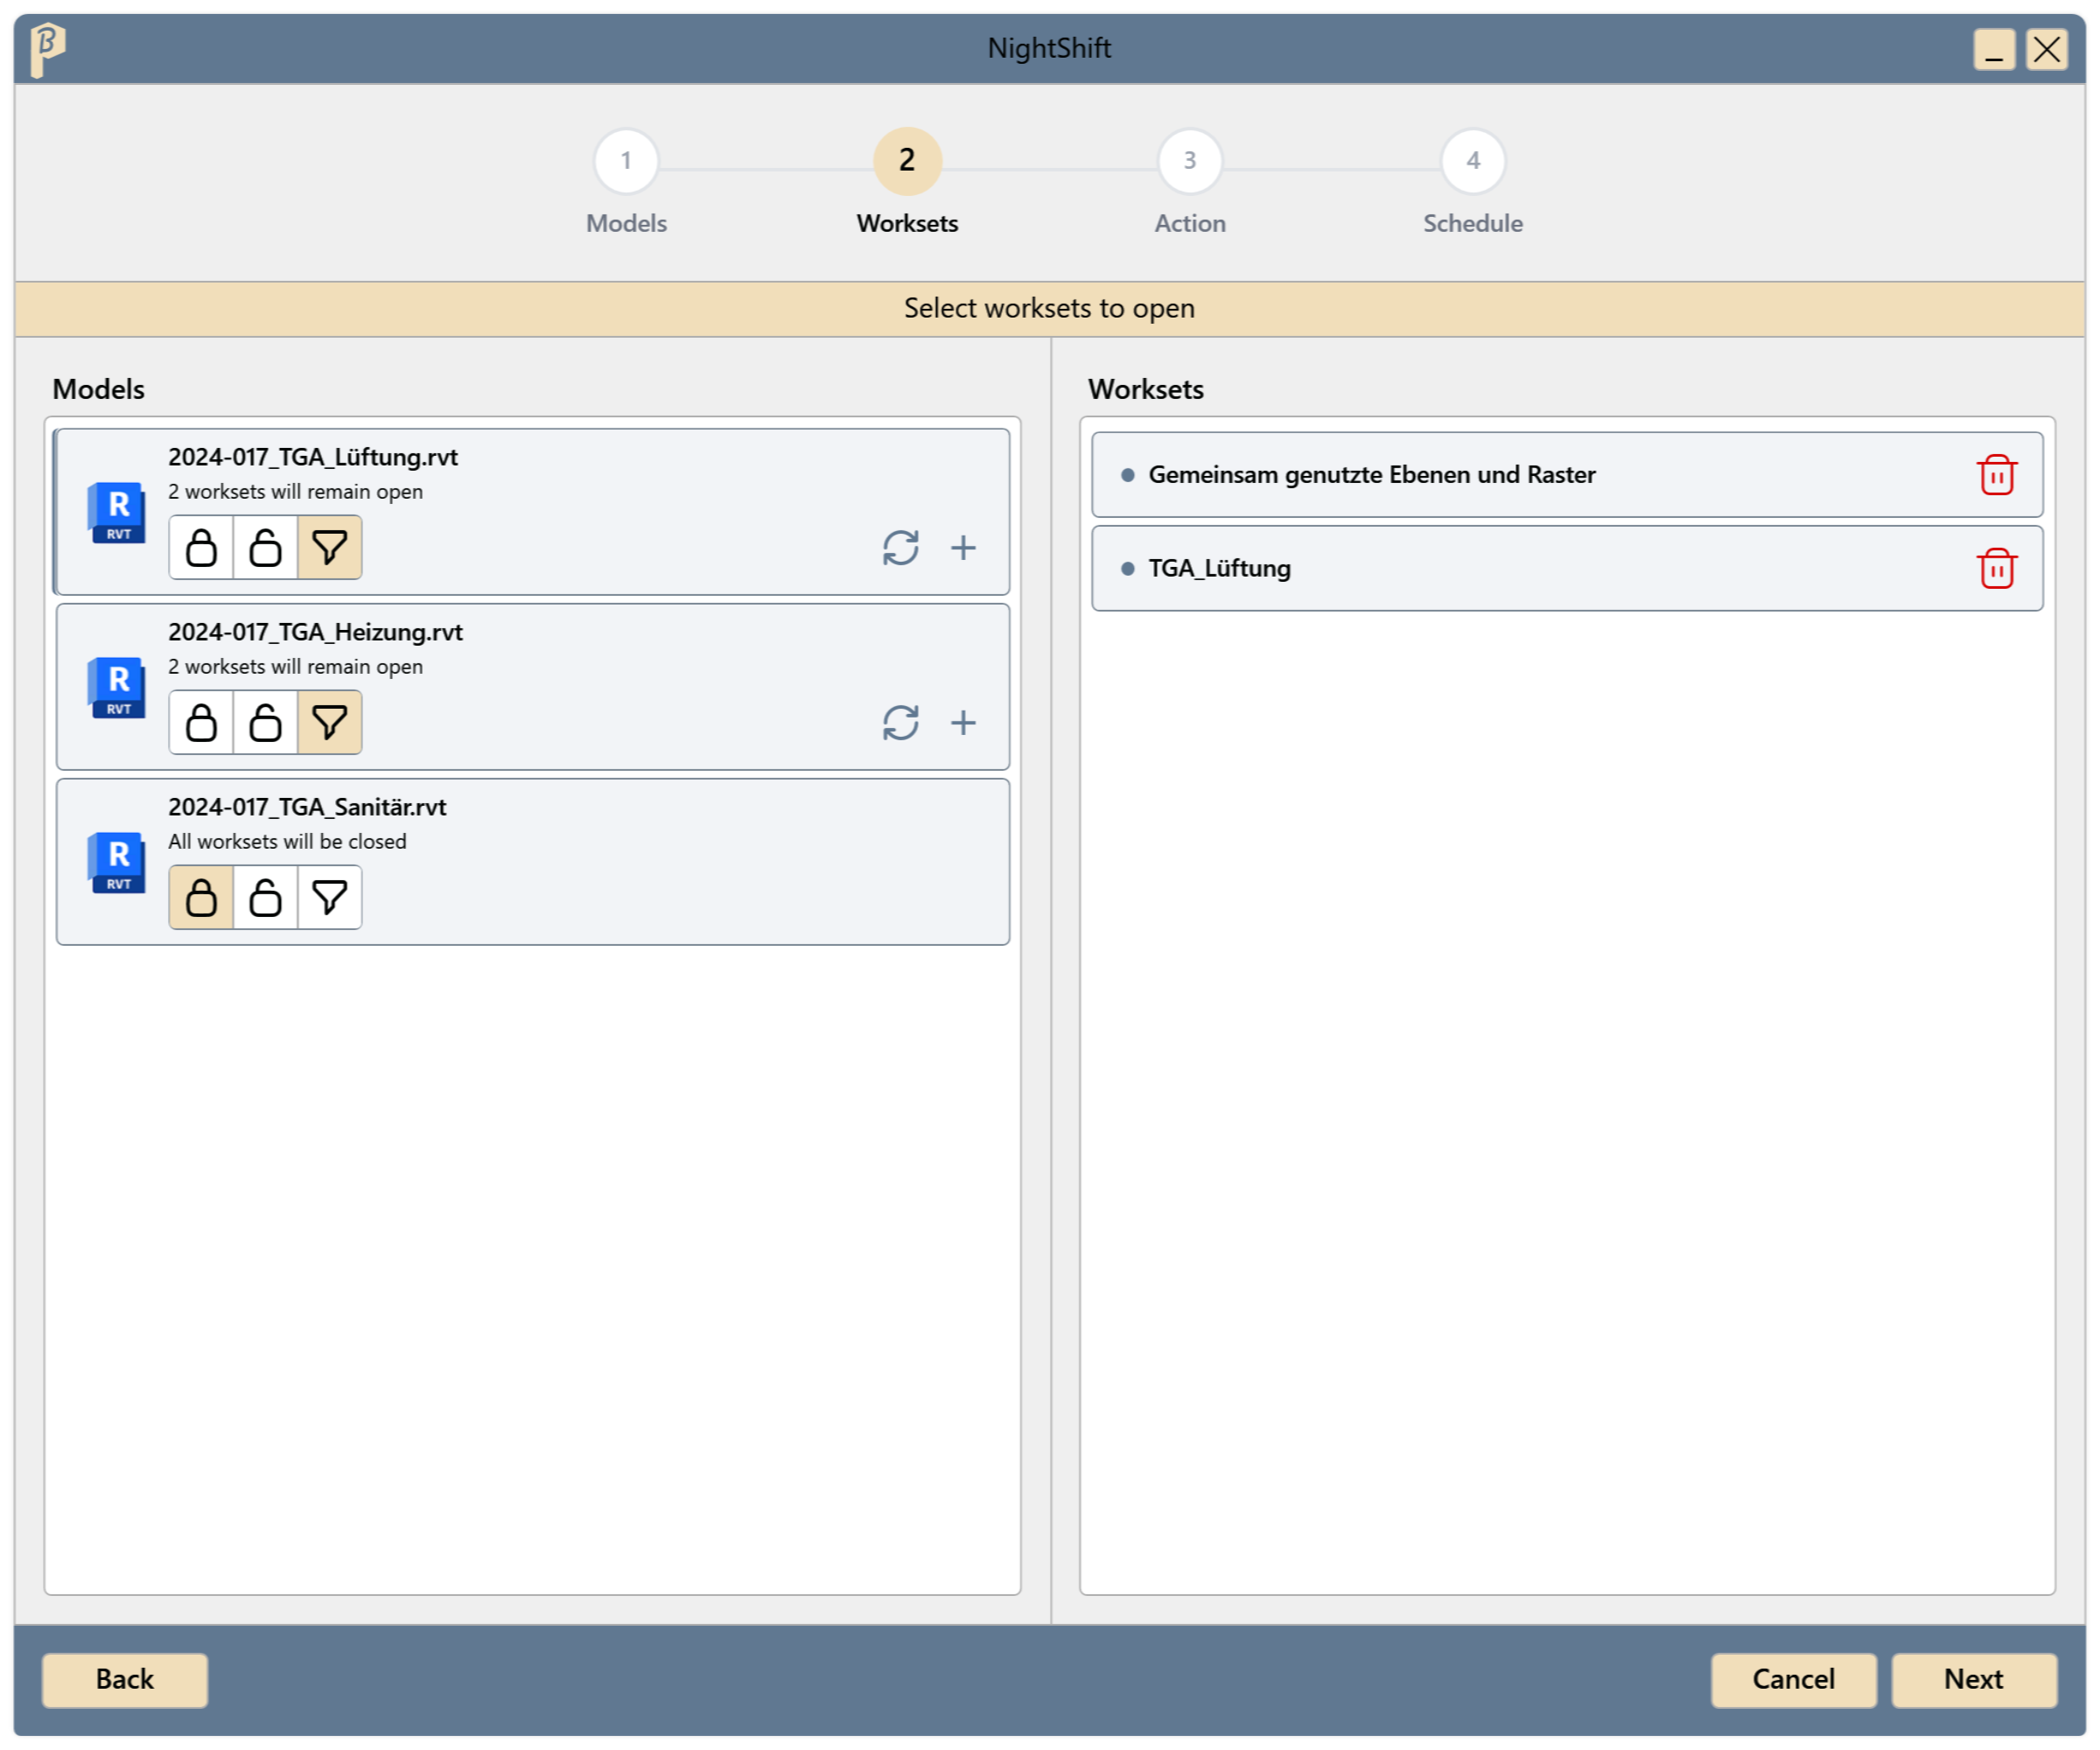
Fig. 4 · Worksets step What the Select worksets to keep open window shows depends on the Revit version:
Revit version of the model In the window same as the running Revit The model's worksets are loaded automatically. Check the ones you need (or Select All) and click Apply. a different one The worksets cannot be loaded. Under Add workset names, enter the names, one per line (or separated by commas or semicolons), and click Apply. 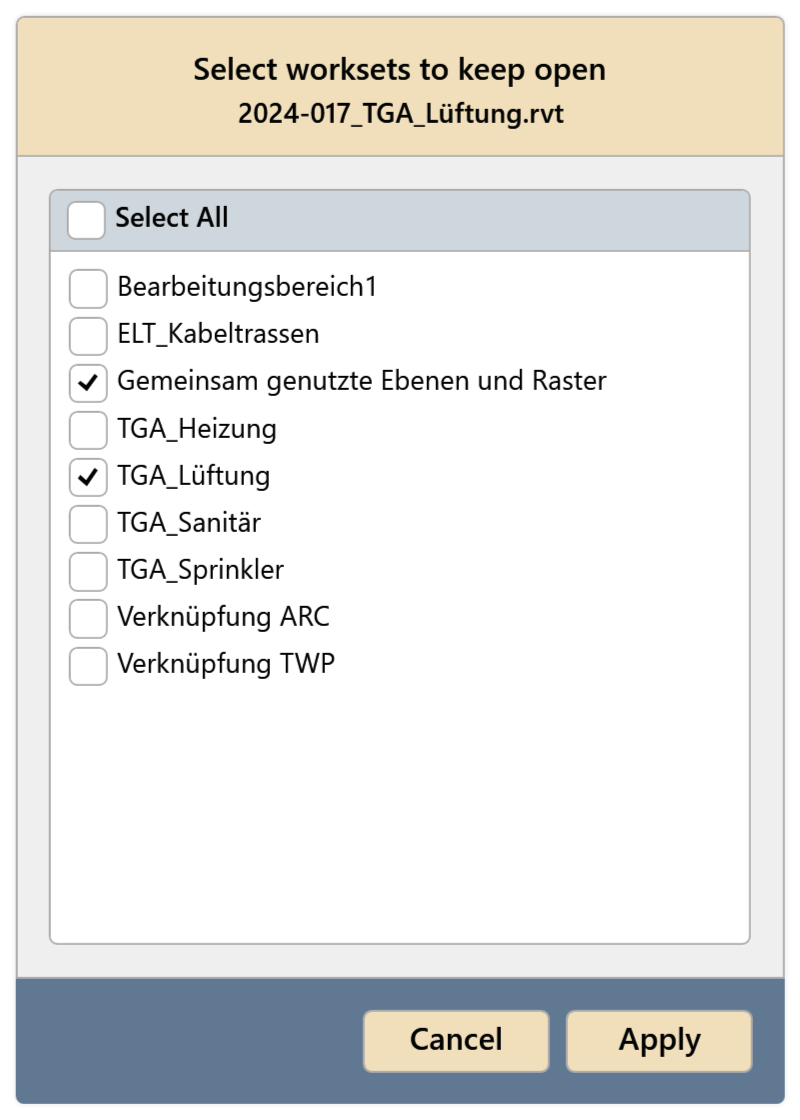
Fig. 5 · Same Revit version: check worksets in the loaded list 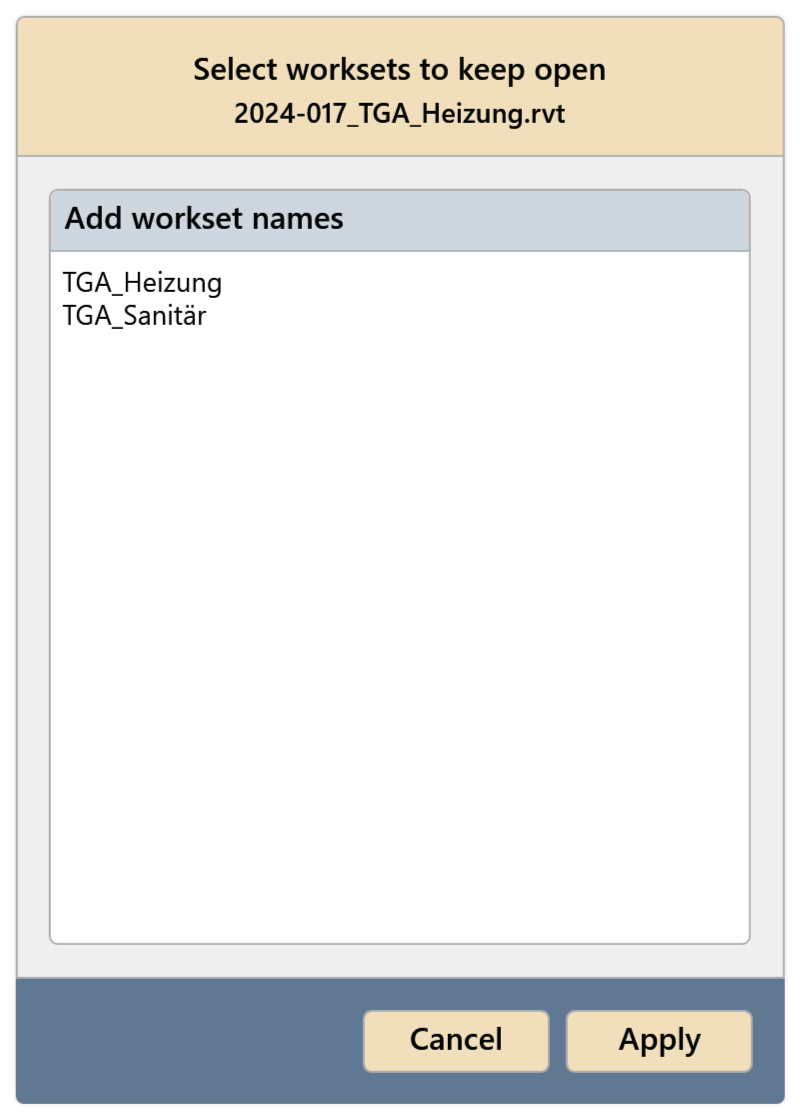
Fig. 6 · Different Revit version: enter the workset names Loading can take a while because the model is read in the background. The window does not have to stay open: the model's row shows “Loading worksets…”, and meanwhile you can continue setting up the other models and the next steps. Open the window again later and check the worksets. The job can only be saved once at least one workset is set for every model with Keep only Selected Open.
Action step: choose one of the four actions and fill in its settings (see Actions). A job has exactly one action.
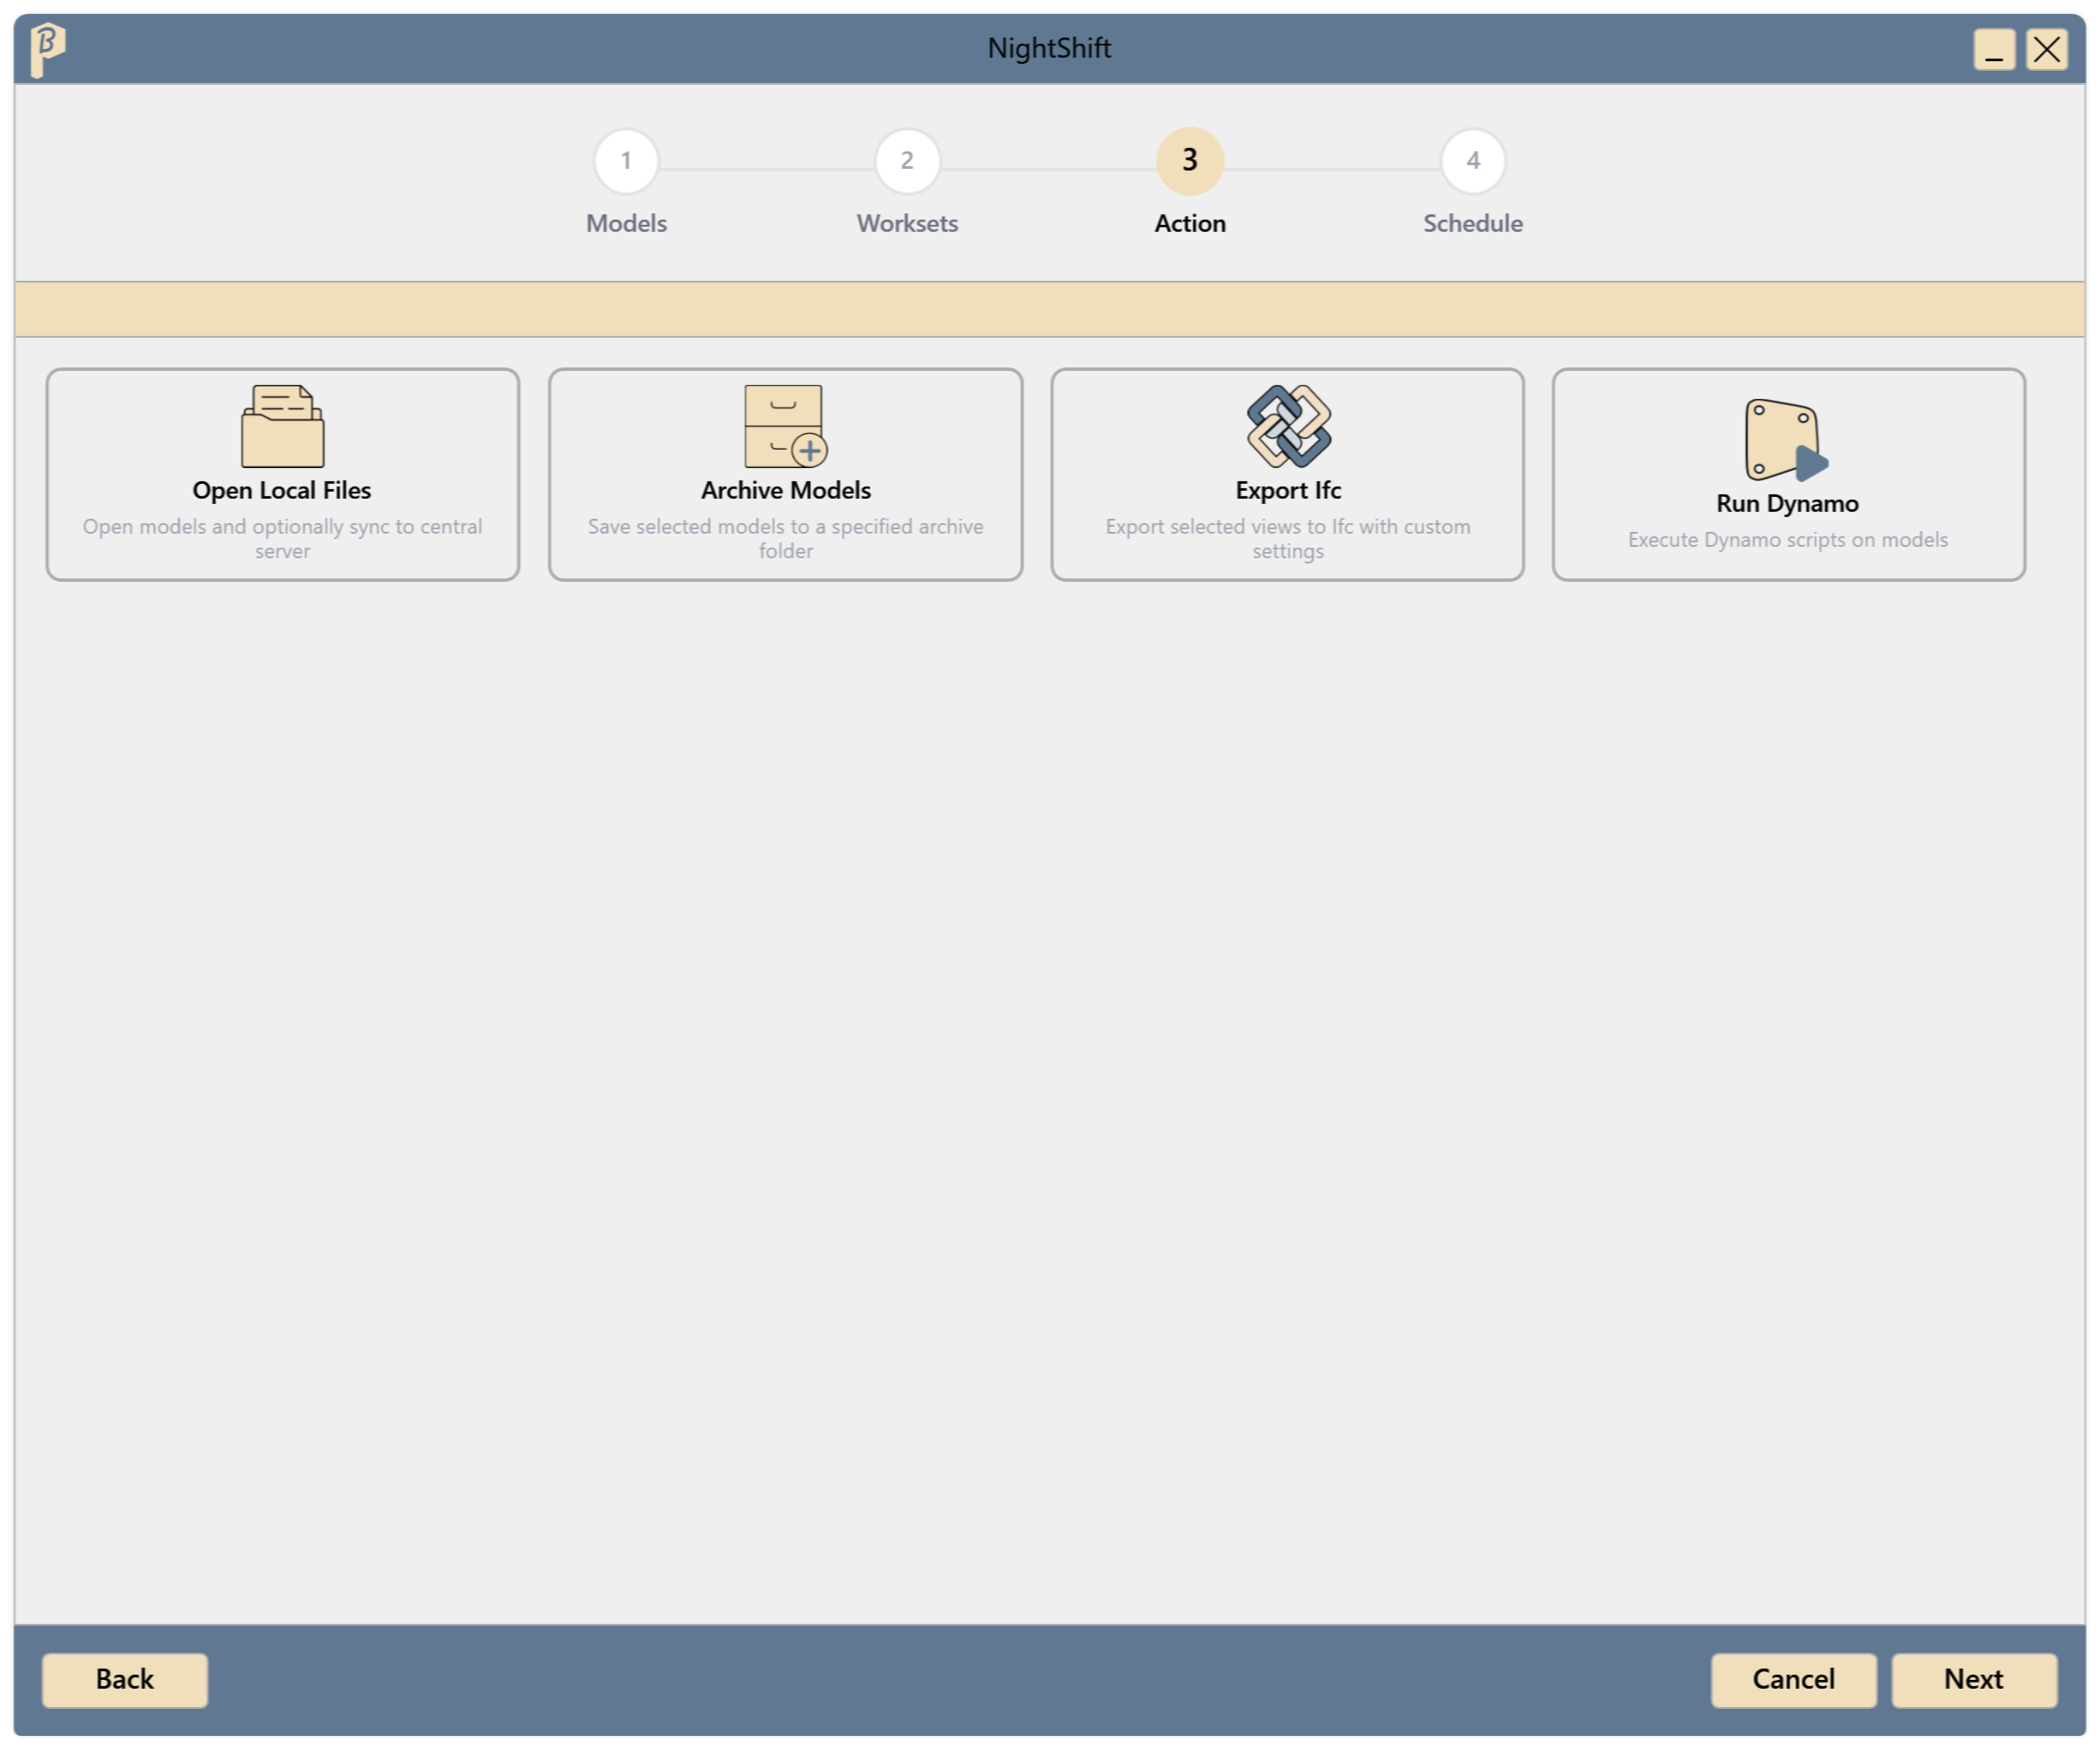
Fig. 7 · Action step Schedule step: under Job Details, enter a Job name and optionally a Description.
Choose the Frequency, then set the Start Date and Start Time. The start must be in the future.
Frequency Runs Once once at the start time Daily every day at the start time Weekly on the weekdays chosen under Repeat on Every two weeks every second week on the chosen weekdays Monthly every month on the day of the start date 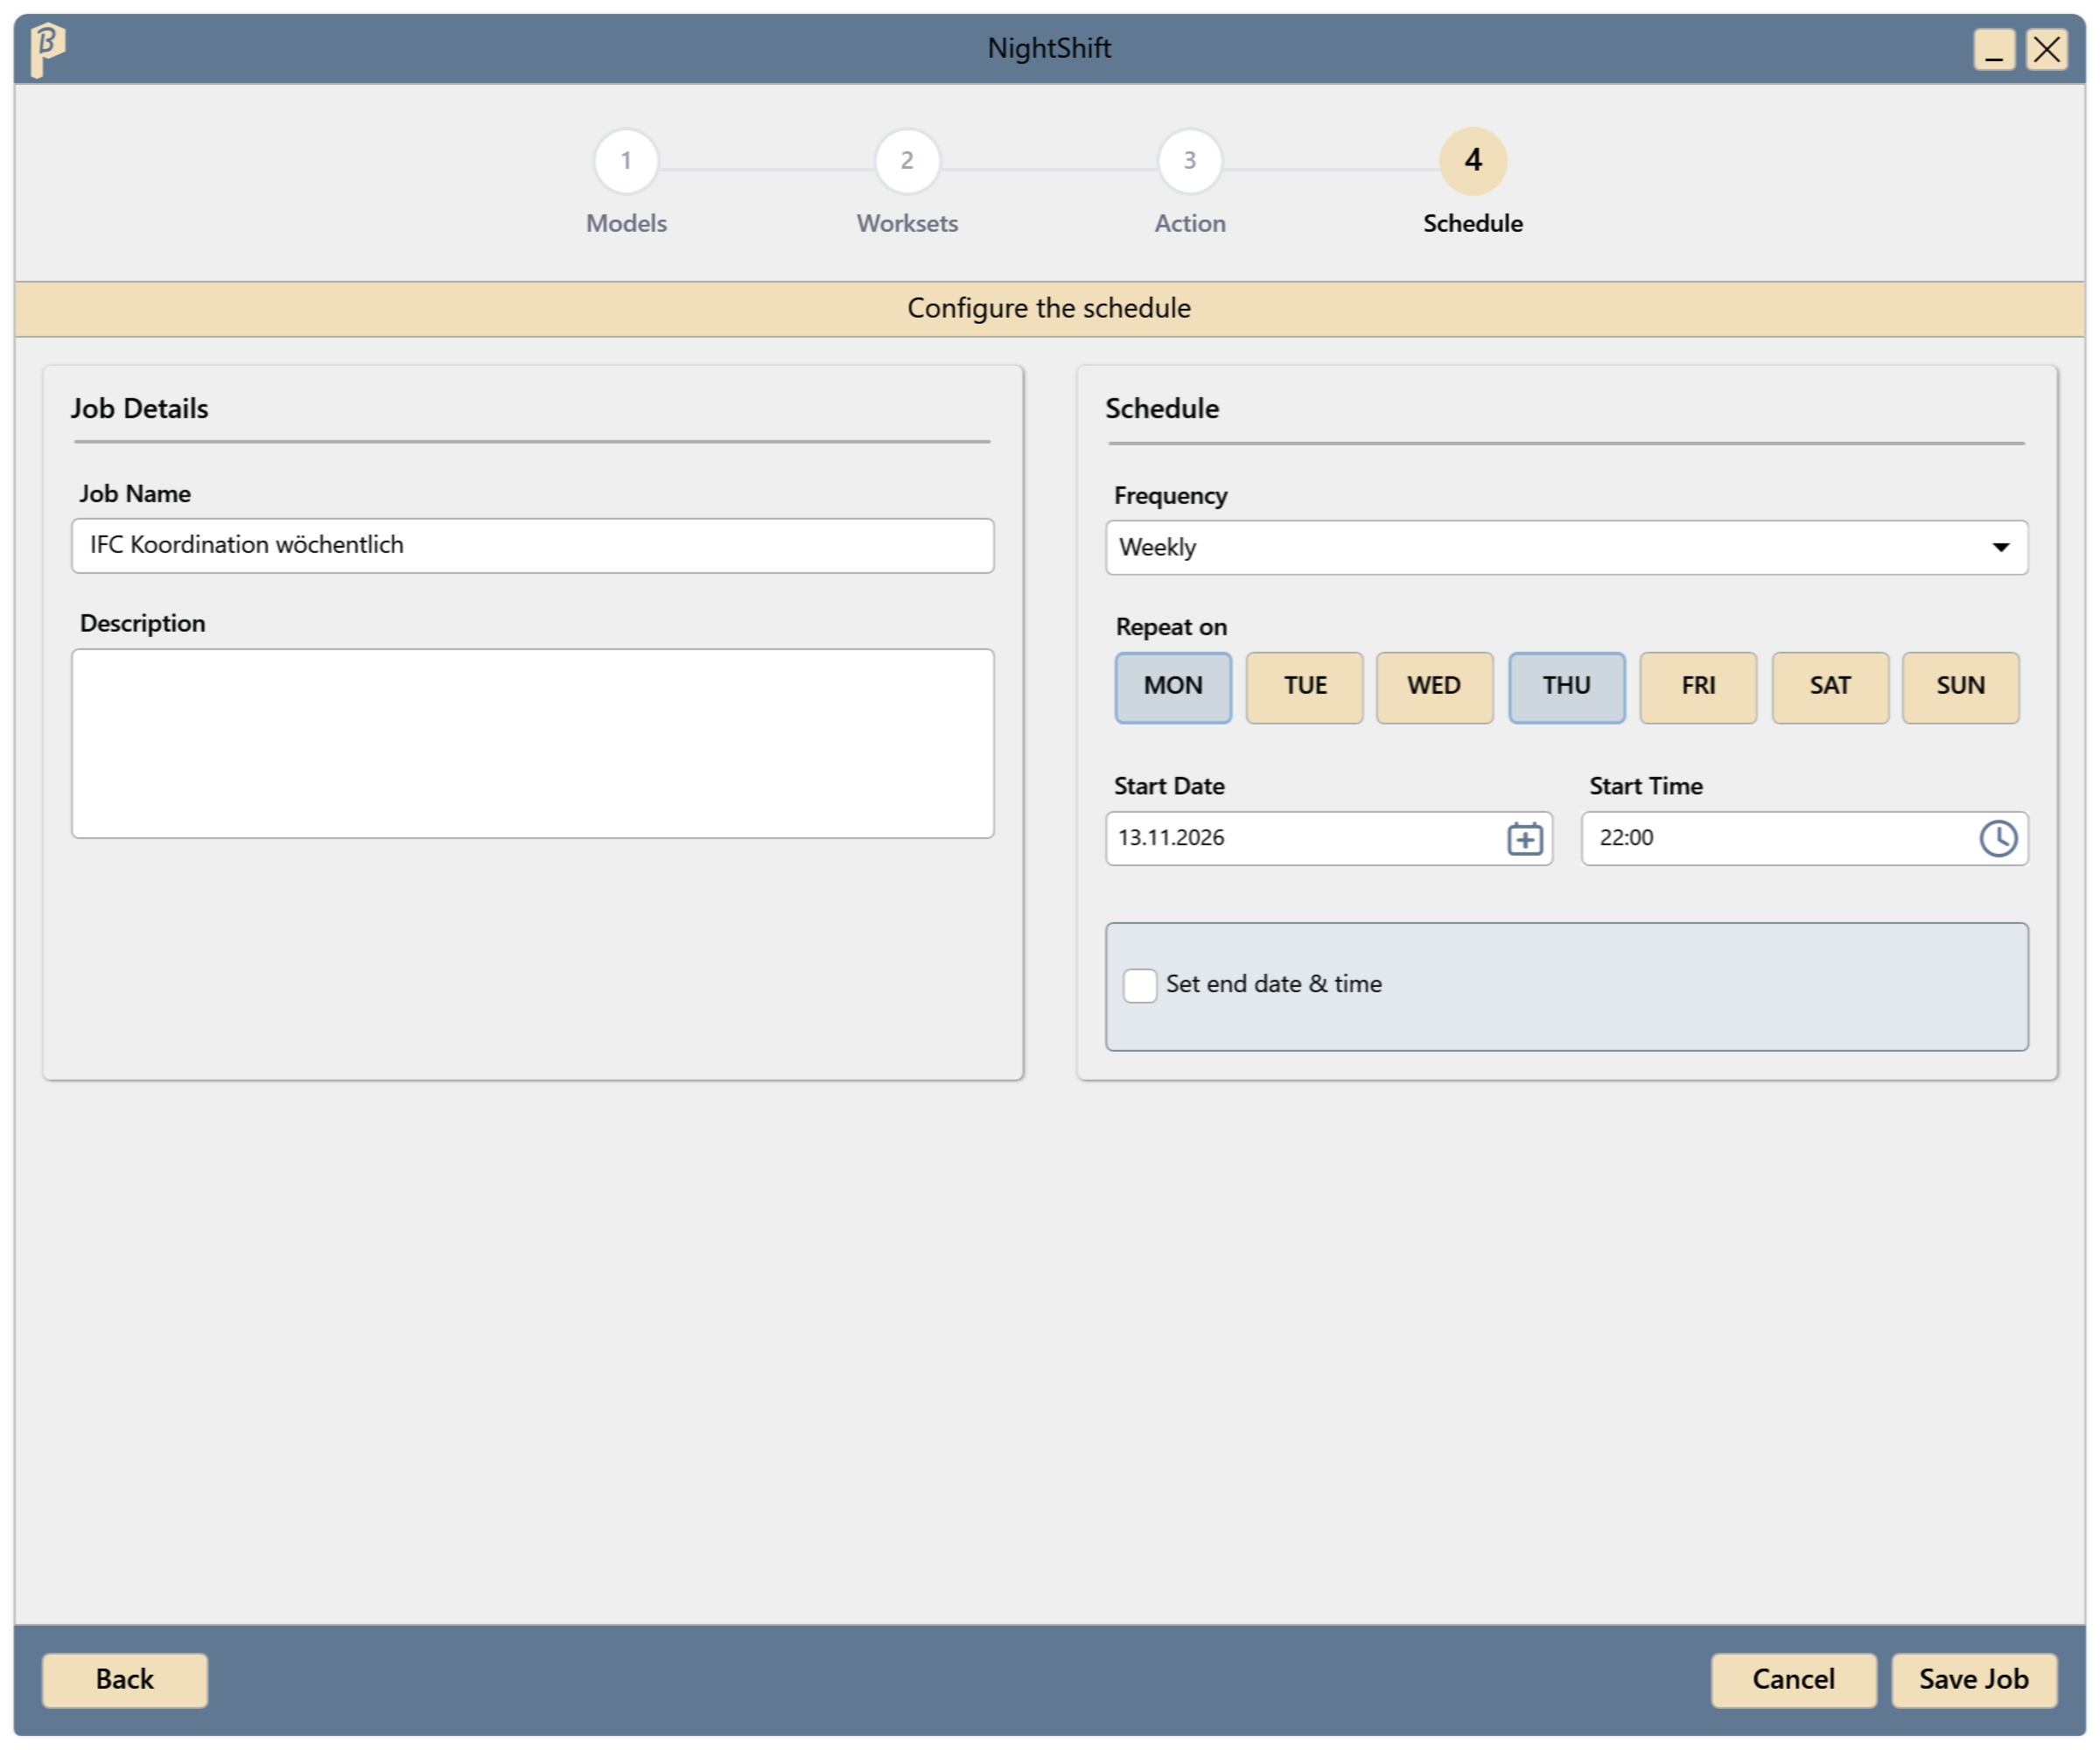
Fig. 8 · Schedule step Optionally turn on Set end date & time. The job then ends automatically. The end must be after the start.
Click Save Job. Use Back or click a step at the top to change earlier entries; Next checks each step before moving on.
The message “Task saved successfully.” appears. The job is registered in Windows Task Scheduler and visible in JobManager.
What happens during a run
At the scheduled time, NightShift starts Revit. If the job is already running, no second run is started.
The models are opened one after another, with the chosen worksets. A progress window shows the elapsed time, the current model, how many models are done and how many errors occurred. Cancel ends the run after the current step; models not yet started are skipped.
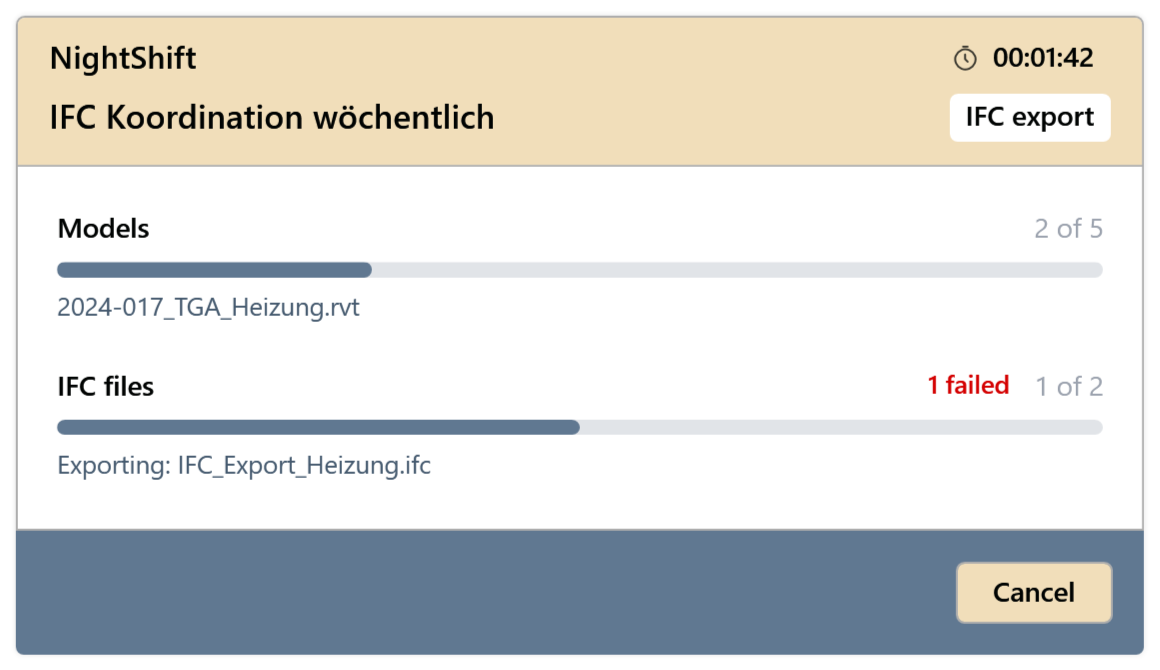
Fig. 9 · Progress window during a run At the end, NightShift shows a summary: Run finished, Run finished with issues or Run cancelled. It appears for Export Ifc, Run Dynamo and Archive Models, not for Open Local Files. Examples are on the action pages.
Every run is listed in JobManager under History, with the result per model and the log.
Limitations
- Existing jobs are checked, started, paused and deleted in JobManager. Only the schedule can be changed there; for other models or a different action, create a new job.
Common problems
“Revit Server not reachable”
The computer is not in the company network. Connect the VPN and click Connect again.
“Connection failed”
Check the model source and Revit version and connect again. For BIM360/ACC, complete the sign-in in the browser; after two minutes without an answer, NightShift gives up.
“Select at least one model.”
Add at least one model in the Models step.
“Enter a job name.”
Enter a job name in the Schedule step.
“Select a start date and time in the future.”
Set the start time to a later point.
“Select an end date and time after the start date and time.”
Set the end to a point after the start, or turn off Set end date & time.
“Select at least one weekday.”
For weekly frequencies, click at least one day under Repeat on.
“Select at least one workset.” / “Enter at least one workset name.”
With Keep only Selected Open, choose or enter worksets for each model.
“Failed to load worksets for this model. Try refreshing.”
Load them again with Refresh worksets.
“Select a task.”
Click one of the four actions in the Action step.
“Complete the selected task settings before continuing.”
Fill in the action's required fields, e.g. the archive folder or IFC settings file.