 PluBIM Help

TableSync
Create and update drafting or legend views from Excel data.
- Ribbon group
- Data
- Version
- PluBIM 1.5.0
TableSync brings a range from an Excel file into the model as a drafting view or legend and keeps the view up to date with the file.
When to use it
| You want to … | How |
|---|---|
| Show an Excel table, e.g. a legend or overview, on sheets | Add a table |
| Bring the view up to date after changes in Excel | Update after changes |
| Change the worksheet, range, name or type of the view, redraw, unlink or delete the view | Manage a table |
| Edit element parameter values in Excel | Use DataSync |
Requirements
- The Excel file (.xlsx or .xls) is stored where everyone on the project can reach it, e.g. on the file server or in ACC.
The TableSync window
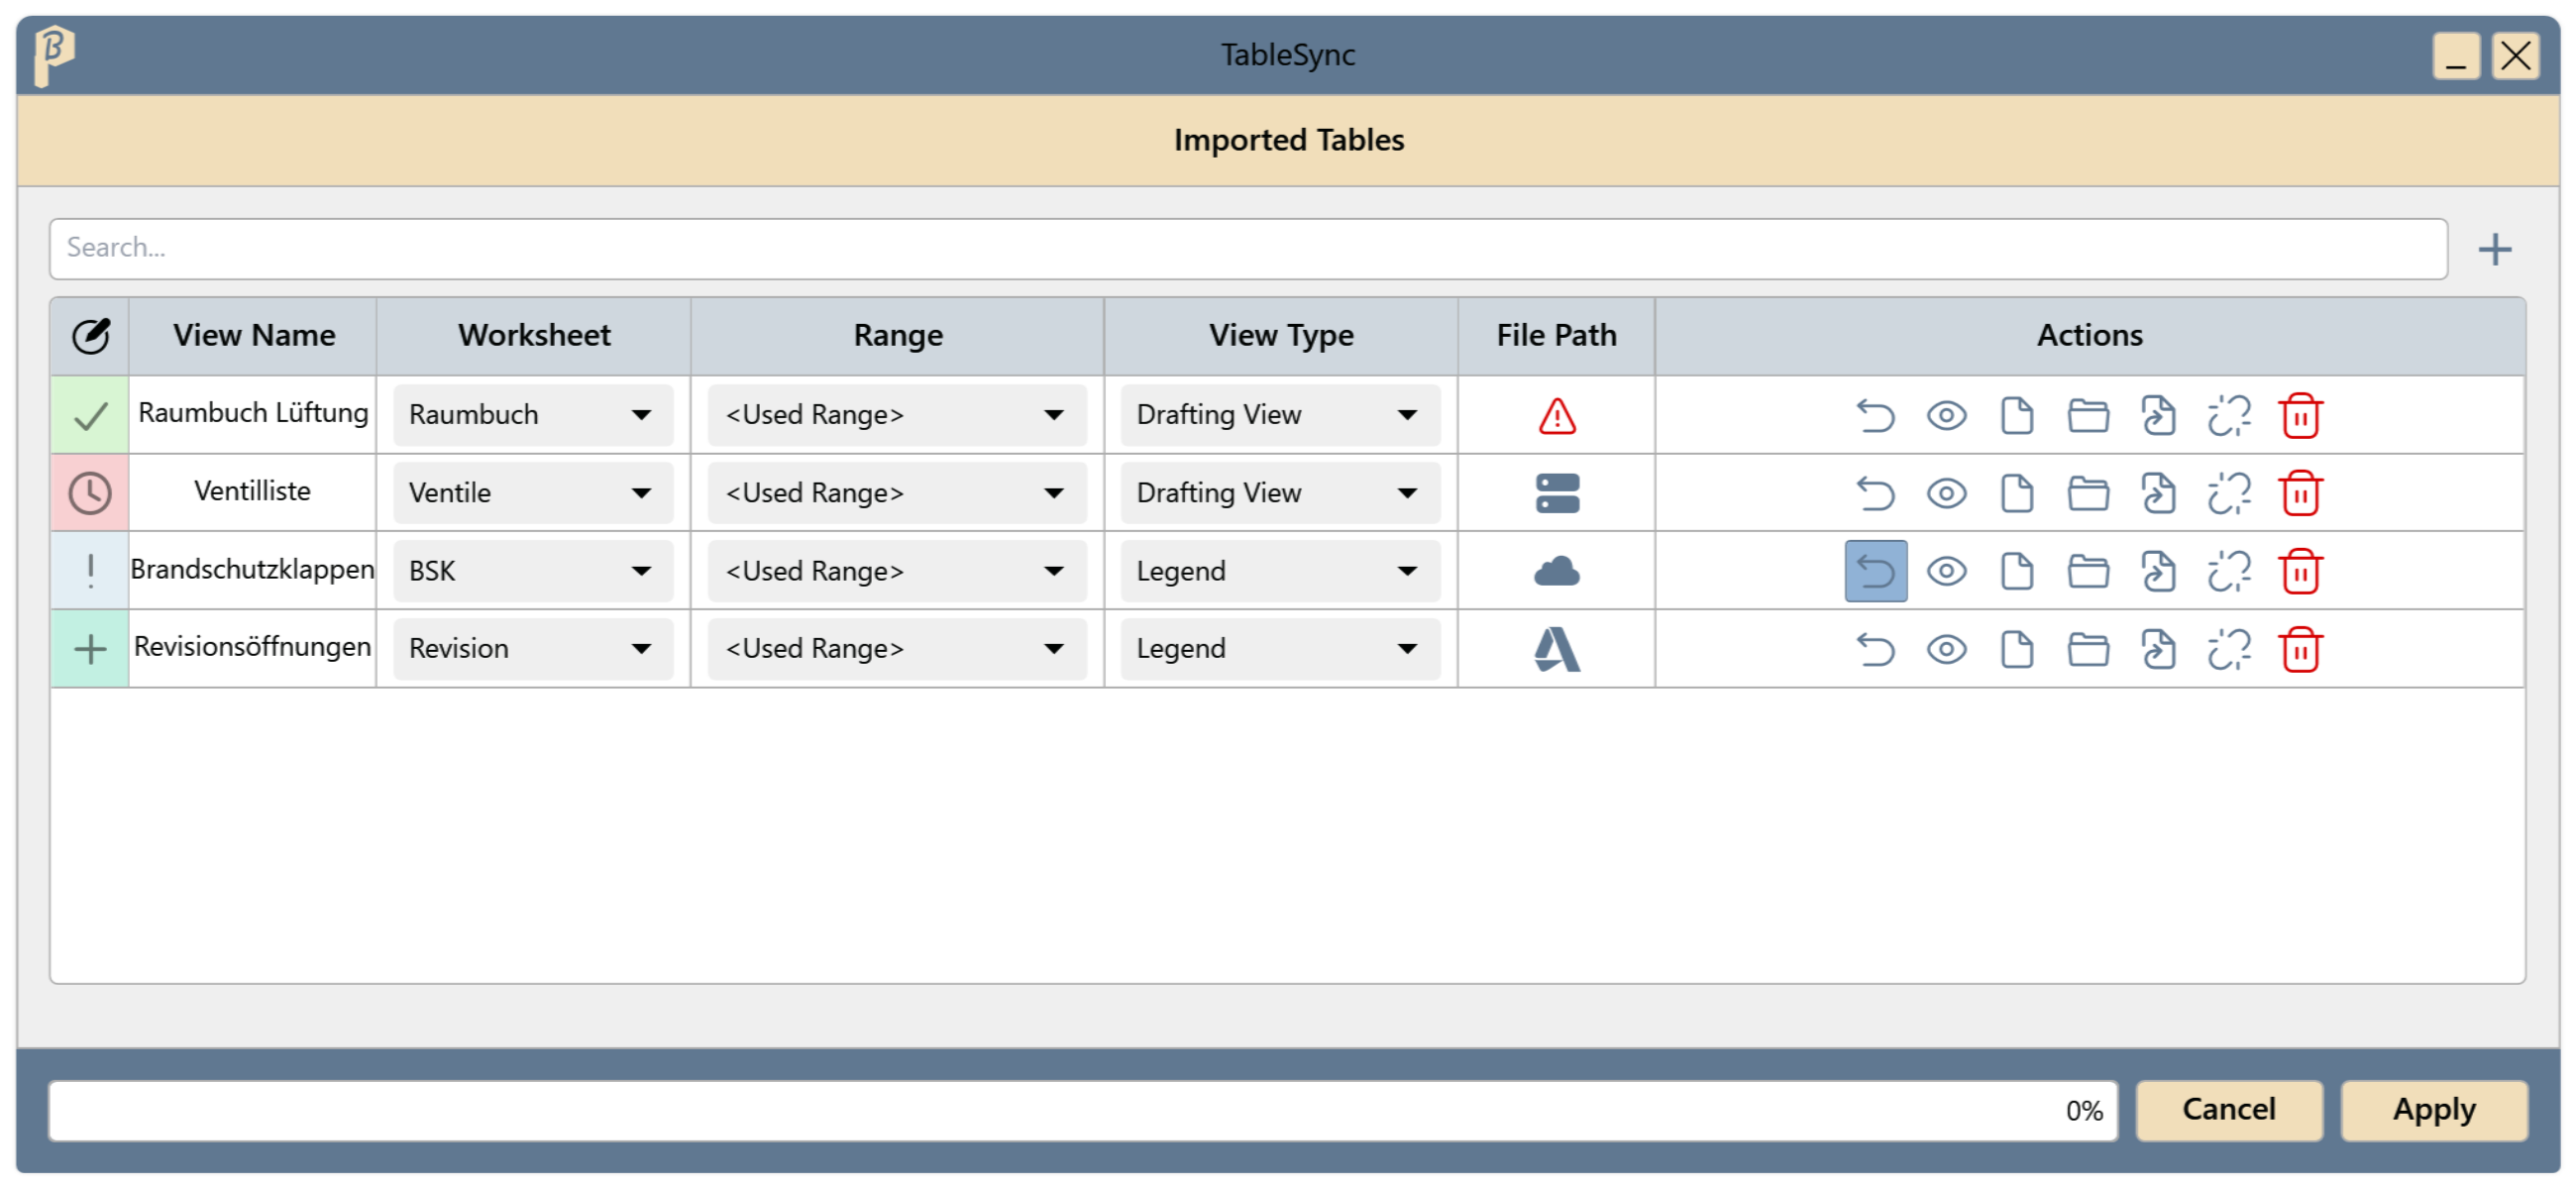
Under Imported Tables, each table in the model has one row:
- Status: icon at the start of the row; the tooltip names the state (see Table status).
- View Name, Worksheet, Range and View Type can be changed directly in the row.
- File Path: icon for where the Excel file is stored: file server, OneDrive or ACC. A file on your own computer shows a red warning icon because others cannot reach it. The tooltip shows the full path.
- Actions, the icons from left to right: Reset, Open View, Open Excel File, Open folder, Change file path, Unlink and Delete.
Nothing in the window is written to the model until you click Apply. Cancel closes the window without changes.
Add a table
In the ribbon, click PluBIM › Data › TableSync.
Click Add Table (+). The Add Table window opens.
Under File Path, choose the Excel file. Worksheet shows the first worksheet, Range the used range.
Under Worksheet and Range, choose what to bring in. Range offers <Used Range> as well as the named ranges and Excel tables of the worksheet.
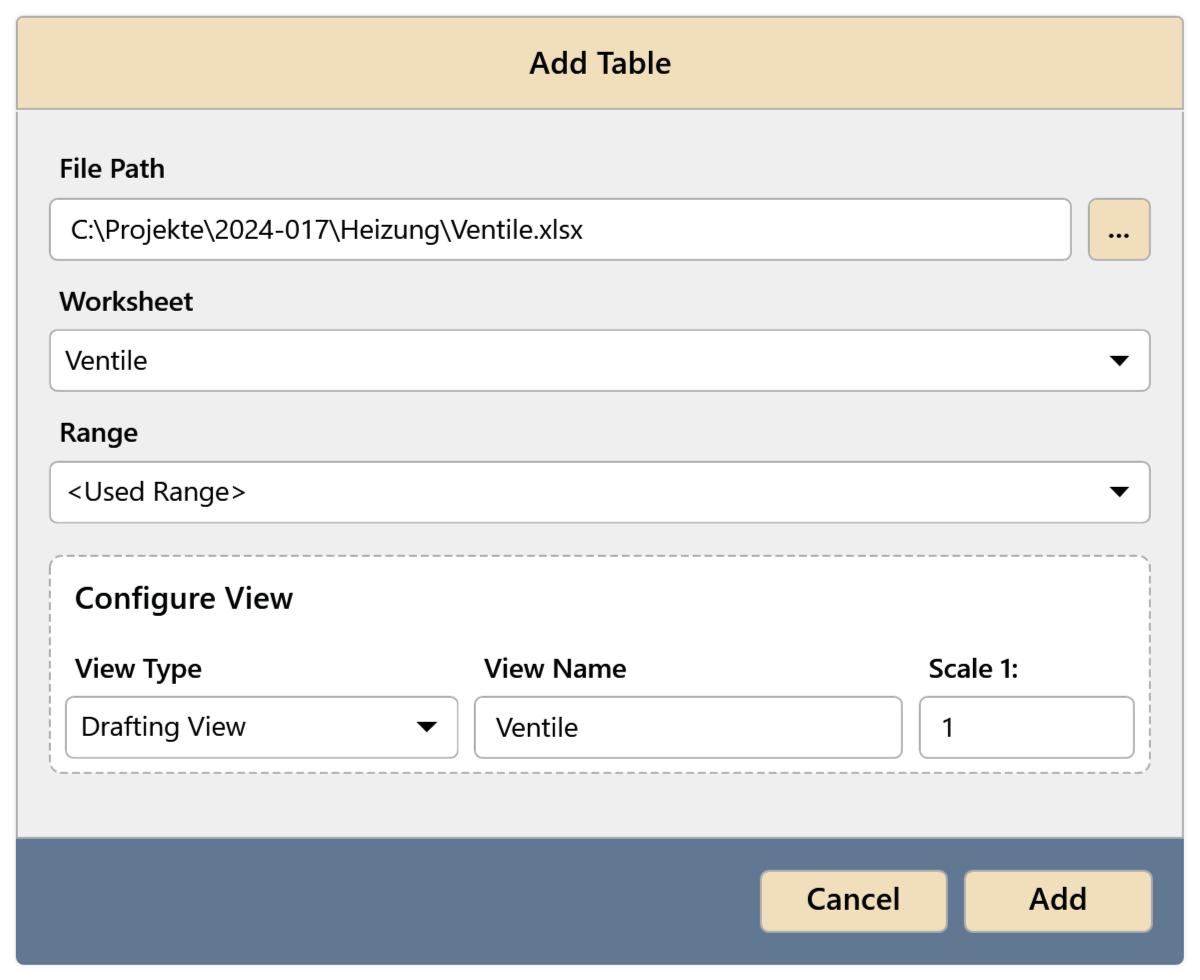
Fig. 2 · Add Table Under Configure View, choose the View Type: Drafting View or Legend.
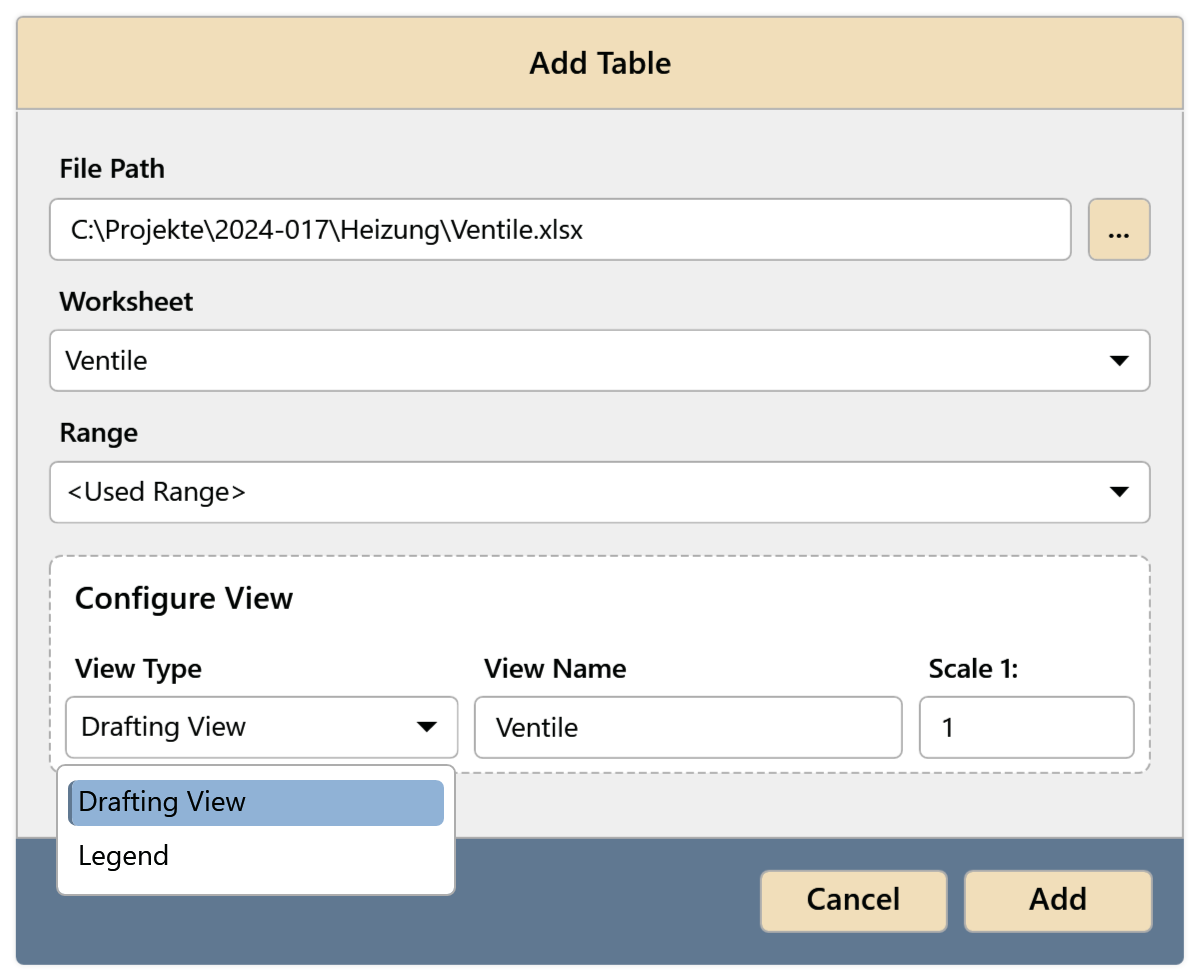
Fig. 3 · View type Check View Name and Scale 1:. The worksheet name is suggested; if a view with that name already exists, TableSync adds a number, e.g. “Valves 001”.
Click Add. The table appears in the list with the status “New Table to be added.”
Click Apply. The progress is shown at the bottom of the window.
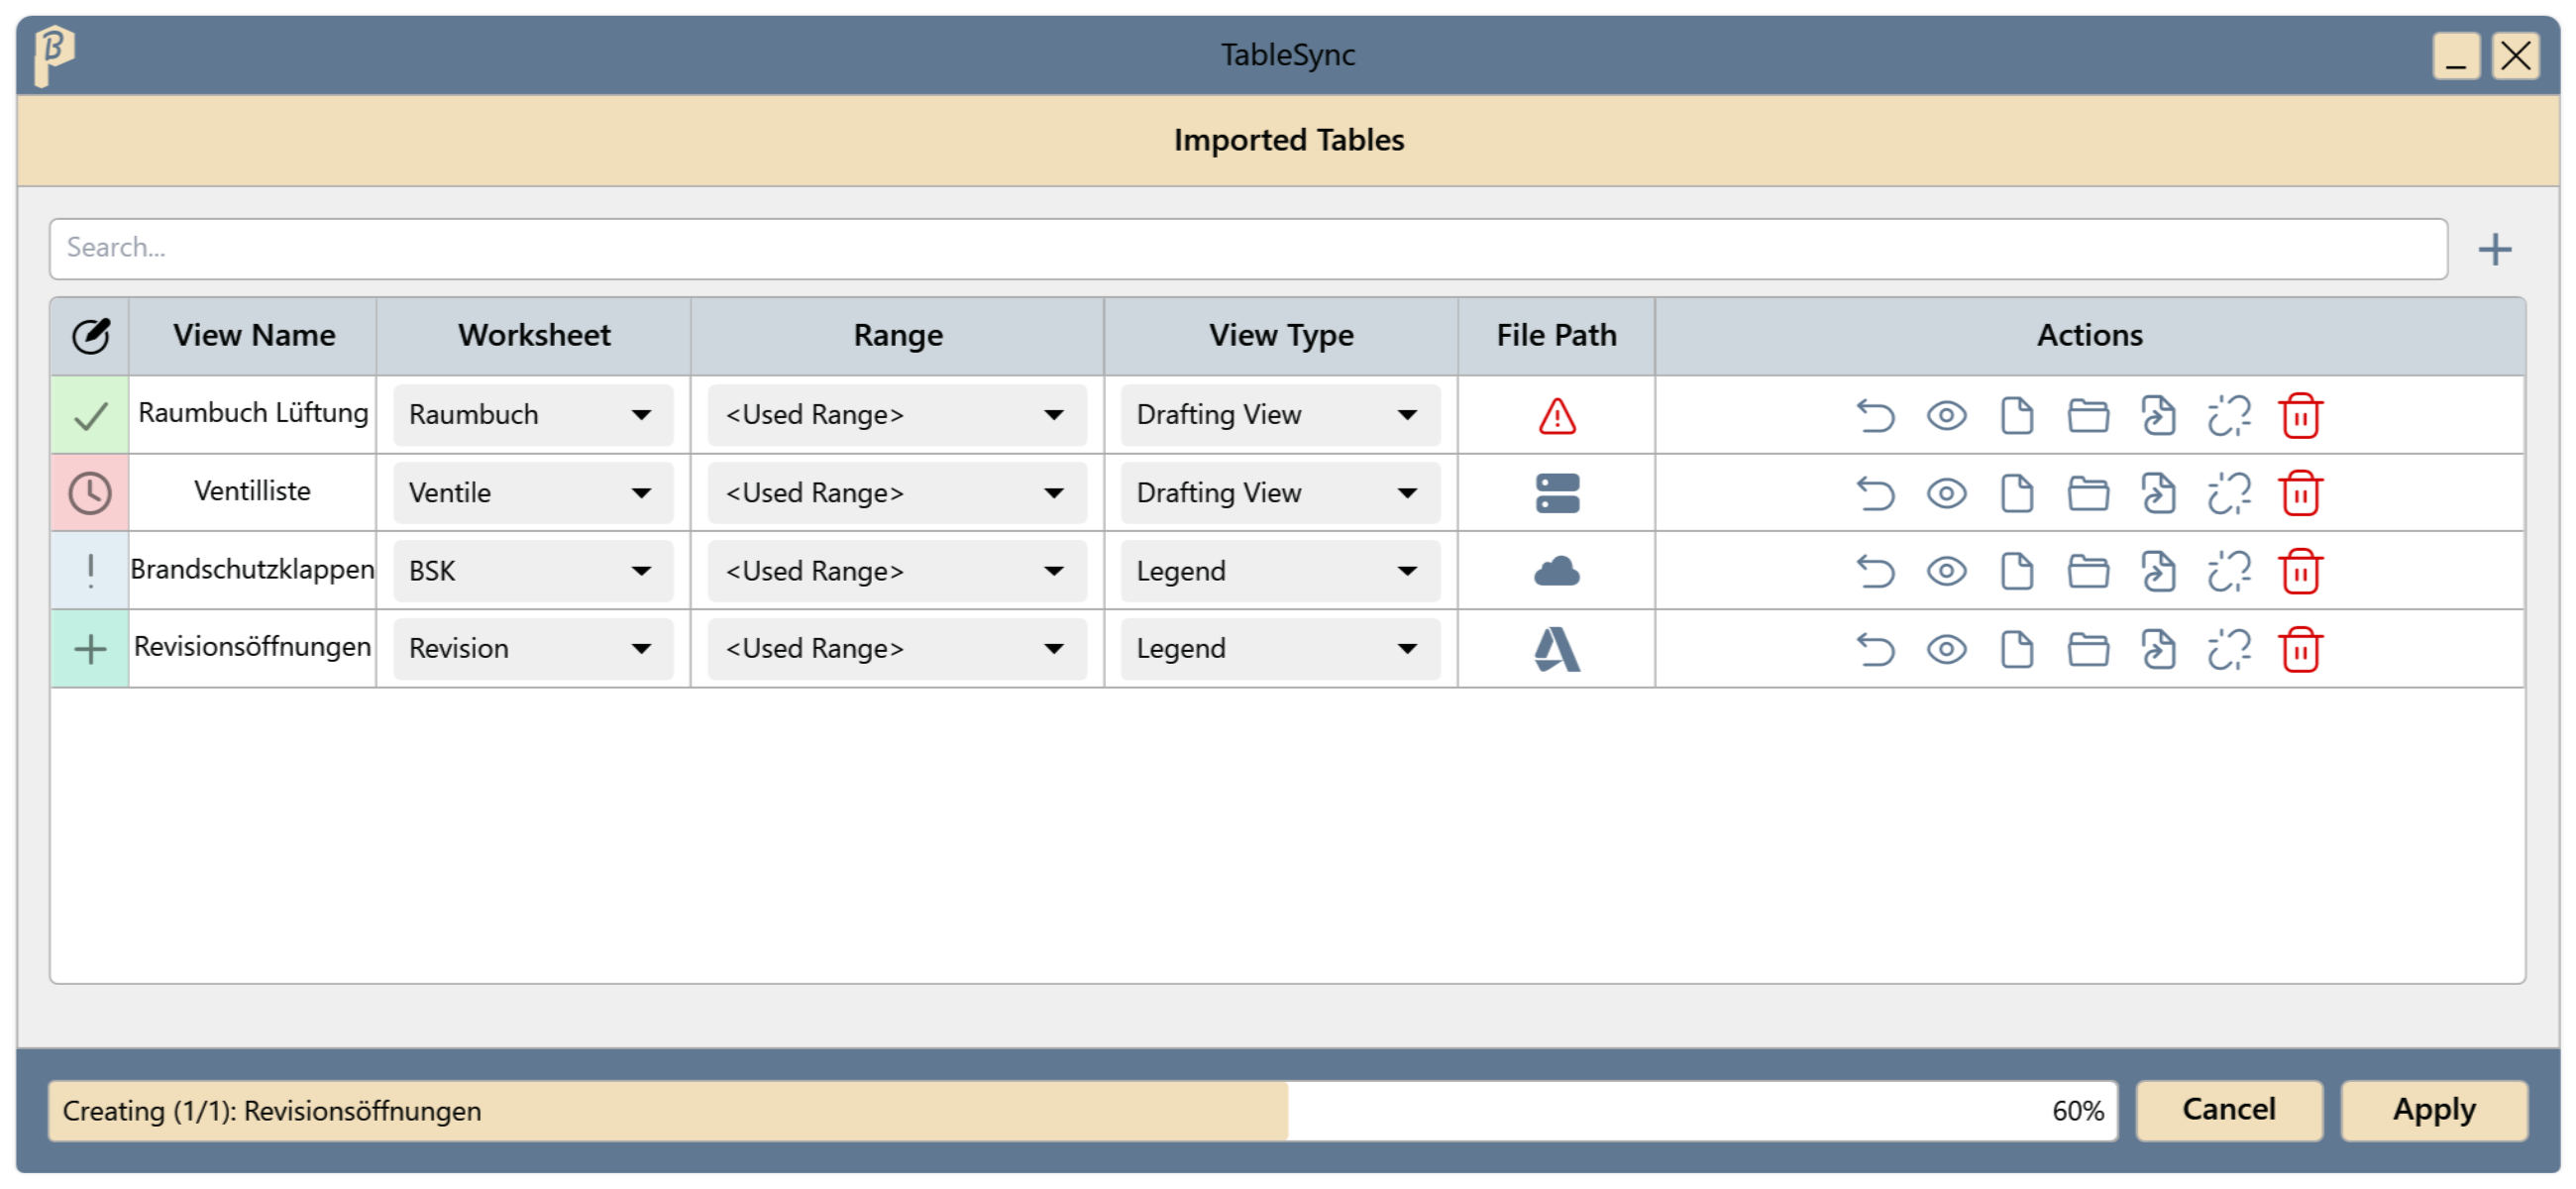
Fig. 4 · Apply in progress
The model has a new view with the Excel table. Text with font style and alignment, cell colors, borders, merged cells and images are carried over. Hidden rows and columns are left out of the view. The row shows “Table and View are synced.”
Update after changes
Change and save the Excel file.
Open TableSync. Tables whose file has changed since the last Apply show the clock icon with “Excel file changed since last apply.” (row “Excel changed” in Fig. 5). This also applies if the file is saved while TableSync is open.
Click Apply. All pending changes are applied.
The views show the current content of the Excel files.
If the scale of a view is changed in Revit, TableSync shows “View scale was changed.” Apply redraws the table at the new scale.
Manage a table
Change what is needed in the row:
- Worksheet or Range: the view is redrawn with the new content.
- View Name: the view is renamed.
- View Type: the view is deleted and created as the new type. You then have to place it on sheets again.
Or choose an action under Actions:
- Reset: redraws the view from the Excel file. Anything changed by hand in the view is lost.
- Change file path: opens Add Table (as in Fig. 2) to link a different Excel file.
- Unlink: the view stays, the link to the Excel file is removed.
- Delete: removes the row and the view.
Click Apply.
The changes are in the model. Unlinked and deleted tables disappear from the list.
Table status
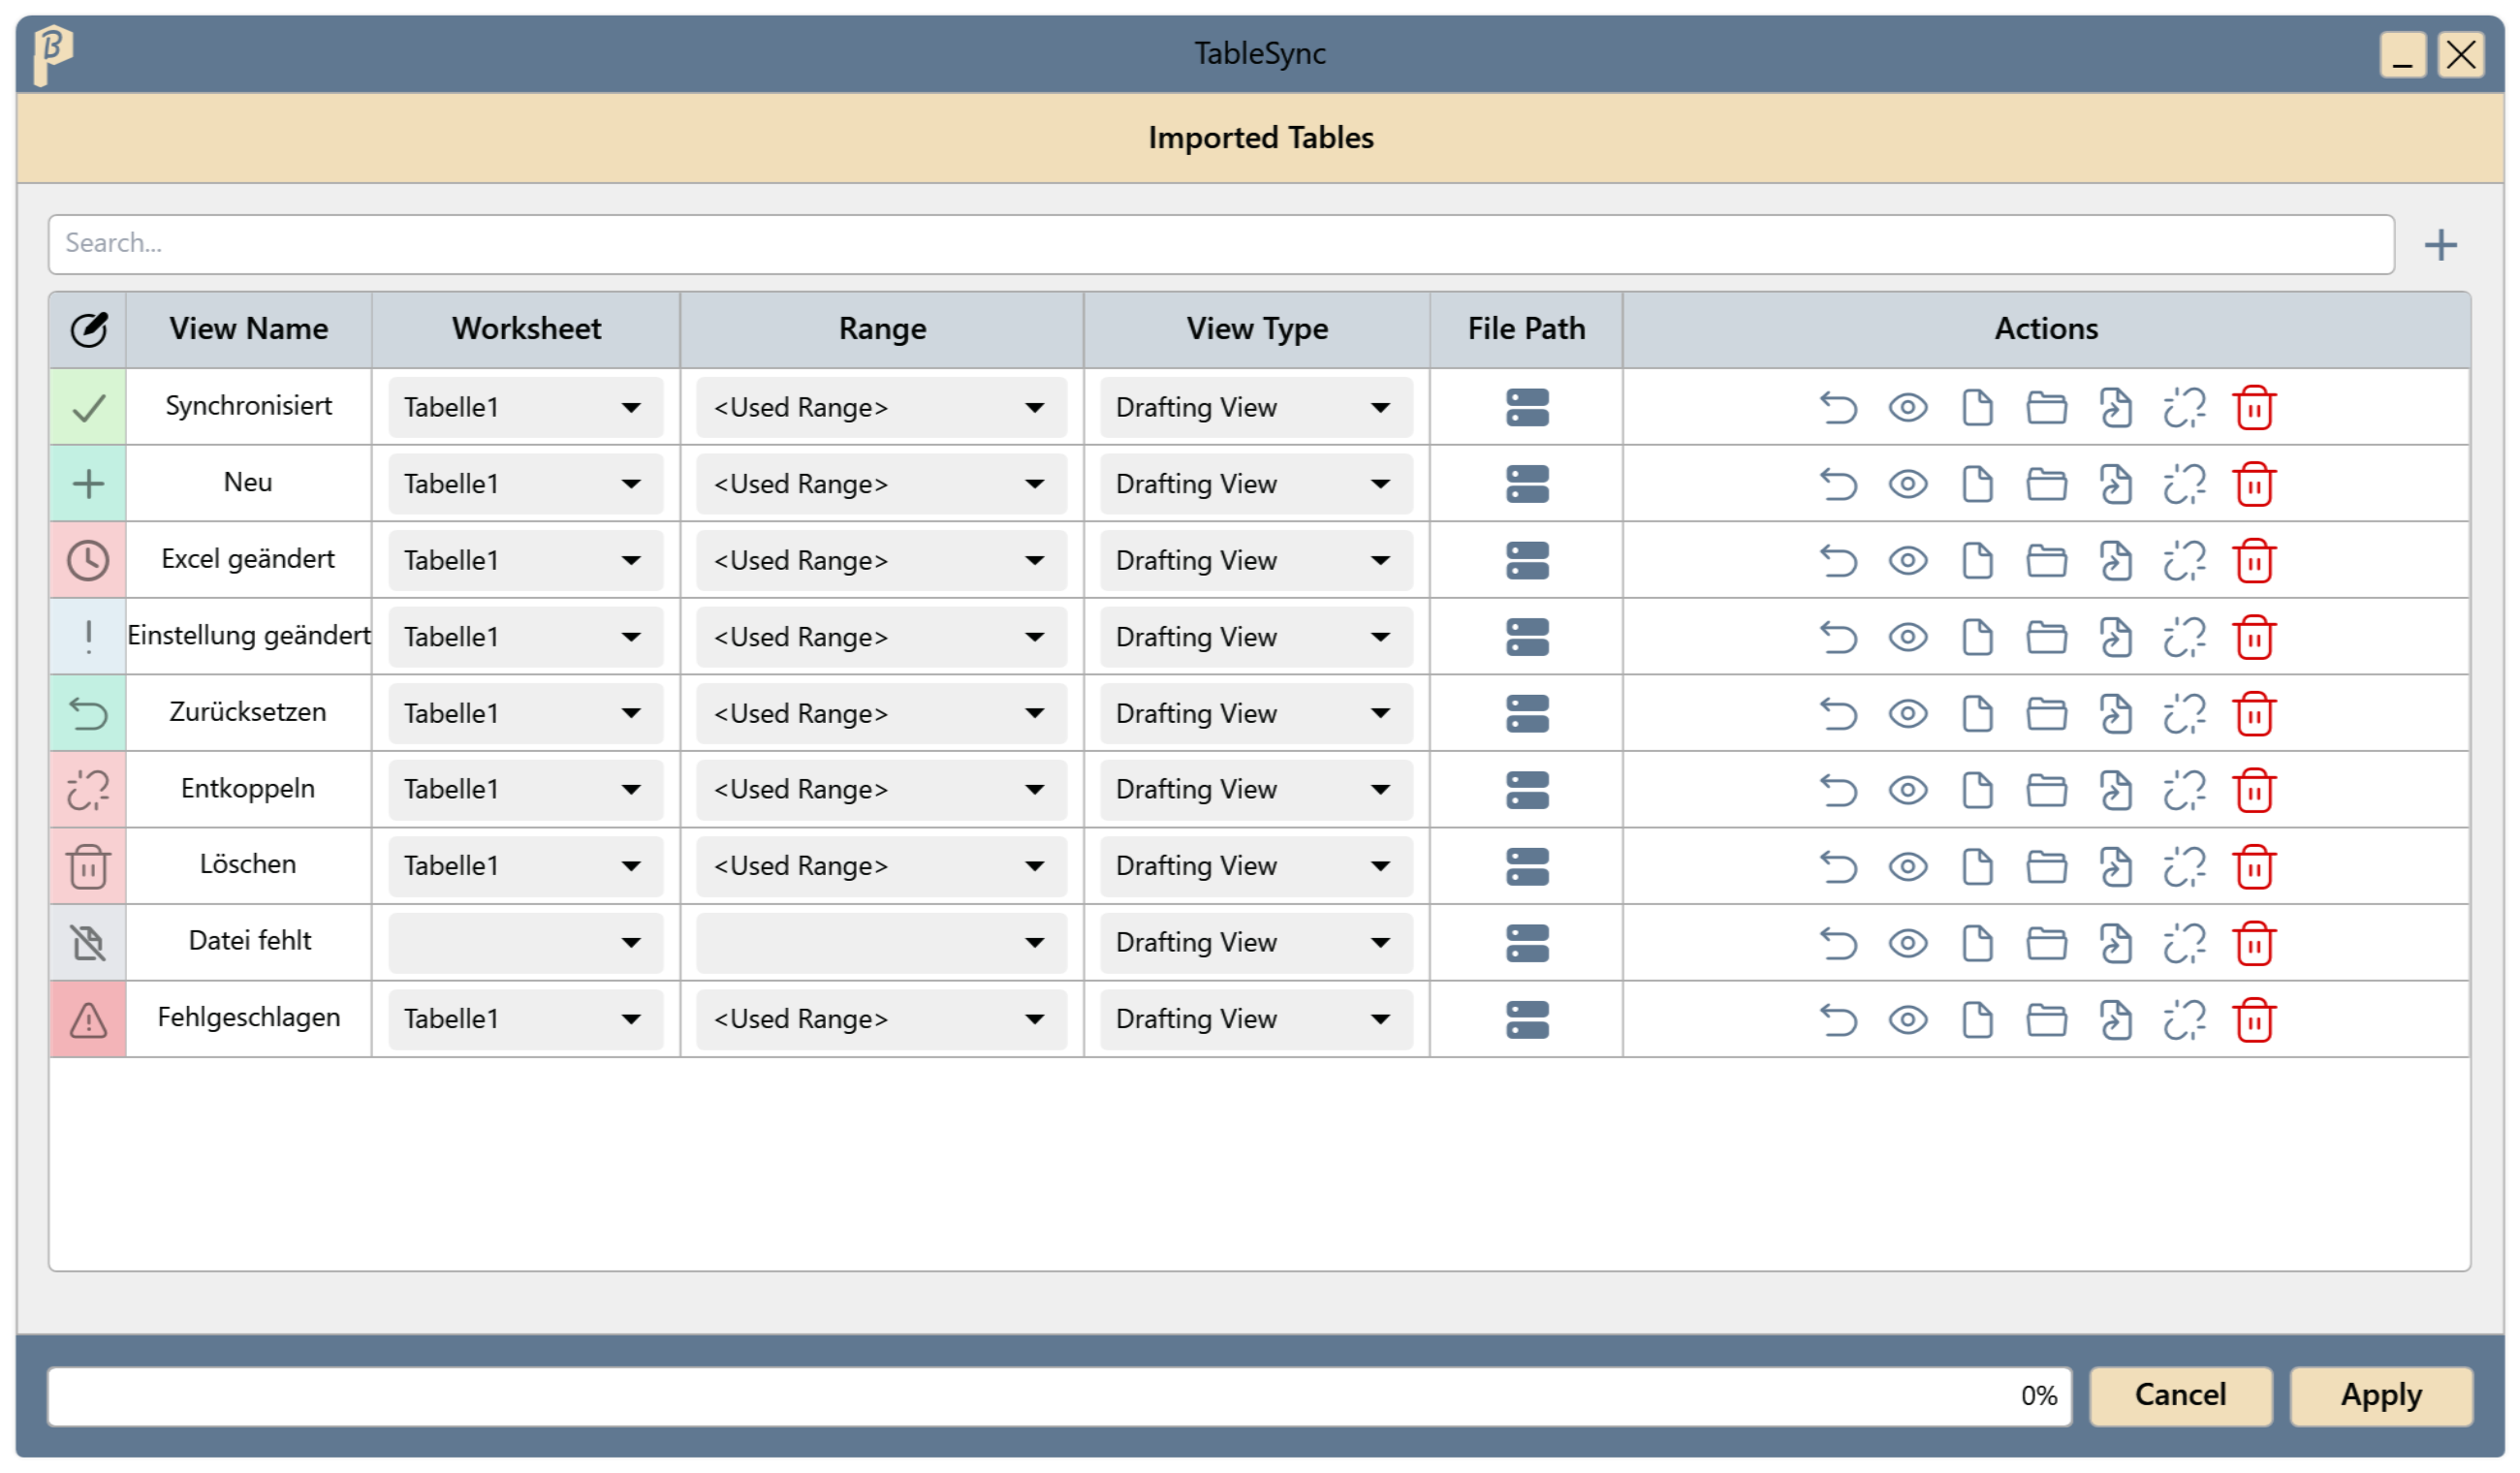
| Icon | Row in Fig. 5 | Tooltip | What Apply does |
|---|---|---|---|
 |
Synced | Table and View are synced. | nothing |
 |
New | New Table to be added. | create the view |
 |
Excel changed | Excel file changed since last apply. | redraw the view |
 |
Setting changed | Table's parameters were modified. | redraw the view |
 |
Reset | View will be reset. | redraw the view |
 |
Unlink | View will be unlinked. | remove the link |
 |
Delete | Table and View will be deleted | delete the view |
 |
File missing | Excel file is missing | remove the link |
 |
Failed | Process Failed. Check log file. | nothing |
Limitations
If a row shows “Excel file is missing”, Apply removes the link of this table. First relink the file with Change file path, then Apply.
- Anything changed by hand in a view is overwritten the next time it is redrawn.
Common problems
“Excel file is missing”
The file is no longer at the saved location. Click Change file path, choose the file again, then Apply.
“Value is required”, “Must be a number” or “Scale must be greater than 0”
Enter a whole number greater than 0 under Scale 1:, e.g. 50.
“Process Failed. Check log file.”
The table could not be brought in, e.g. because the worksheet or named range was renamed or deleted in the Excel file. Choose Worksheet and Range again in the row and Apply again; if that does not help, contact support.
The view differs from Excel
Click Reset and Apply.