 PluBIM Help
Bends
Create elbows at open run ends and split 90° elbows into two 45° elbows.
- Ribbon group
- ModelKit
- Version
- PluBIM 1.5.0
The Bends group on the PB-Modeling tab contains three commands.
| You want to … | How |
|---|---|
| Place an elbow in a fixed direction at an open end, also on several runs at once | ElbowPad |
| Replace a 90° elbow with two 45° elbows | ElbowSplit |
| Point the direction of the elbow directly in the view | Compass |
Which elements?
| Command | Works with | Not for |
|---|---|---|
 ElbowPad |
Straight pipes, ducts, conduits and cable trays with an open end | Pinned runs, curved runs, ends that are already connected |
 ElbowSplit |
90° elbows between two straight, round runs: pipes, round ducts, conduits | Rectangular and oval ducts, cable trays, elbows with a different angle |
 Compass |
Straight pipes, ducts, conduits and cable trays with an open end | Pinned runs; perspective 3D views |
All three take the elbow from the routing preferences of the run type. The new run after the elbow has the type, size and system of the source run.
ElbowPad
ElbowPad is a window that stays open while you keep working in Revit.
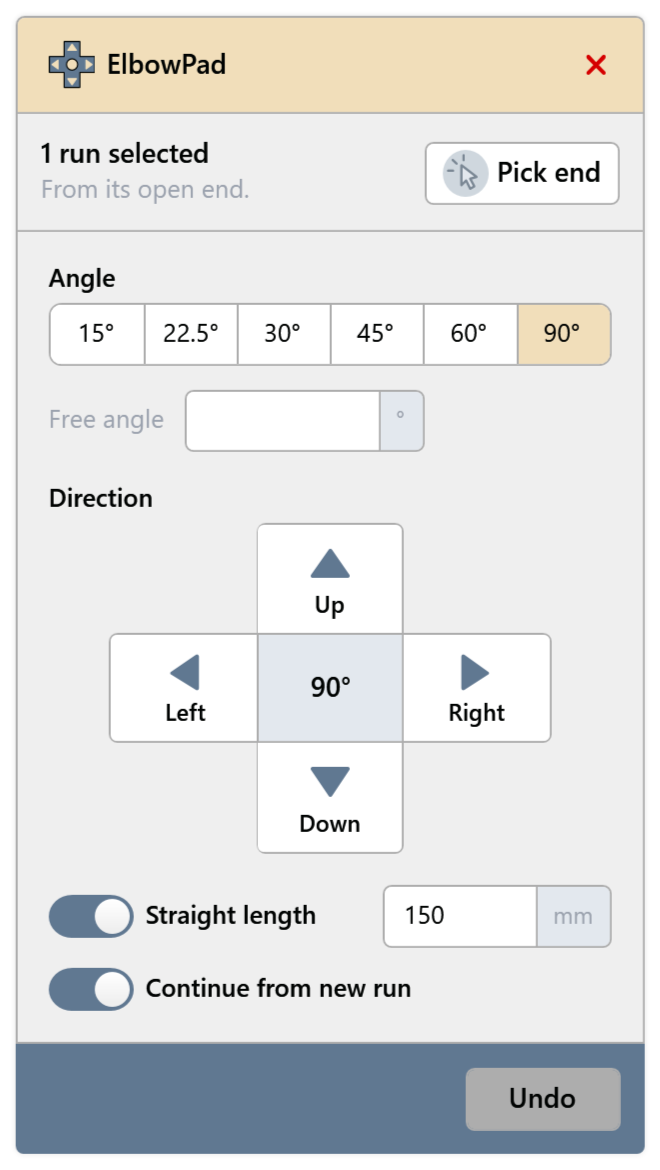
Select one or several runs and click PB-Modeling › Bends › ElbowPad. Without a selection the window opens empty; then click Pick end and click the run near its open end.
The top shows what is selected, e.g. “1 run selected · From its open end.” If selected runs have two open ends, ElbowPad asks you to set the end with Pick end.
Under Angle, choose an angle (15°, 22.5°, 30°, 45°, 60° or 90°) or enter it under Free angle.
Under Direction, click Up, Down, Left or Right. The arrow keys do the same. The elbow and a straight piece of run are created at once.
Place more elbows or revert the last one with Undo. The X at the top right or Esc closes the window.
The switches at the bottom of the window:
- Straight length: length of the straight piece after the elbow. If the switch is off, the length from the settings applies (Bends page).
- Continue from new run: the next elbow starts at the end of the new run. This builds a run elbow by elbow. If the switch is off, ElbowPad stays on the original run.
Several parallel runs whose open ends point the same way are turned as a bank: the spacing stays the same, the elbows are staggered one behind the other. If the ends do not point the same way, ElbowPad turns each run on its own and warns: “The selected ends are not parallel, so they were turned one by one and not as a bank. Check the new runs for clashes.”
ElbowSplit
ElbowSplit replaces a 90° elbow with two 45° elbows. The runs before and after it stay where they are.
Several elbows at once
Select the 90° elbows.
Click PB-Modeling › Bends › ElbowSplit. All selected elbows are split; the two 45° elbows are connected directly.
Click elbows one by one
Without a selection, click PB-Modeling › Bends › ElbowSplit. A small window opens.
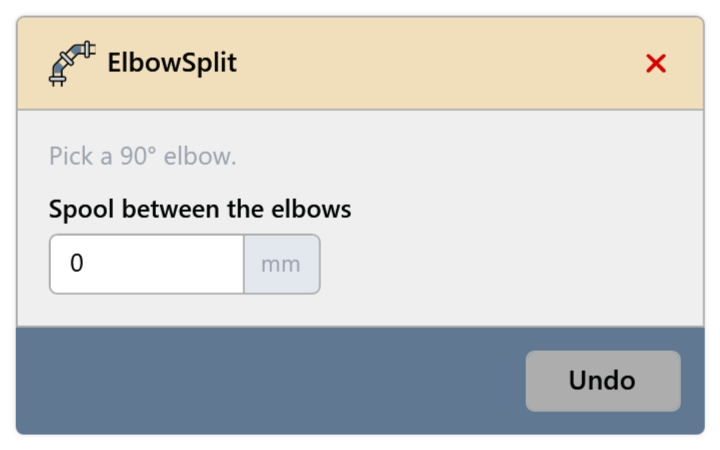
Fig. 5 · ElbowSplit window Under Spool between the elbows, enter the length of the straight piece between the two 45° elbows. 0 connects the elbows directly.
Click the elbows one after another. Each one is split at once.
Undo reverts the last split elbow. Finish with Esc or the X at the top right; all split elbows stay.
The runs at the elbow must be long enough for two 45° elbows and the spool. Otherwise ElbowSplit reports “The runs next to the elbow are too short for two 45° elbows.” and leaves the elbow unchanged.
Compass
Compass shows a compass at the open end of a run with all possible elbow directions. You click the direction directly in the view.
Click PB-Modeling › Bends › Compass.
Click the run near its open end.
Rings with ticks appear at the end: 90° elbows all around (for cable trays only up, down, left and right) as well as 45° and 22.5° up, down, left and right. Hover a tick: a line shows where the run will go.
Click the tick. The elbow and run are created, the compass disappears.
Compass needs a view without perspective (plan, section, elevation or 3D without perspective), and Generic Models must be visible in the view: the compass is drawn with them.
Settings for bends
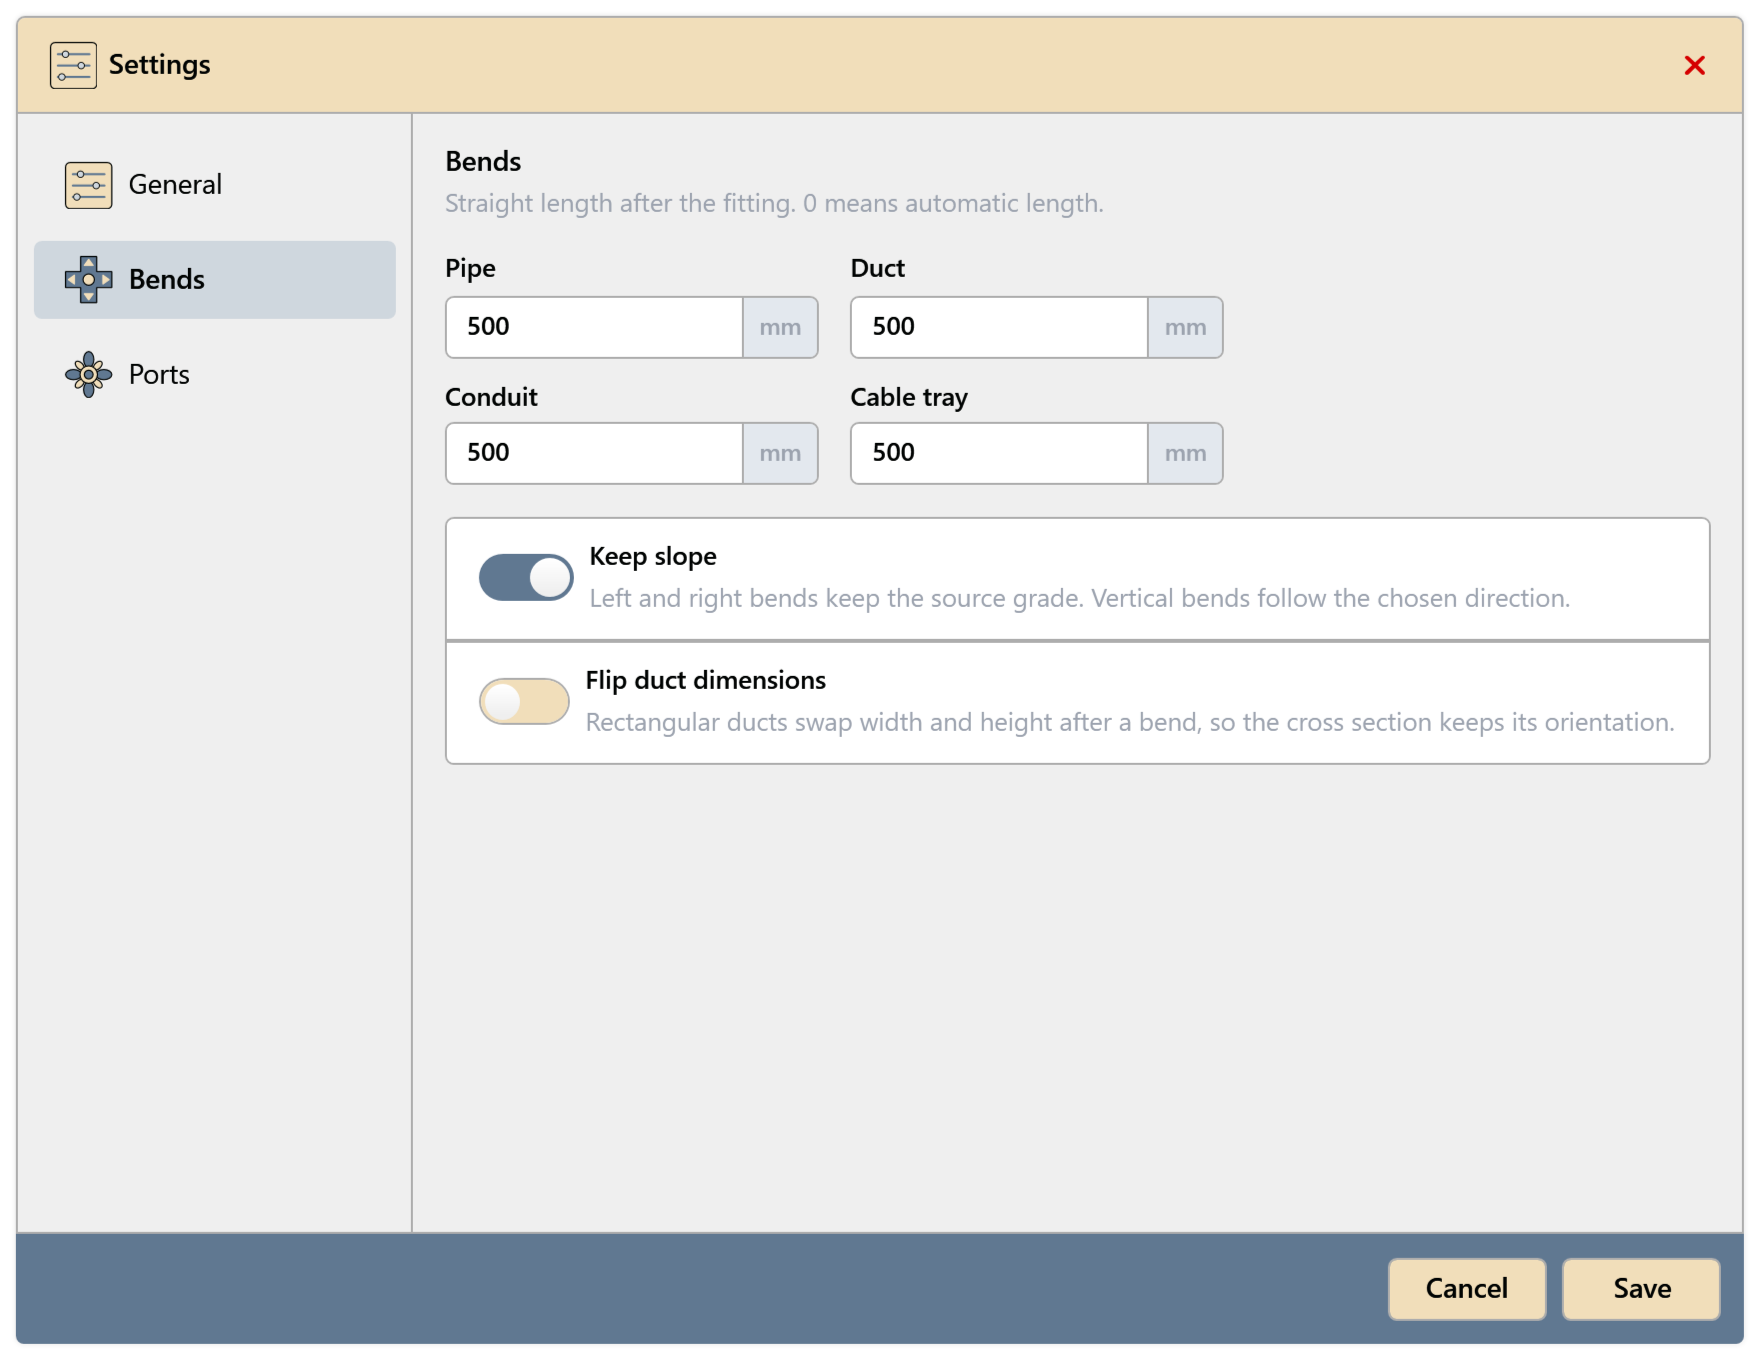
Under PB-Modeling › General › Settings, Bends page:
- Pipe, Duct, Conduit, Cable tray: straight length after the elbow. 0 means automatic length. Applies to Compass, and to ElbowPad when Straight length is off there.
- Keep slope: left and right elbows keep the slope of the run. Up and down elbows follow the chosen direction.
- Flip duct dimensions: rectangular ducts swap width and height after an elbow, so the cross section keeps its orientation.
Common problems
“The elbow is not a 90° elbow between two straight pipes, round ducts or conduits.”
ElbowSplit only splits 90° elbows between straight, round runs. Rectangular ducts and cable trays do not work.
“Compass needs an orthographic view. …”
The active 3D view has a perspective. Switch to a plan, section or a 3D view without perspective.
“The last compass operation failed and was rolled back. …”
Common causes: Generic Models are hidden in the view, the run is pinned, or no matching elbow is loaded for the run type in the routing preferences.
“Load a compatible elbow fitting and check the routing preferences, bypass offset and spacing.” / “No fitting could be placed. …”
No elbow for this size or angle is set in the routing preferences of the run type. Load the elbow and add it to the routing preferences.