 PluBIM Help

ModelKit
Modeling tools for pipes, ducts, conduits and cable trays on the PB-Modeling tab.
- Ribbon group
- Modeling
- Version
- PluBIM 1.5.0
ModelKit brings together PluBIM's modeling tools on a tab of their own, PB-Modeling. The commands extend, bend, connect and align pipes, ducts, conduits and cable trays.
Open and close the tab
In the ribbon, click PluBIM › Modeling › ModelKit. The PB-Modeling tab appears next to PluBIM and becomes active.

Fig. 1 · PB-Modeling tab. Click to enlarge. To hide it, click PB-Modeling › General › Close. Revit switches back to PluBIM.
If the tab is still open when you exit Revit, it is back at the next start. The modeling commands are only available in model views of a project.
How all commands work
Views: the commands run in floor plans, ceiling plans, sections, elevations and non-perspective 3D views of a project, not in families.
Select first or click: if suitable elements are selected when you start, the command works with them. Otherwise the status bar says what to click. Esc cancels.
Undo: whatever a command creates or changes in one run, Undo in Revit reverts in one step. The exception are commands whose window stays open while you click (e.g. AutoBranch, ElbowSplit, Rotate): Undo in the window reverts the last step, and in Revit each step is then an entry of its own.
System: if an open end has no system, ModelKit asks once which pipe or duct system the new runs get.
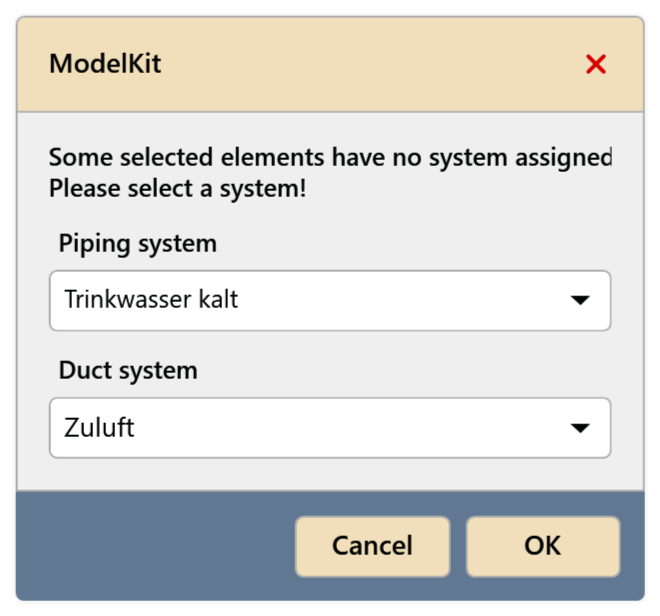
Fig. 2 · System selection for ends without a system
Fixed first, then the moving part: when a command asks for two elements, the first click is the element that stays where it is, and the second is the element that is moved, rotated or connected. So for MoveConnect, AlignConnect and Align3D, first the destination, then the component; for AutoBranch, DropBranch, DownToMain, WyeToMain and DuctTap, first the main, then the branch; for SetSpacing and AlignParts, first the reference. Exception: for ExtendTo, the runs are selected first, then the target.
Settings
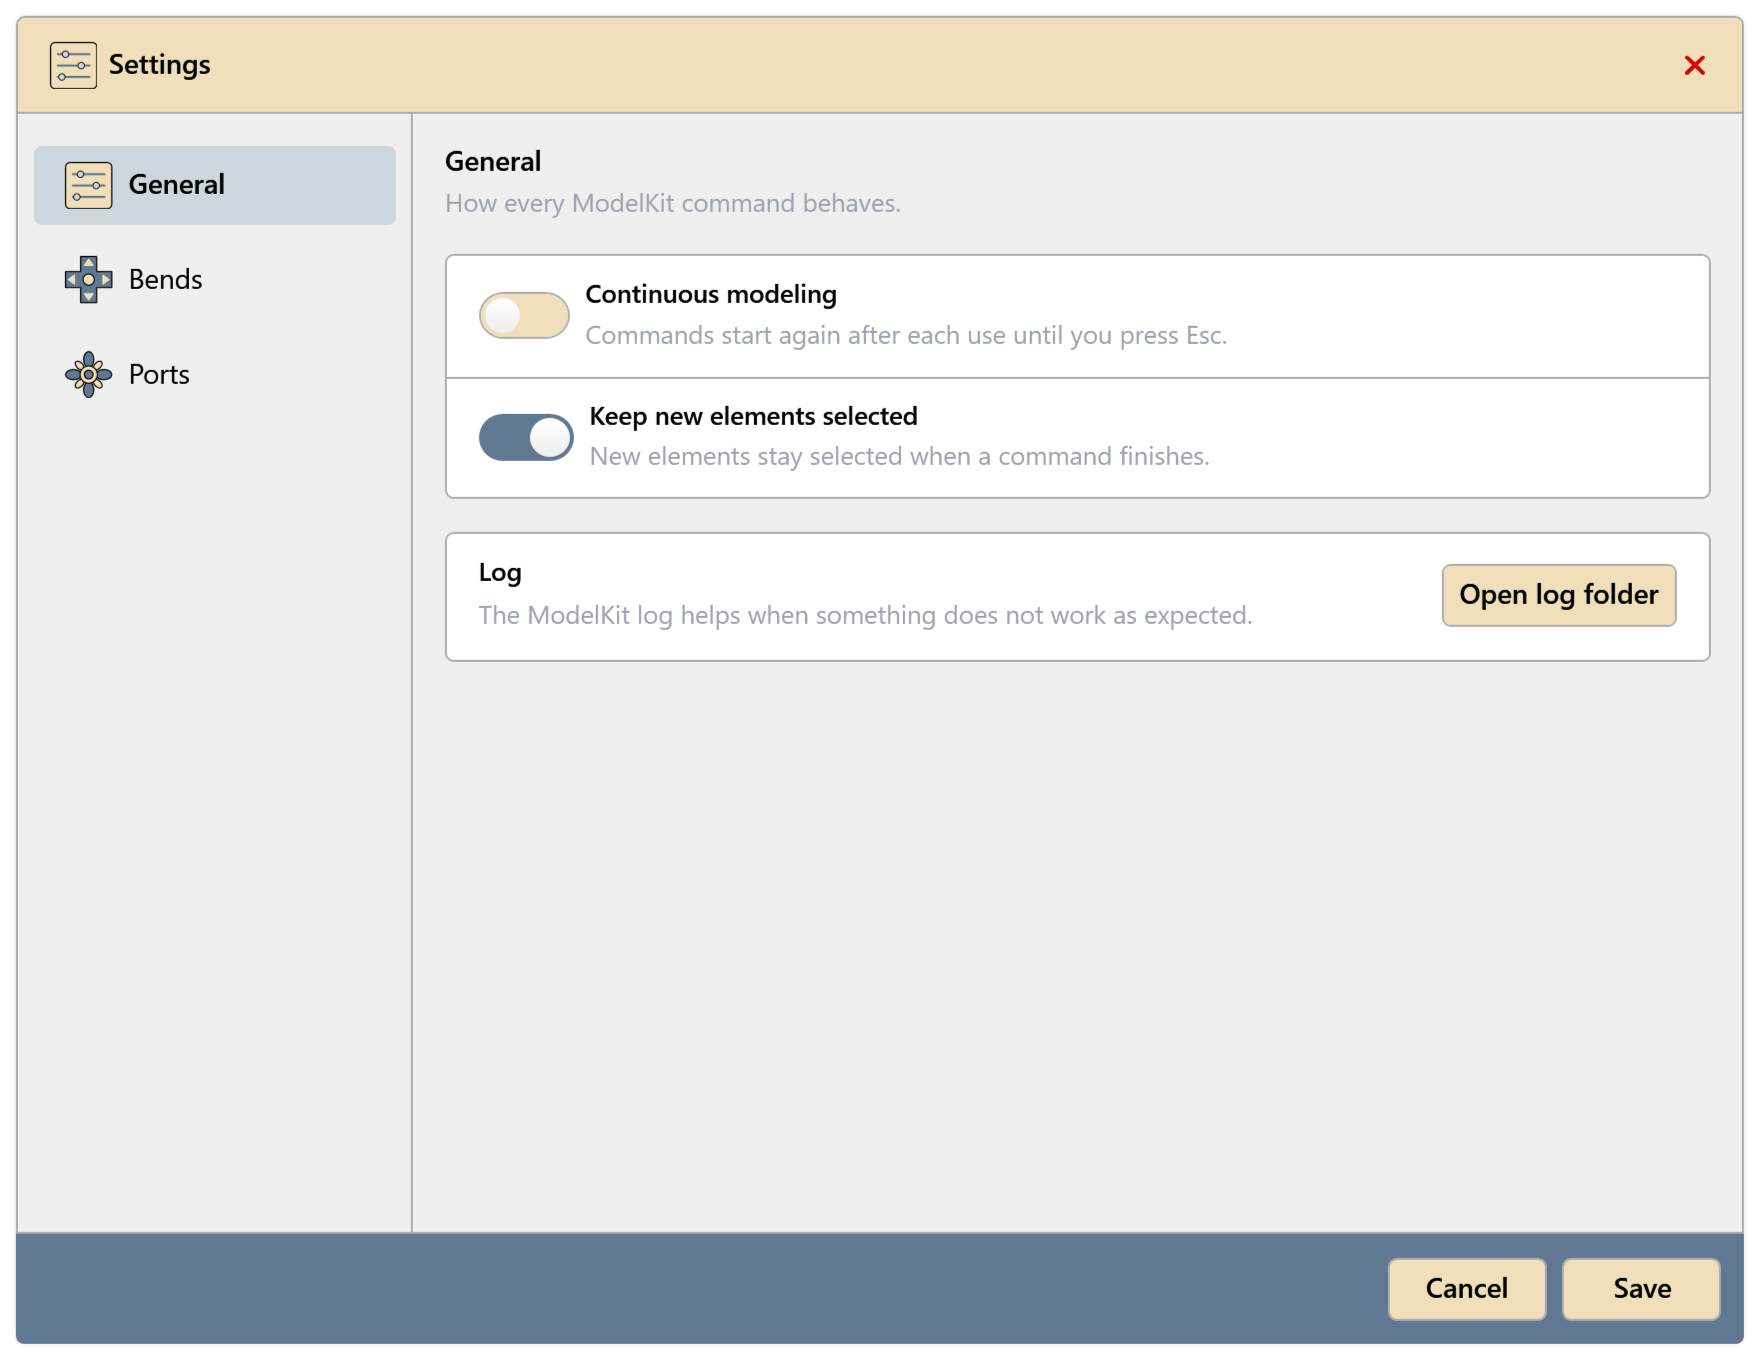
PB-Modeling › General › Settings, General page, applies to all commands:
- Continuous modeling: a command started without a selection starts again after each use until you press Esc.
- Keep new elements selected: what a command created stays selected afterwards, e.g. for the next command.
- Open log folder: opens the folder with the ModelKit log file. Send the log file along when reporting an error.
Apply changes with Save.
The Bends and Ports pages are described under Bends and Ports.
Result of a run
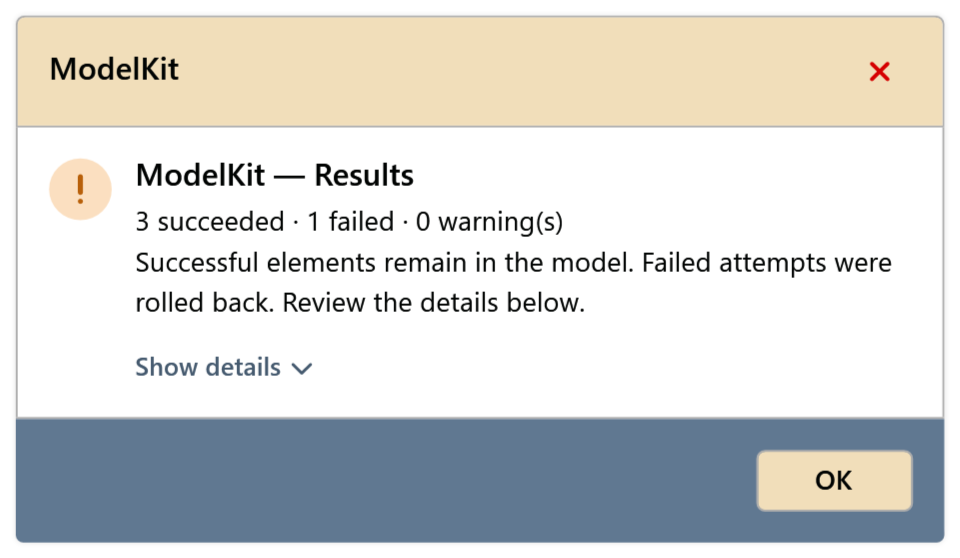
If a command processes several elements and something goes wrong for some of them, ModelKit reports ModelKit — Results at the end, e.g. “3 succeeded · 1 failed · 0 warning(s)”. What worked stays in the model; failed attempts are rolled back. The details give the ID and reason for each element.
Commands
In the order of the PB-Modeling tab.
Ports1 command
- AutoRunsExtend the open ports of an MEP component with short runs.Guide

Bends3 commands


Routing8 commands
- AutoBranchConnect a branch run to a main at the chosen angle.Guide
- VertOffsetShared bypass up or down for one or several runs.Guide
- SideOffsetShared sideways bypass for one or several runs.Guide
- OffsetLinkConnect two round runs in different planes.Guide
- AngleRouteConnect two round runs in one plane at the chosen angle.Guide
- DropBranchConnect a pipe above a main with an elbow and a 45° branch.Guide
- PipeArrayCreate several parallel pipes along a drawn path.Guide
- ExtendToExtend runs straight to a face, edge, grid or level.Guide


Connect and Align10 commands
- MoveConnectMove a component to the destination and connect it.Guide
- AlignConnectAlign a component to the destination and connect it.Guide
- Align3DAlign a component in 3D to a reference component.Guide
- AlignBranchMove a branch so it meets the main.Guide
- DownToMainPlace a branch perpendicular to the main, sloping down to it.Guide
- UpToMainPlace a branch perpendicular to the main, rising to it.Guide
- WyeToMainConnect a branch to a sloped main with a 45° elbow and a 45° wye.Guide
- DuctTapPlace a takeoff between a duct main and a branch duct.Guide
- Transition, OffsetCreate a transition fitting or an offset between two ducts.Guide
- TeeTapTurn a tee on a duct into a takeoff and back.Guide


Modify9 commands
- RotateRotate a fitting or a chain of elements about its axis.Guide
- SetSystemChange the system type of pipes or ducts.Guide
- ClearSystemDelete the MEP systems of the selected elements.Guide
- SetSlopeApply a slope to straight pipes, ducts and conduits.Guide
- SetSpacingArrange elements at an even spacing from a reference element.Guide
- AlignPartsLine up couplings and accessories with a reference part.Guide
- DisconnectDisconnect two elements from each other.Guide
- DetachAllDisconnect every connection of the selected elements.Guide
- CutSectionCut a section out of a run between two points.Guide


Electrical1 command
- AutoDetectorPlace smoke and heat detectors in MEP spaces automatically.Guide

General2 commands
- SettingsOpen the ModelKit settings.
- CloseHide the PB-Modeling tab and return to PluBIM.

